Build sections
A section is a block you build once and place on many templates, such as a post's hero. Build one when the same arrangement of components belongs on more than one template.
The example is the blog's Post hero section. It holds Studio's Image and Header components and the blog's own Avatar and Byline, and it shows each post's cover image, title and author. The author's photo and name are two components, so whoever builds the section decides how they sit together. See From a design to components.
Prerequisites
- A Canvas URL on the project. Sections open on the canvas at this address. Set it in Settings, then Configuration. See Project settings.
- A route that renders
<StudioCanvas />at that address. See Mount the section preview route. - The components you need, registered. For Post hero, that's
AvatarandByline. See Register a component. - A content type with at least one entry, such as Blog post with the entry "AI 101", so the section has content to show while you build it.
What this is and what you get
A section is made of:
- Components, arranged on the section's own canvas.
- A schema, which is the shape of the content the section shows, such as the whole Blog post content type or one group field in it. It's optional. A section with a schema binds itself to matching content when someone drops it on a template.
- Exposed props, which are the values each template can set for itself.
- Section slots, which are places each template can fill with its own content. See Author a section with slots.
A section has no URL. It only reaches visitors through the templates that use it.
Faster ways to do this
- Studio CLI.
csdx studio:section:createbuilds a section from one of your components and a content type, with its bindings in place.csdx studio:composition:build --scope sectionbuilds a section from a design. See CLI commands. - Skill. Ask your agent to build the section, and it uses
build-section. See What are skills?
Create the section
-
In Compositions, open the Sections tab and click New Section.
The Create Section dialog opens.
-
Enter a Name, such as
Post hero, and a Section UID, such aspost_hero.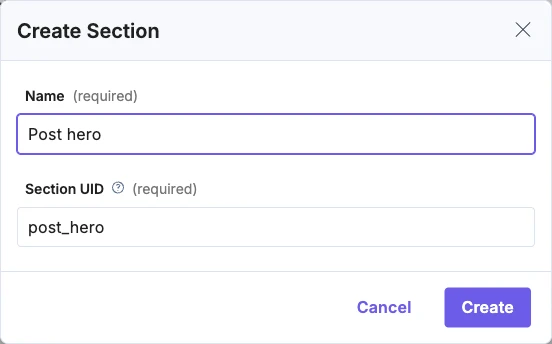
-
Click Create.
The section opens on the canvas. The top bar shows Section and Post hero.
-
Drag components from the Components tab onto the canvas. For Post hero, drag in Image, Header,
AvatarandByline.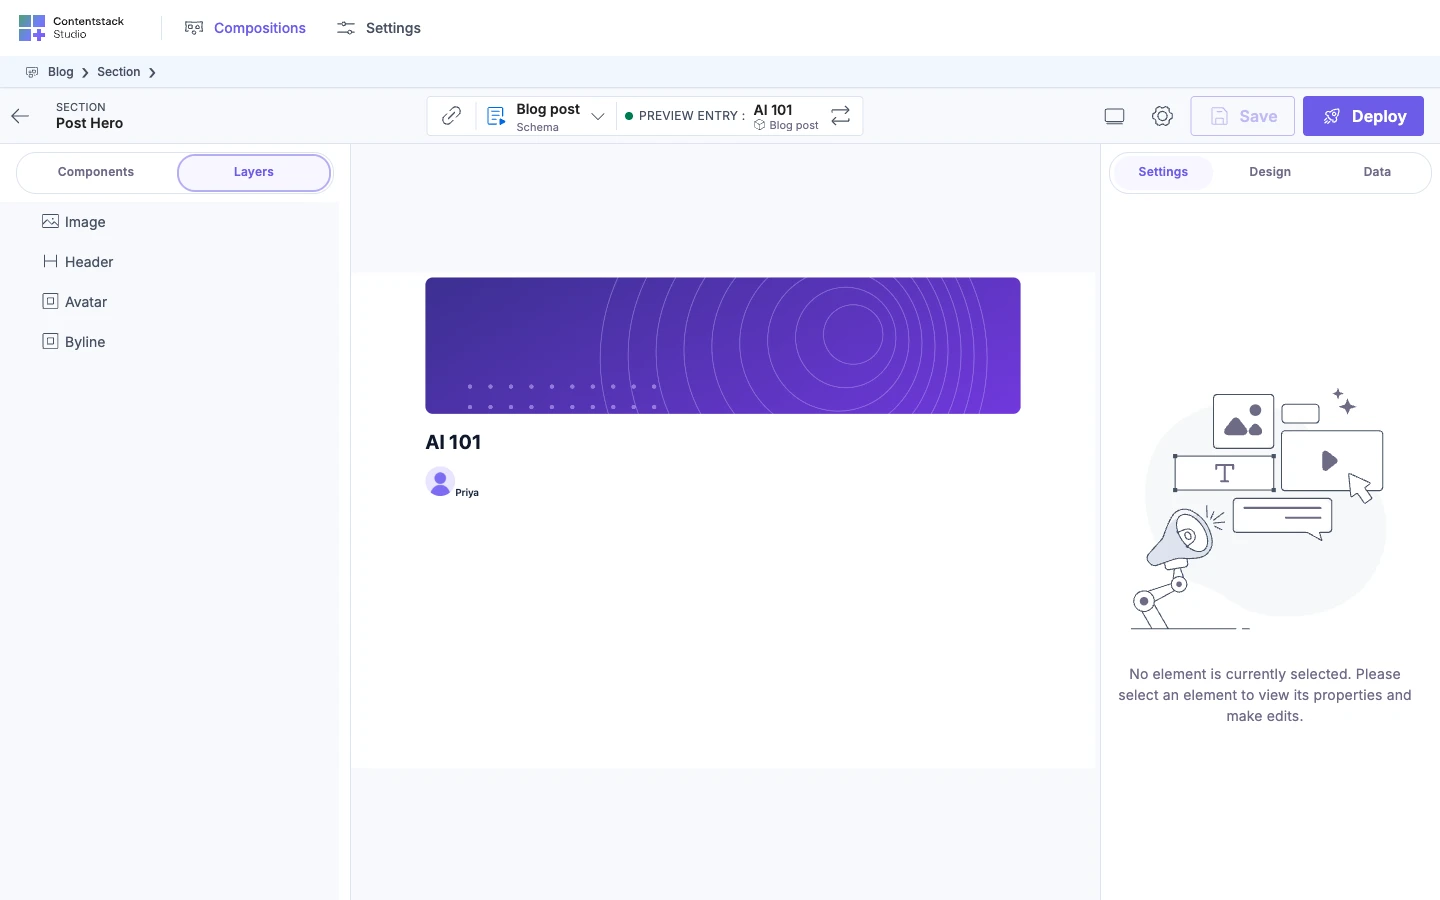
Connect a schema
Connect a schema so the section binds itself to the right content when someone drops it on a template.
-
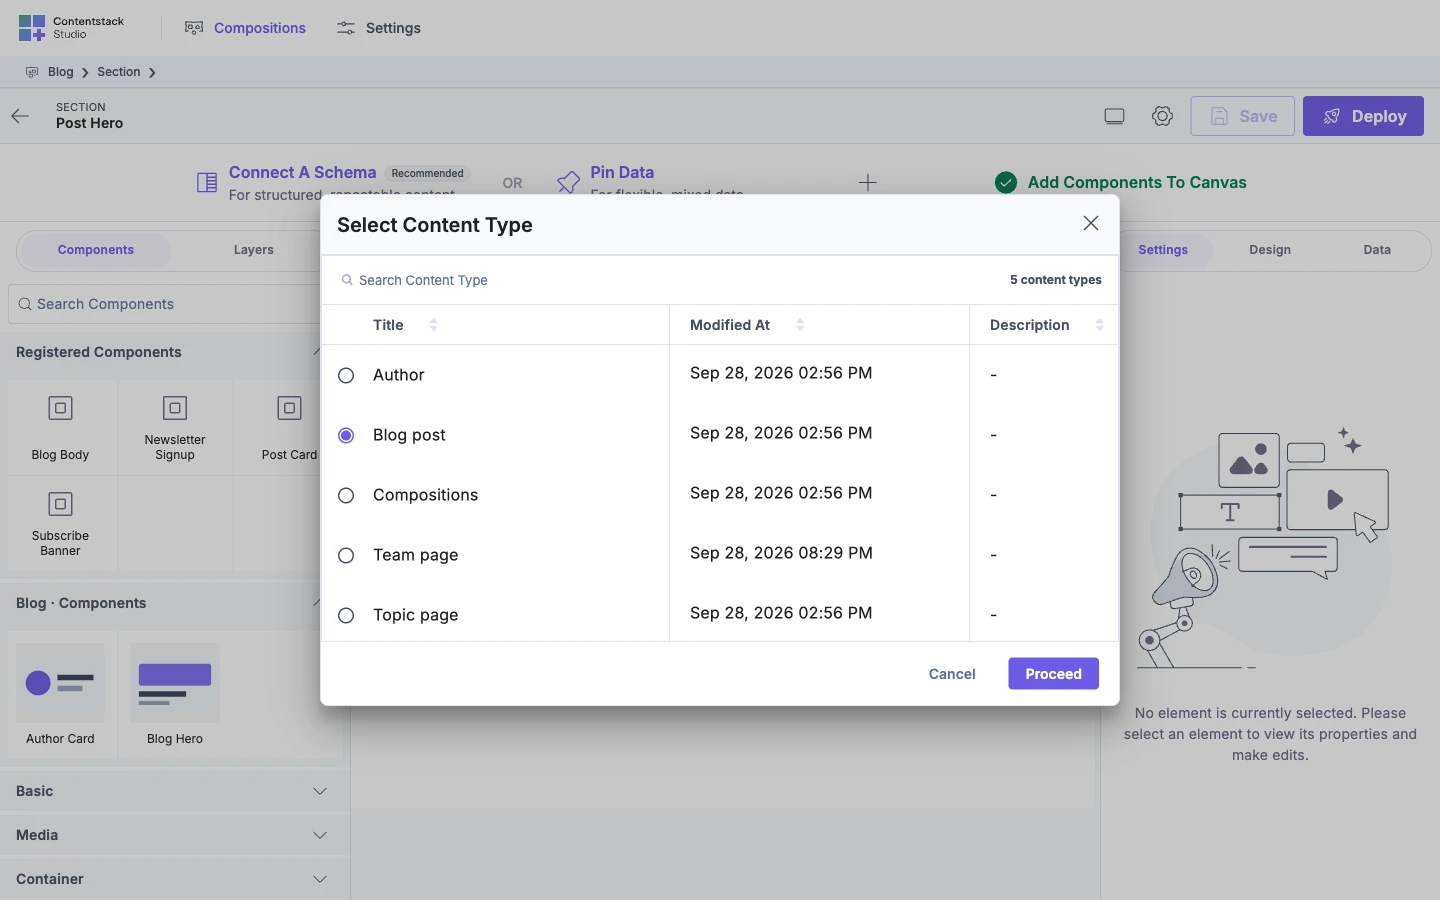
Click Connect A Schema in the bar above the canvas.
The Select Content Type dialog opens.
-
Pick Blog post and click Proceed.
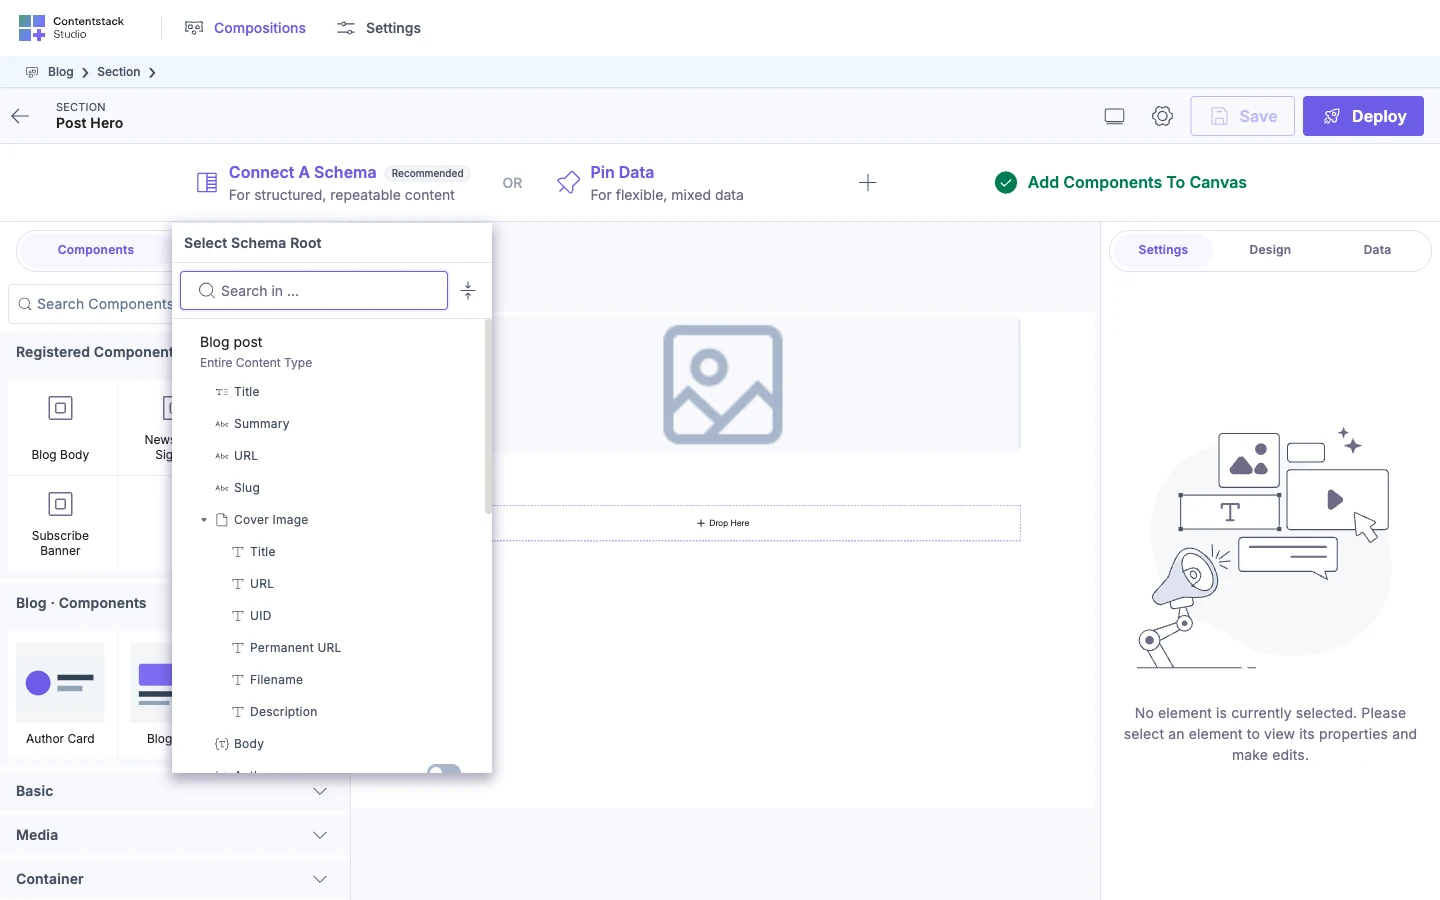
The Select Schema Root list opens. Its first row is the content type, Blog post, marked Entire Content Type. The content type's fields are listed under it.
-
Pick Blog post to use the whole content type, or pick one field, such as a group, a global field, a modular blocks field or a reference. Text, number, date and other single-value fields are greyed out.
The top bar shows the schema's name, with Schema under it.
-
Bind each component to a field of the schema. For Post hero, bind the Image to
cover_image.urland the Header totitle. Bind theAvatarPhoto to the author'sphoto.urland theBylineName to the author'stitle. See Bind a component.
When the root you pick holds many items and nothing is bound yet, Studio offers to add a Repeater first:
-
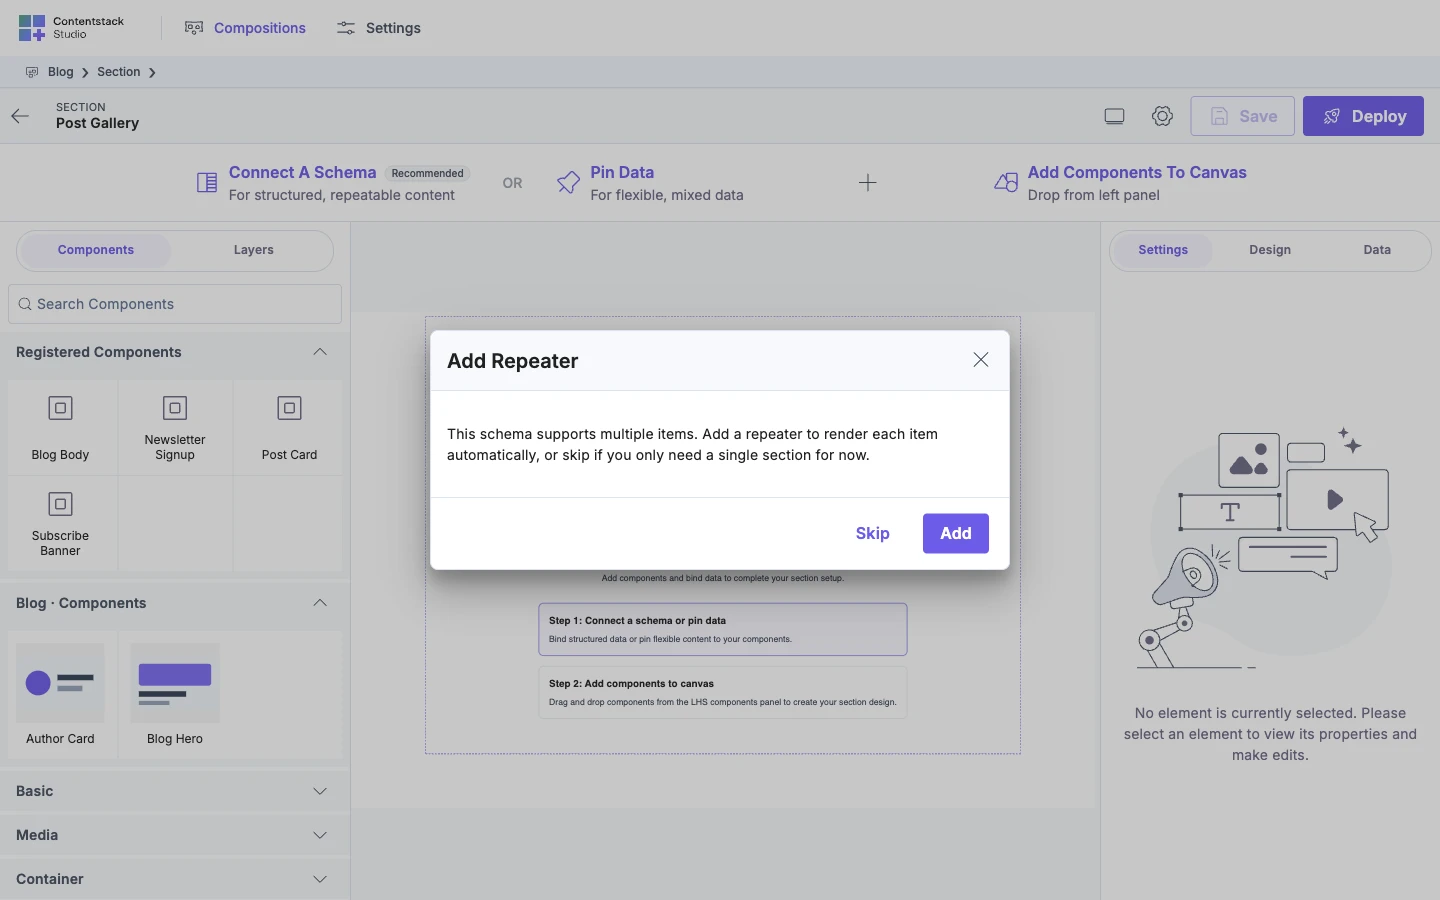
A multiple group, global field, file or link field. The Add Repeater dialog asks whether to repeat the section's content for each item. Click Add, or Skip if you only need one item for now.
-
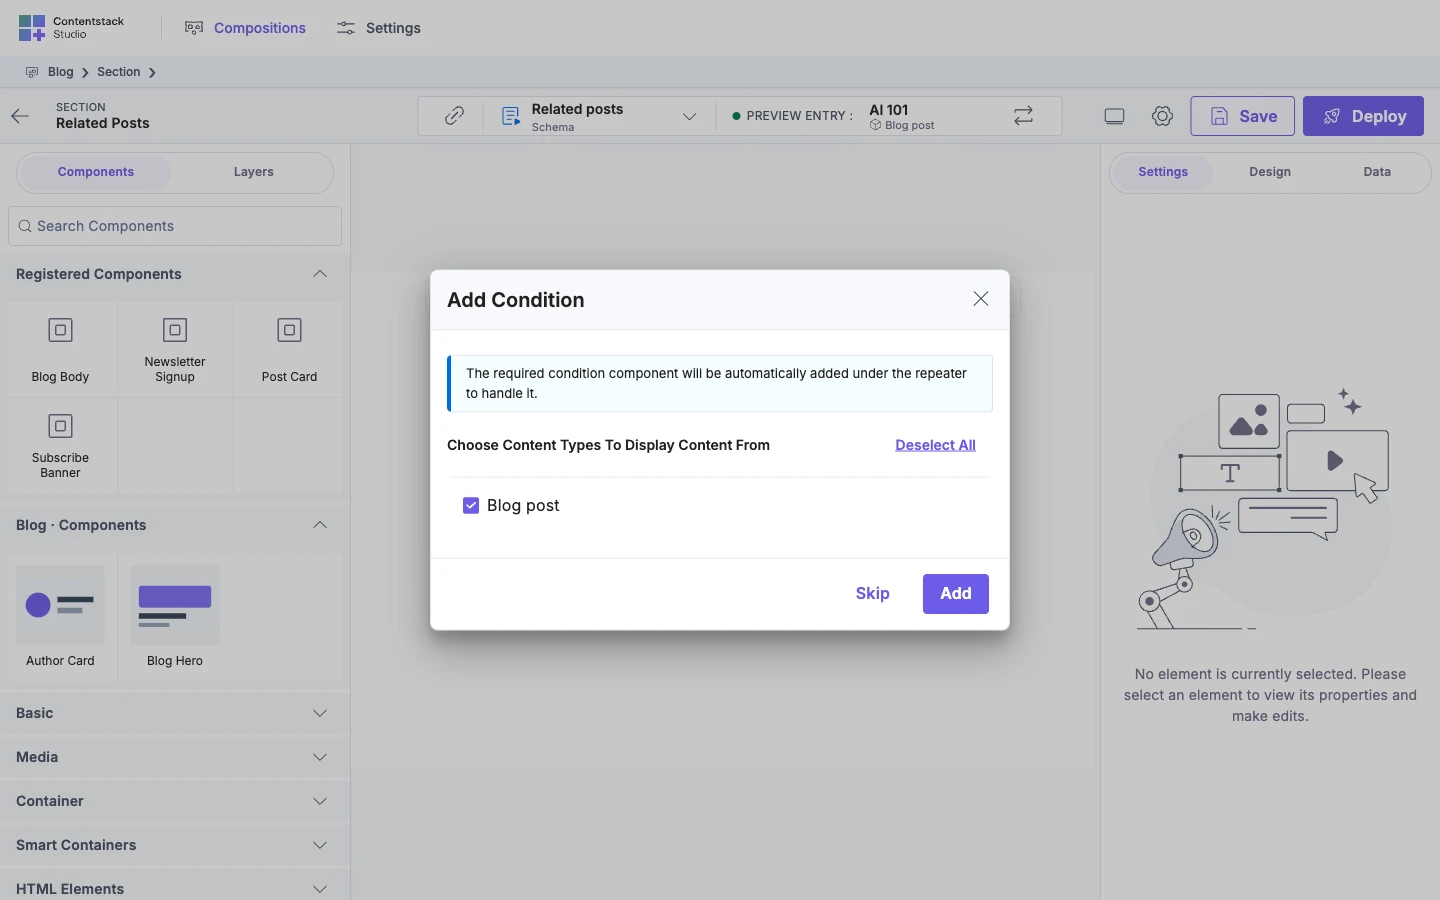
A modular blocks or reference field. Studio adds a Repeater and opens Add Condition, so you can choose which blocks or content types to show. See Render a list of mixed things.
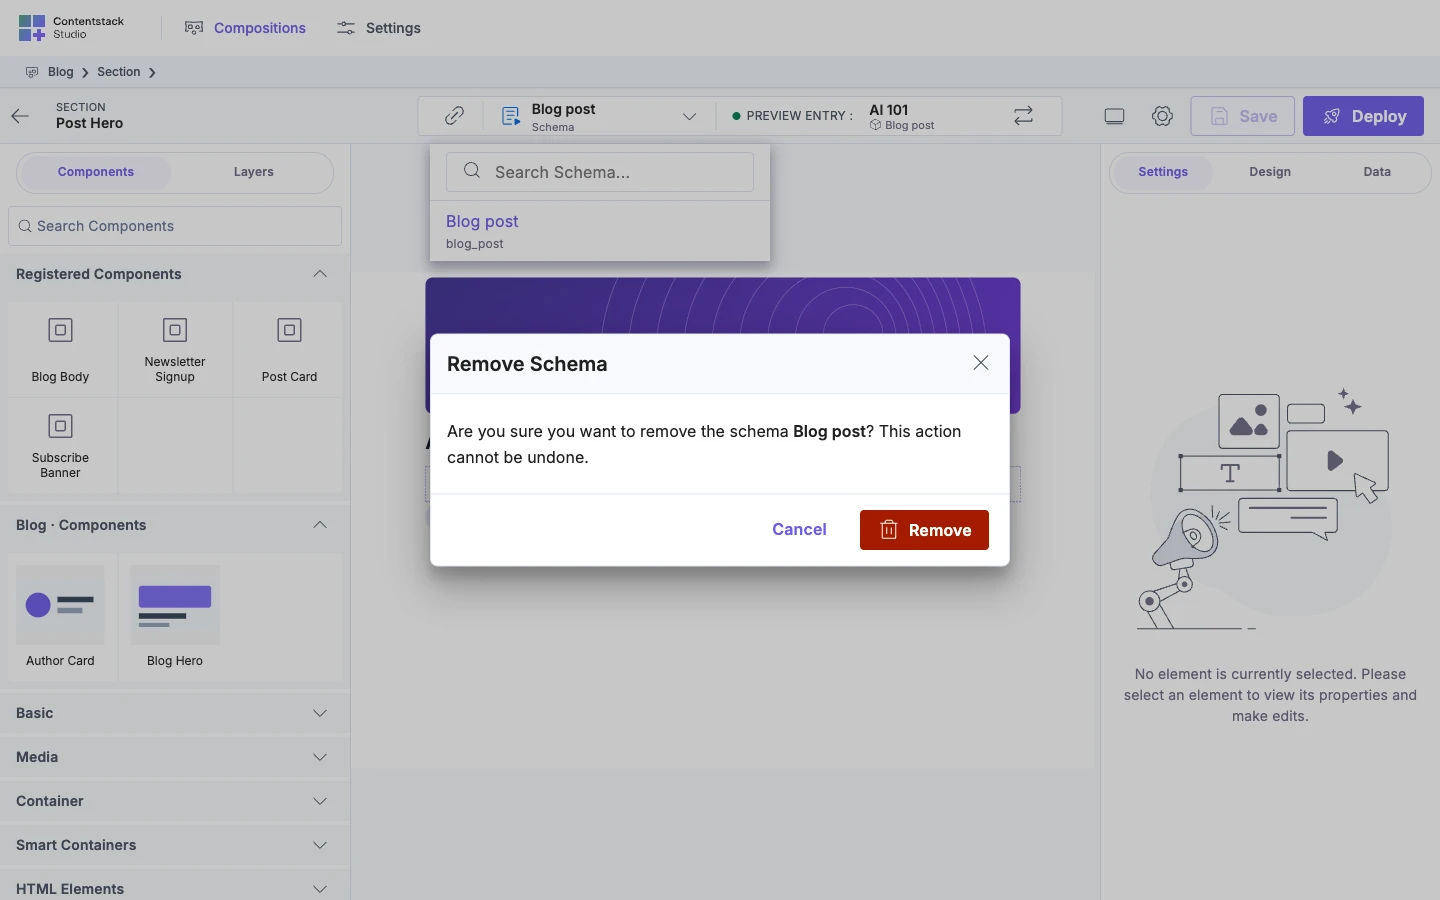
To remove a schema, open the schema list in the top bar and click the delete icon on its row, then click Remove in the Remove Schema dialog. Your components stay on the canvas. To switch to a different schema, add the new one first, then remove the old one.
Use it on more than one content type
A section binds itself only on templates whose content type matches one of its schemas. To use Post hero on an Author template too, add a second schema:
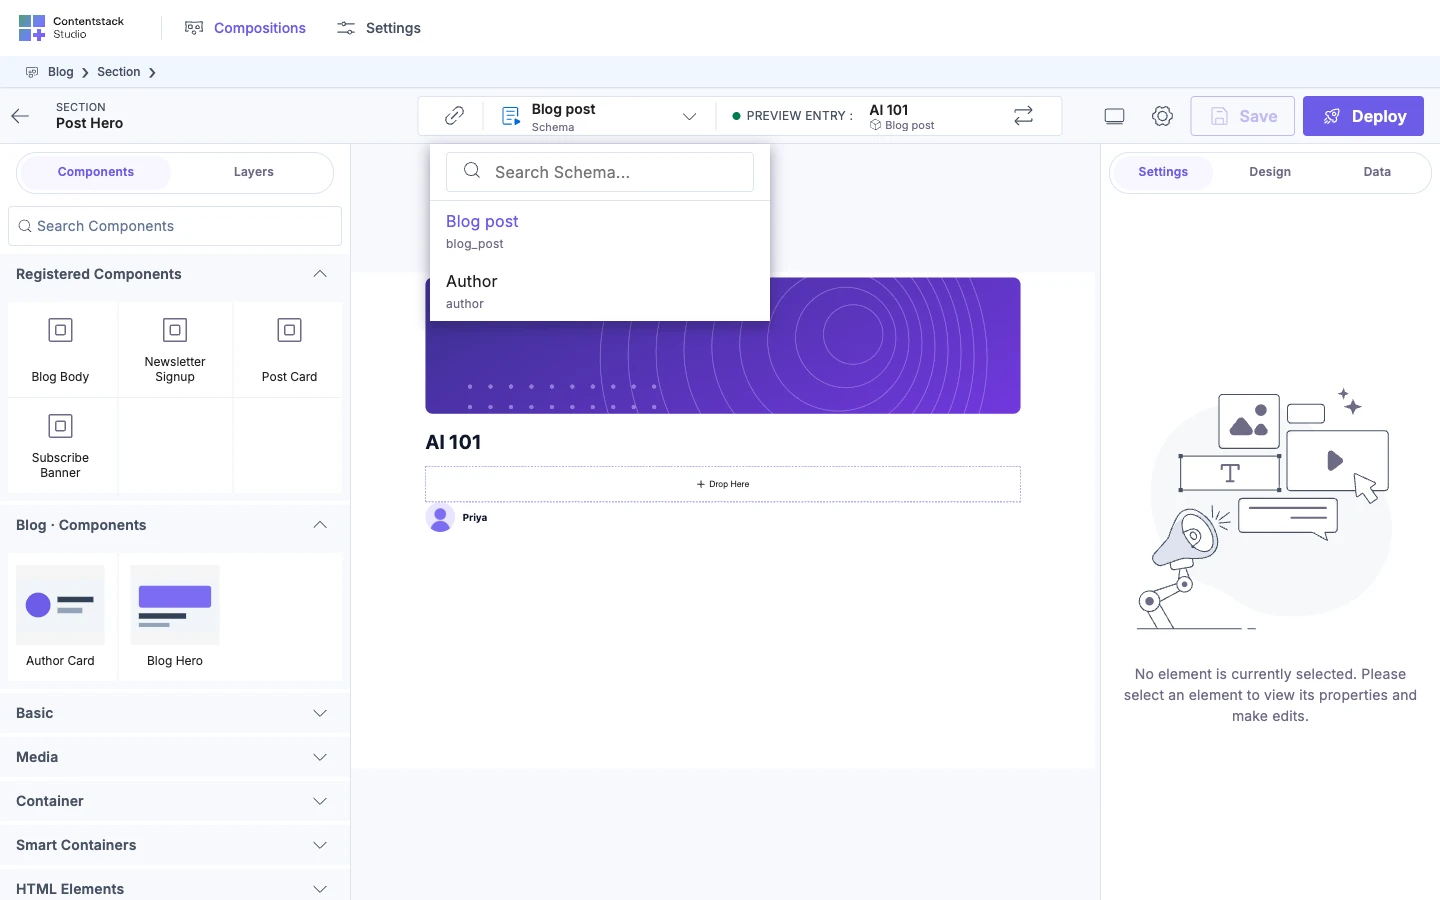
- Click the Add Schema icon in the top bar.
- Pick the content type and its root, the same way as the first schema.
Every schema on a section must be the same kind as the first one. If the first is a whole content type, every other schema must be a whole content type too. If the first is a field, the others must be the same kind of field, such as a multiple group. A single field and a multiple field count as different kinds.
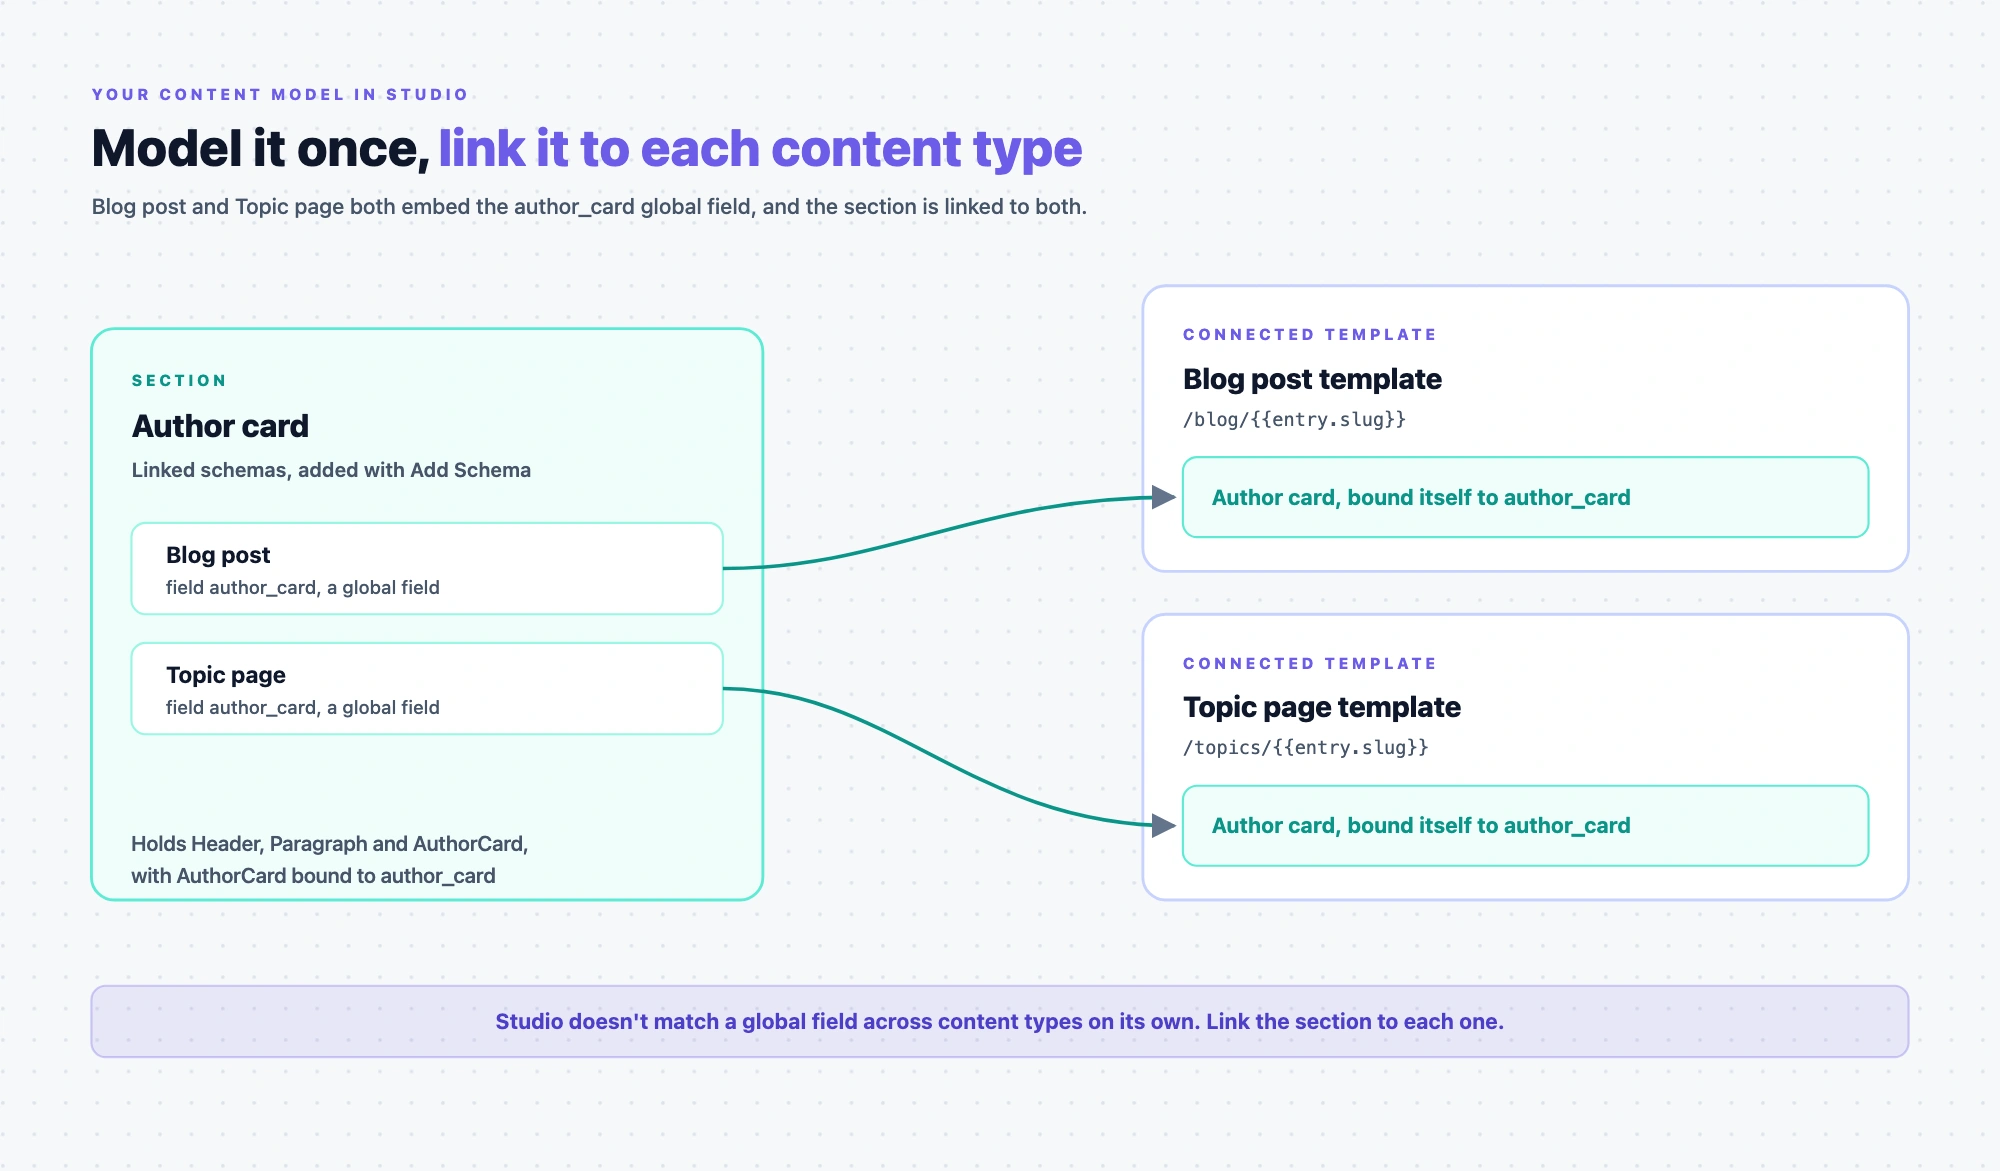
Switch between the schemas from the schema list in the top bar.
Let templates change a value
Expose a prop when each template should set its own value for it, such as the size of the post title.
-
Click Save.
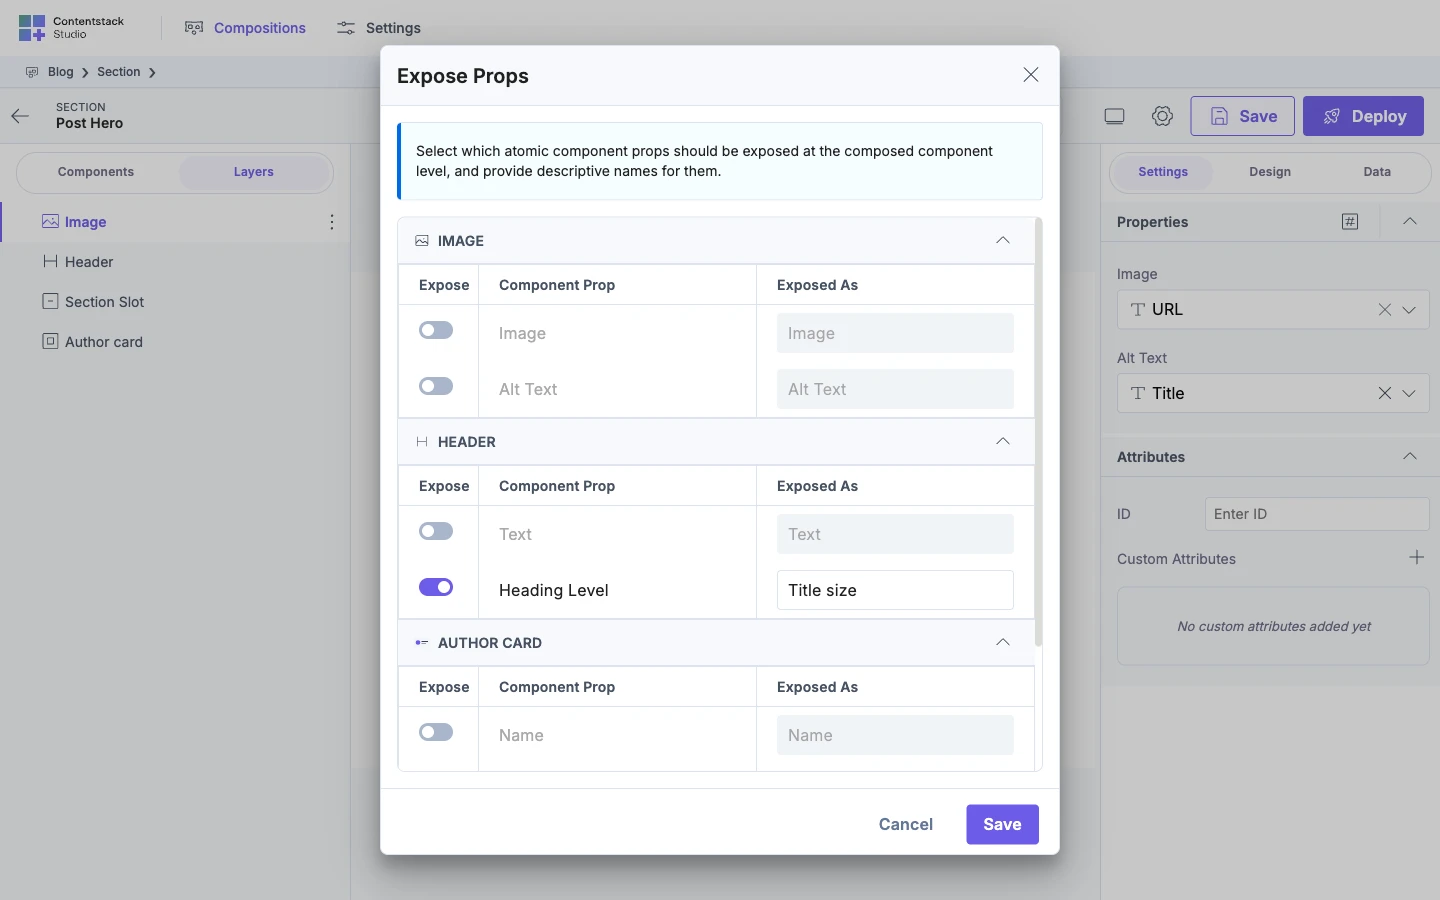
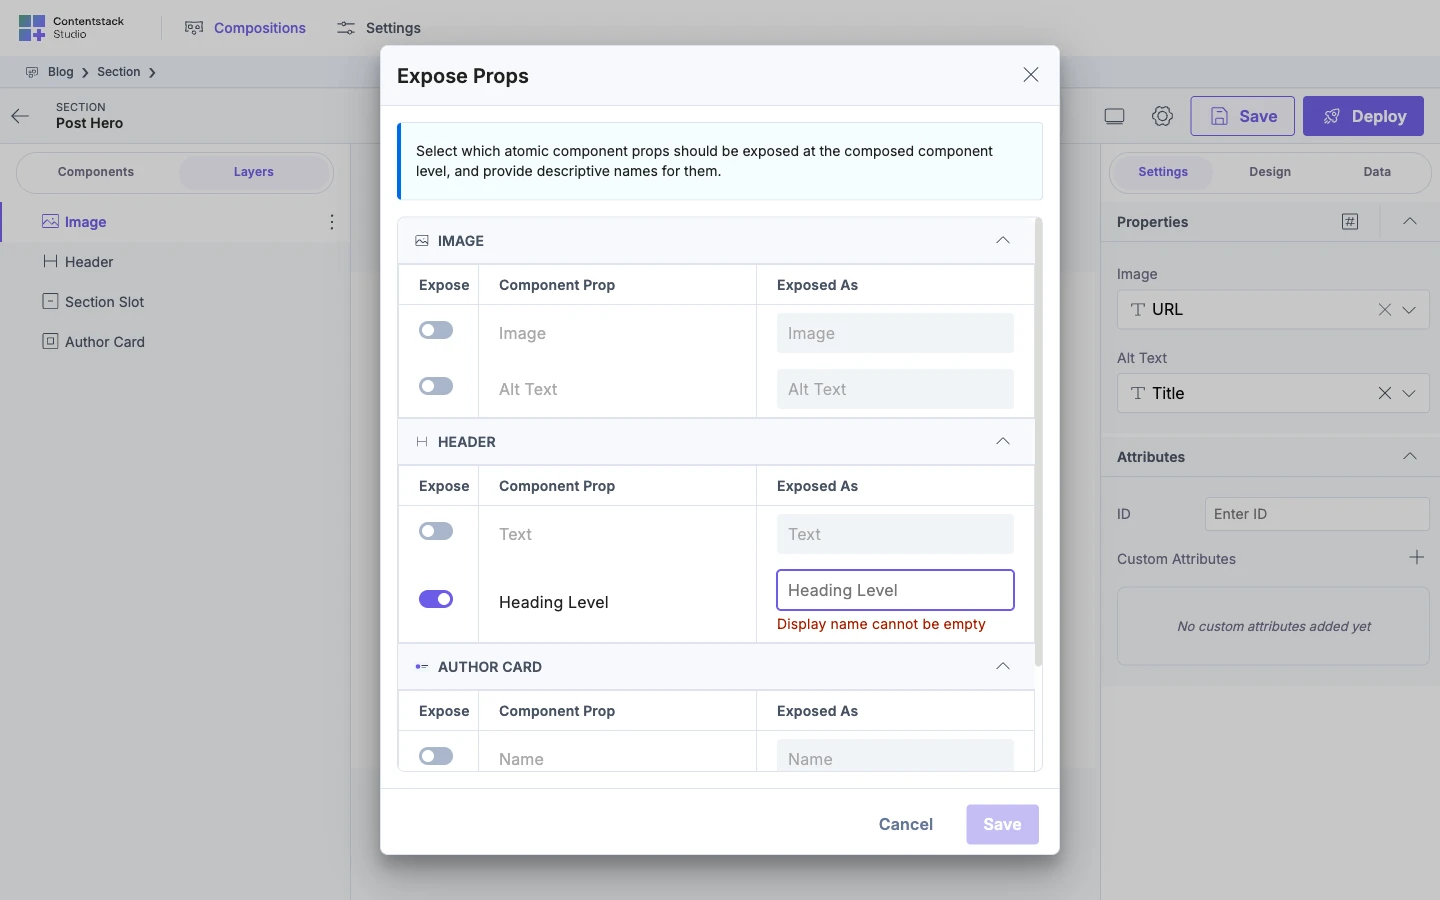
The Expose Props dialog opens. It lists every component in the section, with its props.
-
Turn on Expose for each prop templates may change. Exposed As starts with the prop's own name. Change it to a name template builders recognize. For Post hero, expose the Header's Heading Level as
Title size. -
Click Save.
Studio saves the section and shows Section Saved Successfully. If you click Cancel, the section isn't saved.
The dialog opens every time you click Save on a section. To expose props for one component only, select it and use the icon on the Properties header in the Settings tab.
Save and deploy it
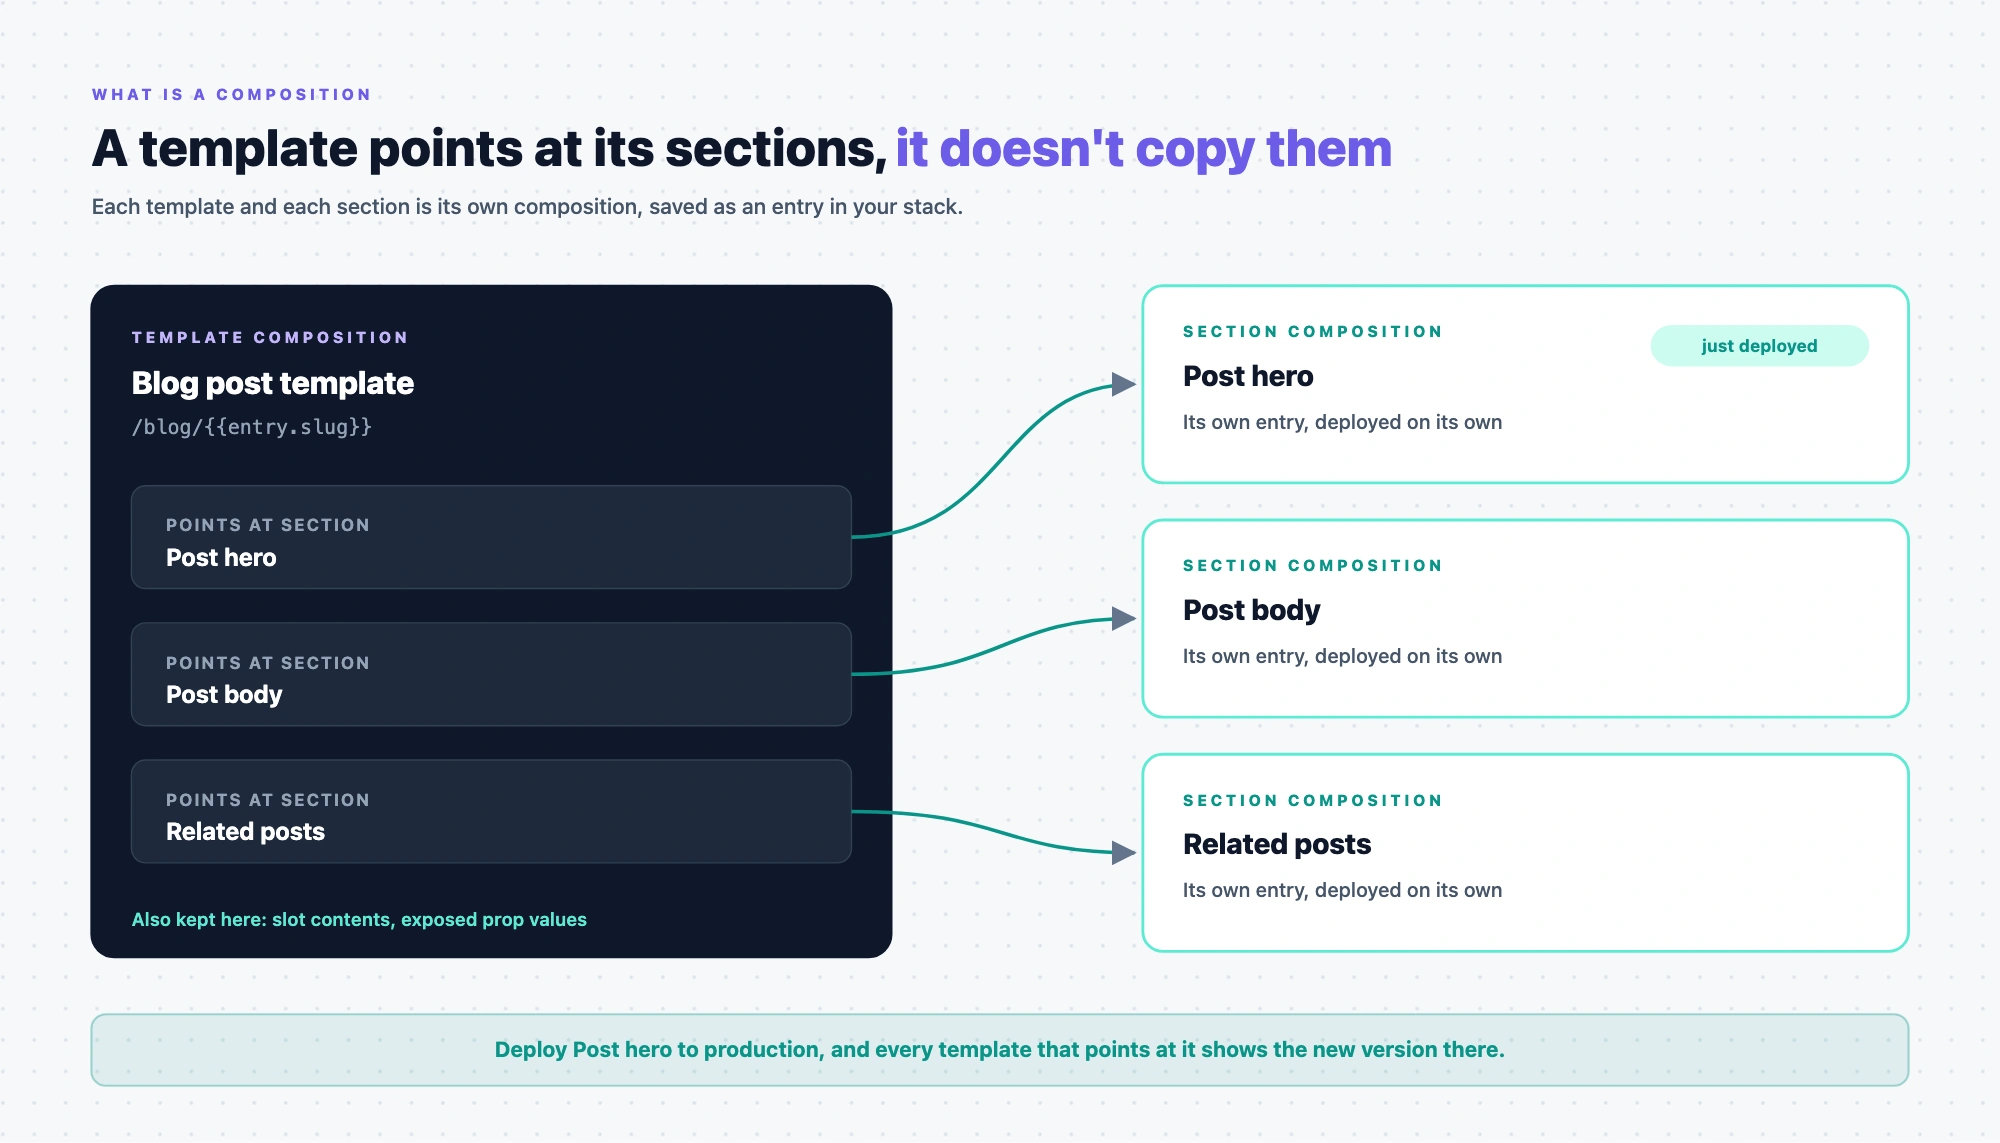
Save stores the section. Deploy puts it on your site. A template doesn't copy the sections it uses. It points at them, so deploying Post hero to an environment updates every template that uses it there. See Save, preview, deploy.
What happens when you drop it on a template
Studio binds the section to the template's content when one of the section's schemas is on the template's content type. Drop Post hero on the Blog post template and its Image, Header, Avatar and Byline show AI 101's cover image, title and author straight away. Studio uses the field you connected.
On the placed section, the Section Data row shows what it's bound to. It also offers other fields of the same shape, which you can switch to:
| Schema root | Other fields that fit |
|---|---|
| Group or global field | The same number of fields, of the same types. The names can differ. |
| Modular blocks | Share at least one block |
| Reference | Point to at least one of the same content types |
A single field only fits a single field, and a multiple field only a multiple field.
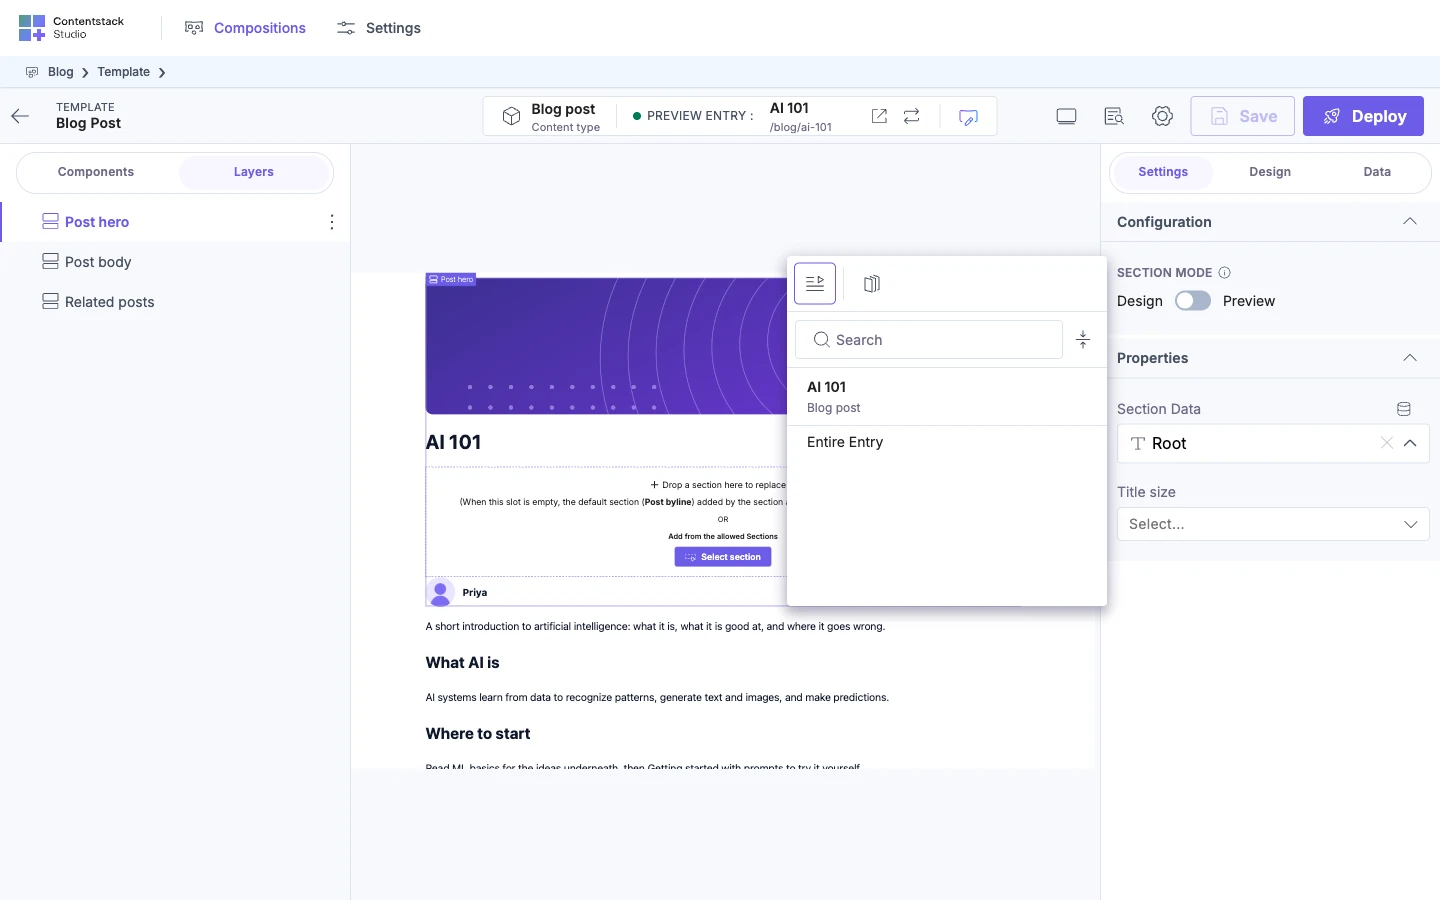
Studio doesn't bind a section on its own on a freeform template, or on a template whose content type has none of the section's schemas. Pick its data from Section Data instead.
If it doesn't work
-
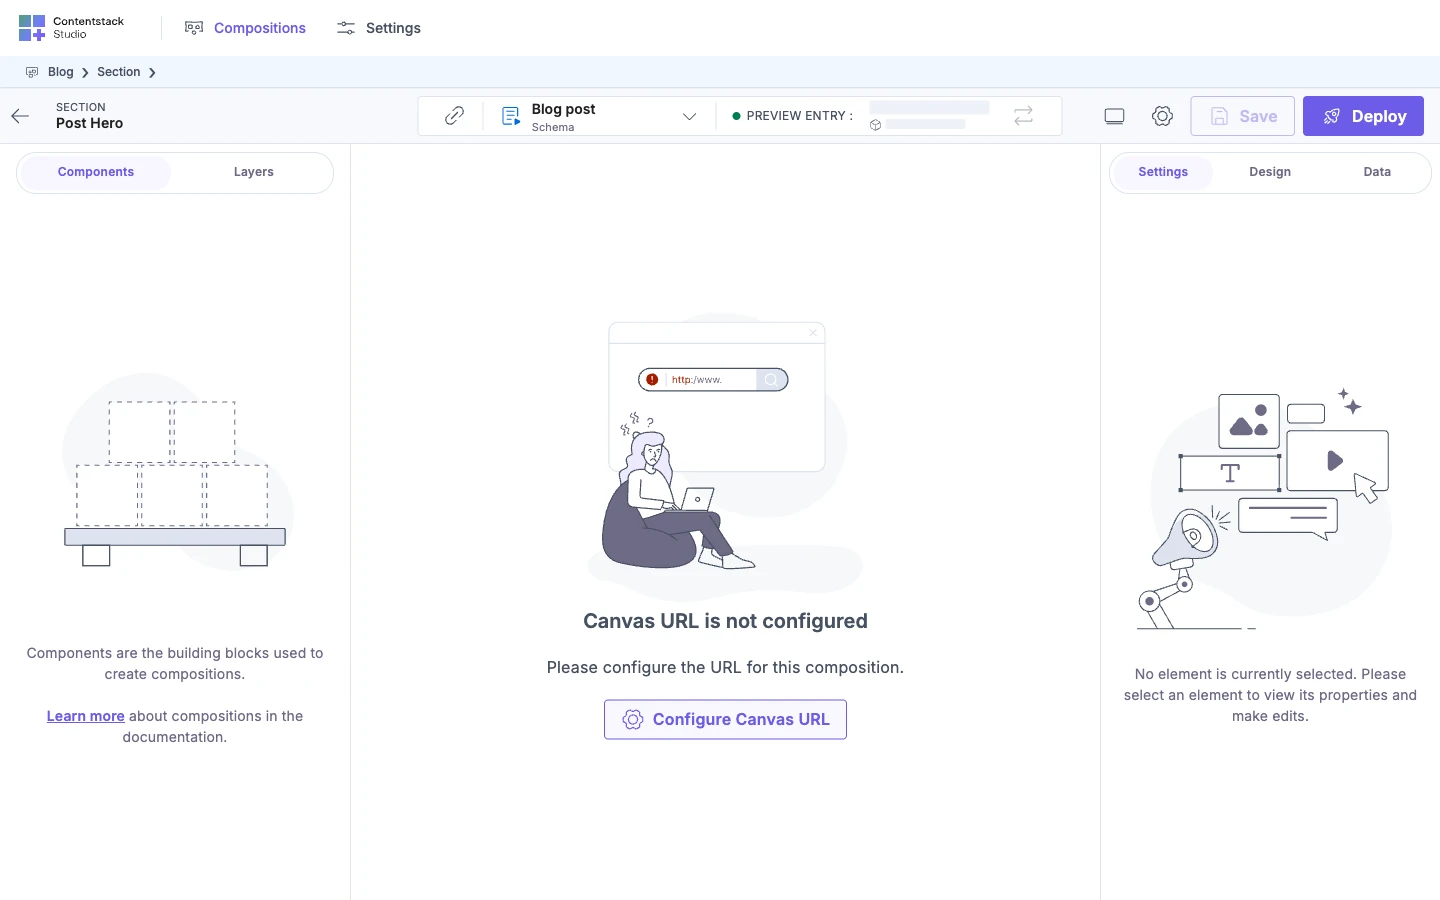
The canvas says "Canvas URL is not configured". The project has no Canvas URL. Click Configure Canvas URL and set one.
-
The canvas says "No Section Canvas on This Route". Nothing at the Canvas URL loads the Studio editor. Your app needs a route there that renders
<StudioCanvas />. See Mount the section preview route.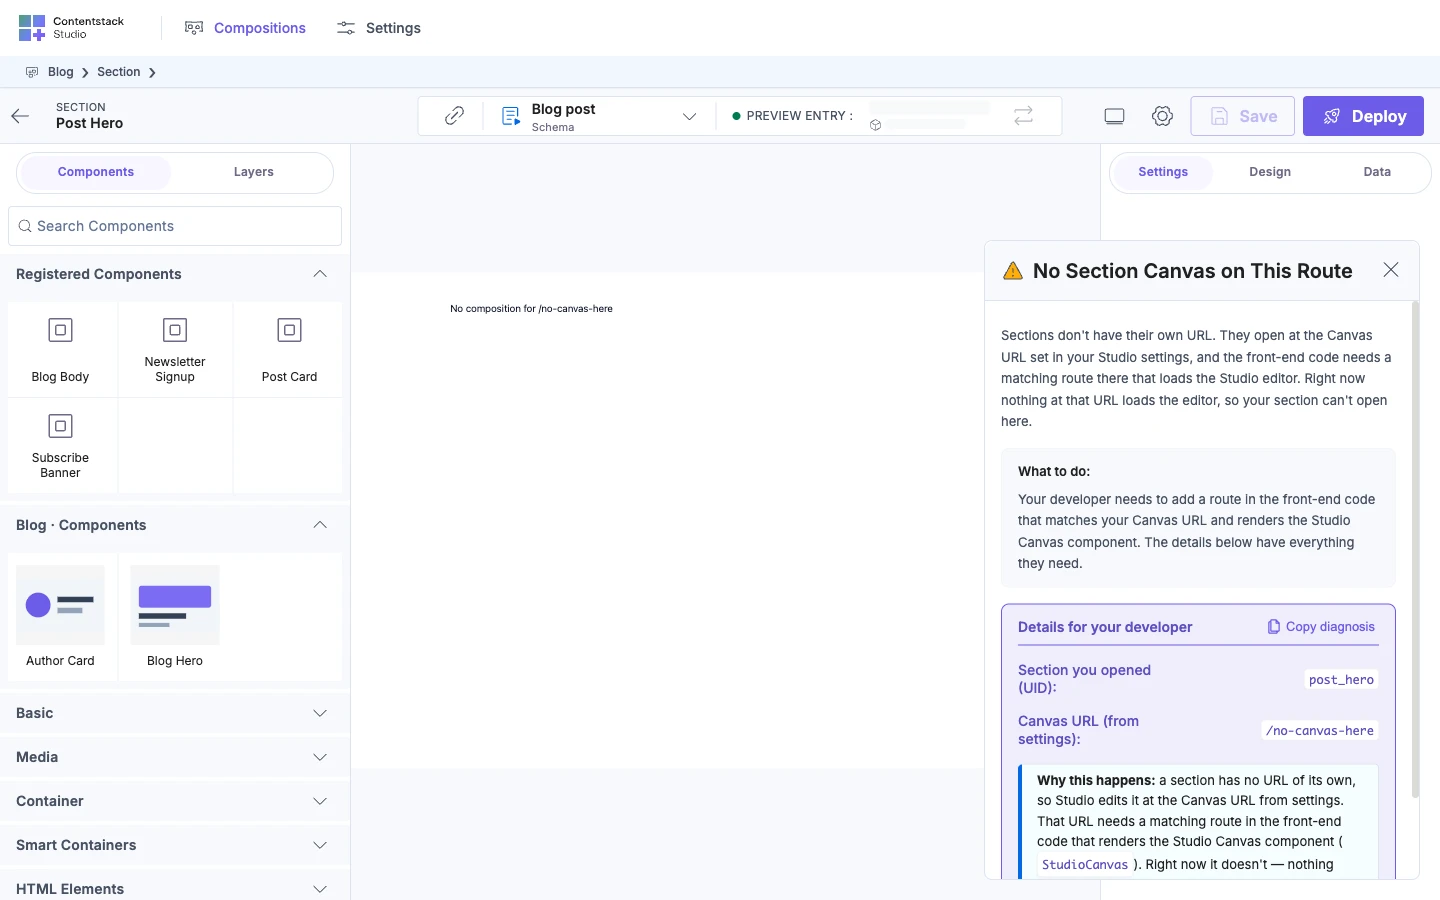
-
The canvas says "A Page Loaded, Not the Canvas". The Canvas URL points at one of your site's real pages. Change the Canvas URL in Settings to a route of its own that renders
<StudioCanvas />.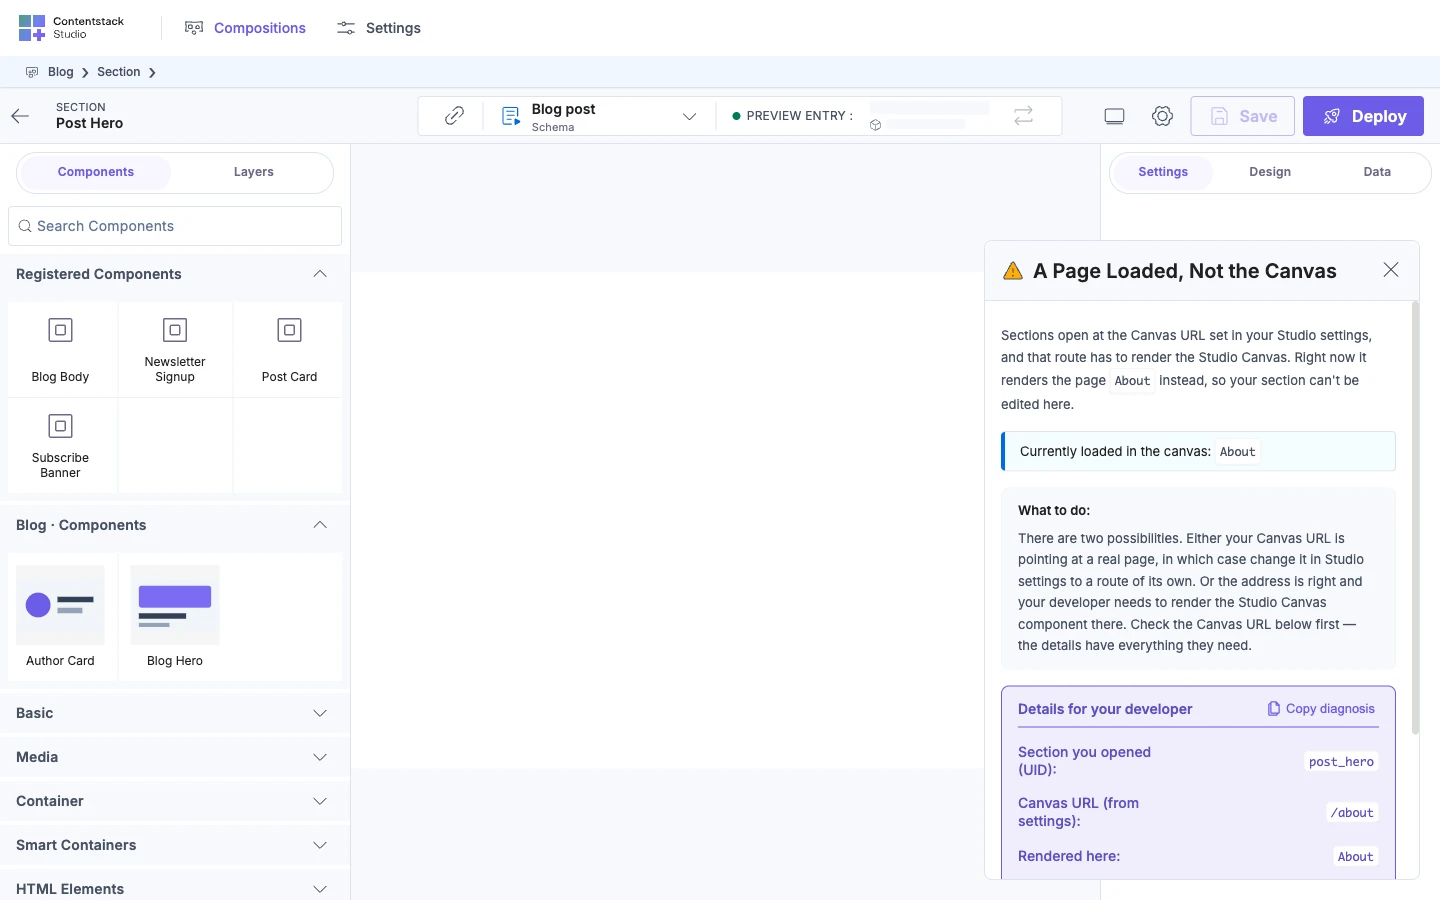
-
The section drops onto a template but doesn't show the entry's content. None of its schemas is on the template's content type, or the template is freeform. Add a schema for that content type, or pick the data from Section Data.
-
It shows the wrong field. The field you connected wasn't available where you dropped the section, such as inside a Repeater, so Studio used the first field that fits. Pick the right one from the placed section's Section Data row.
-
A field is greyed out in Select Schema Root. It holds a single value, or it's a different kind from the section's first schema. Pick the group, global field or block that contains it.
-
Save is greyed out in Expose Props. A name under Exposed As is empty ("Display name cannot be empty") or used twice ("This display name is already used"). Give every exposed prop its own name.
-
The section didn't save. You clicked Cancel in Expose Props. Save again and click Save in the dialog.
-
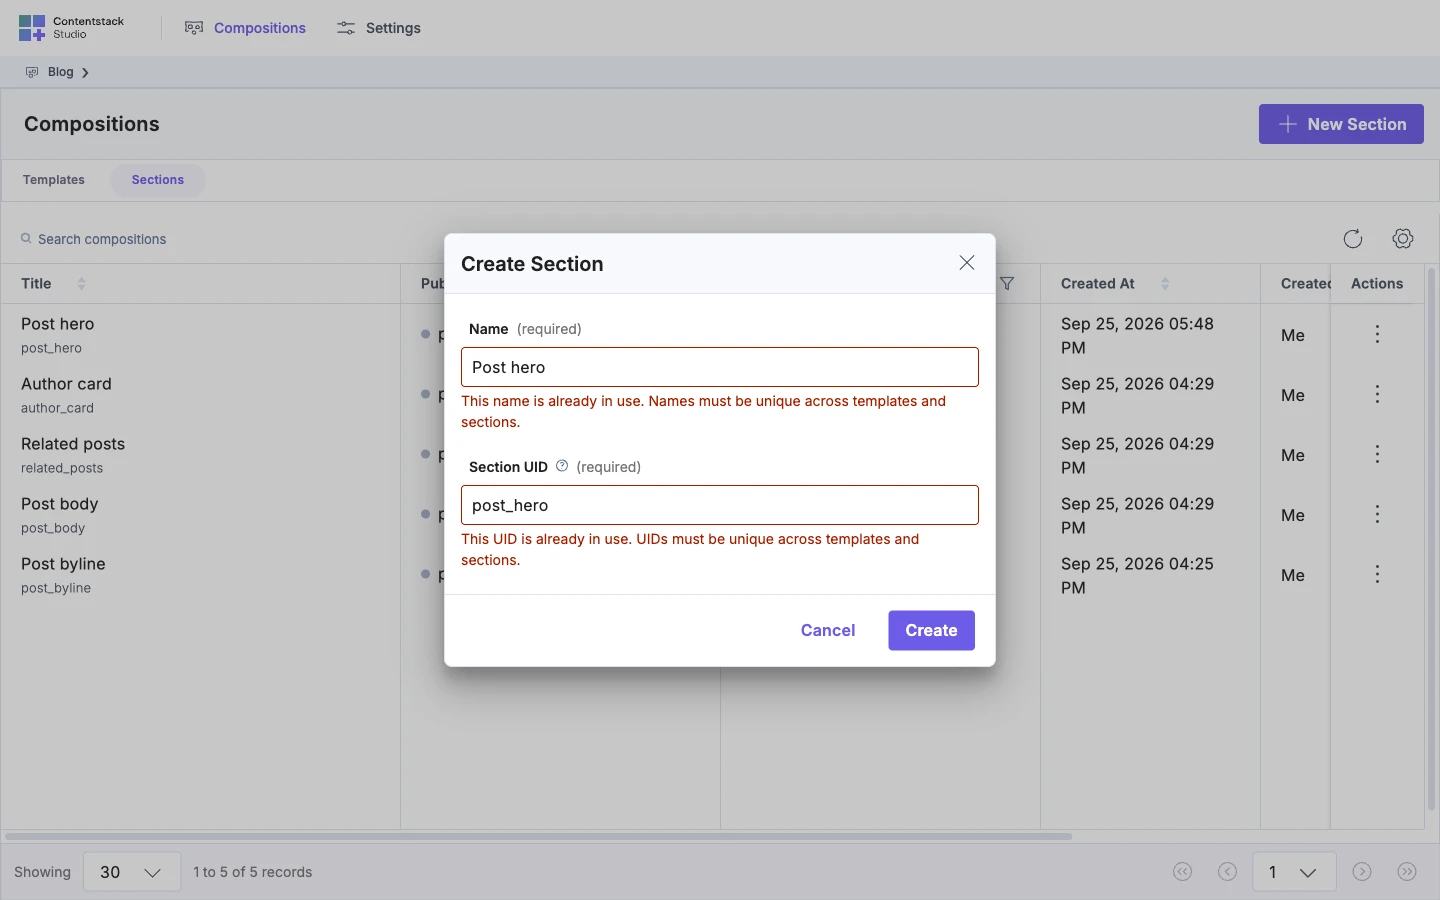
"This name is already in use" or "This UID is already in use". Names and UIDs must be unique across templates and sections. Pick another.