Prepare your Figma file
Prepare your Figma file before you run the Studio Figma plugin on it. You need this page when you're about to generate a component or copy a design into Studio.
Prerequisites
- A Figma file you can edit.
- The plugin installed and signed in to your Studio project. See The Studio Figma plugin.
- Your code components synced to the project, if you plan to use Auto Map. See the next heading.
What this is and what you get
Each change below matches something the plugin does with your layers. The plugin keeps a frame's layout, treats a layer as one image, and flags a named layer as a call to action. It also lists components for mapping and refuses a selection that's too large.
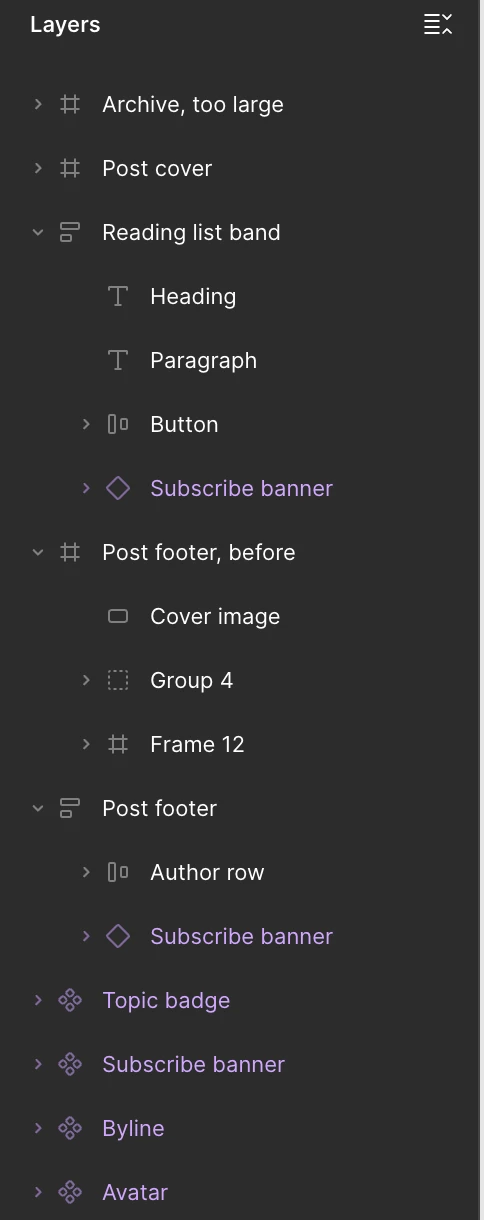
The example on this page is the Post footer frame in the Blog design file. It holds an Author row of Avatar and Byline instances and a Subscribe banner instance.
Sync your components first
Auto Map can only pair a Figma component with a code component you've synced. A component that's missing from the synced list stays unpaired.
Ask your developer to run the command below once for each file that holds Avatar, Byline or SubscribeBanner. The required --component-path flag names the file.
csdx studio:component:sync --component-path=<file>
The command sends each component's name, props and import path to the project, not your code. The steps are in Push your code into Studio.
Put Auto Layout on every frame
In a frame without Auto Layout, the plugin keeps each child at a fixed position. The generated design can't reflow, so at narrow widths content is cut off instead of restacking.
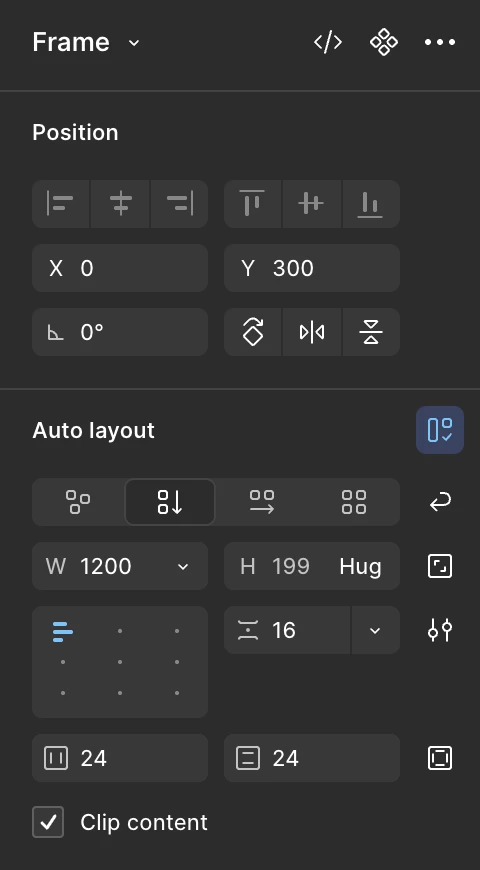
To add it, select the frame and add Auto Layout in the Auto layout section of the right panel. Post footer uses a vertical direction, a gap of 16 and padding of 24. The Layers panel shows the Auto Layout icon next to the frame.
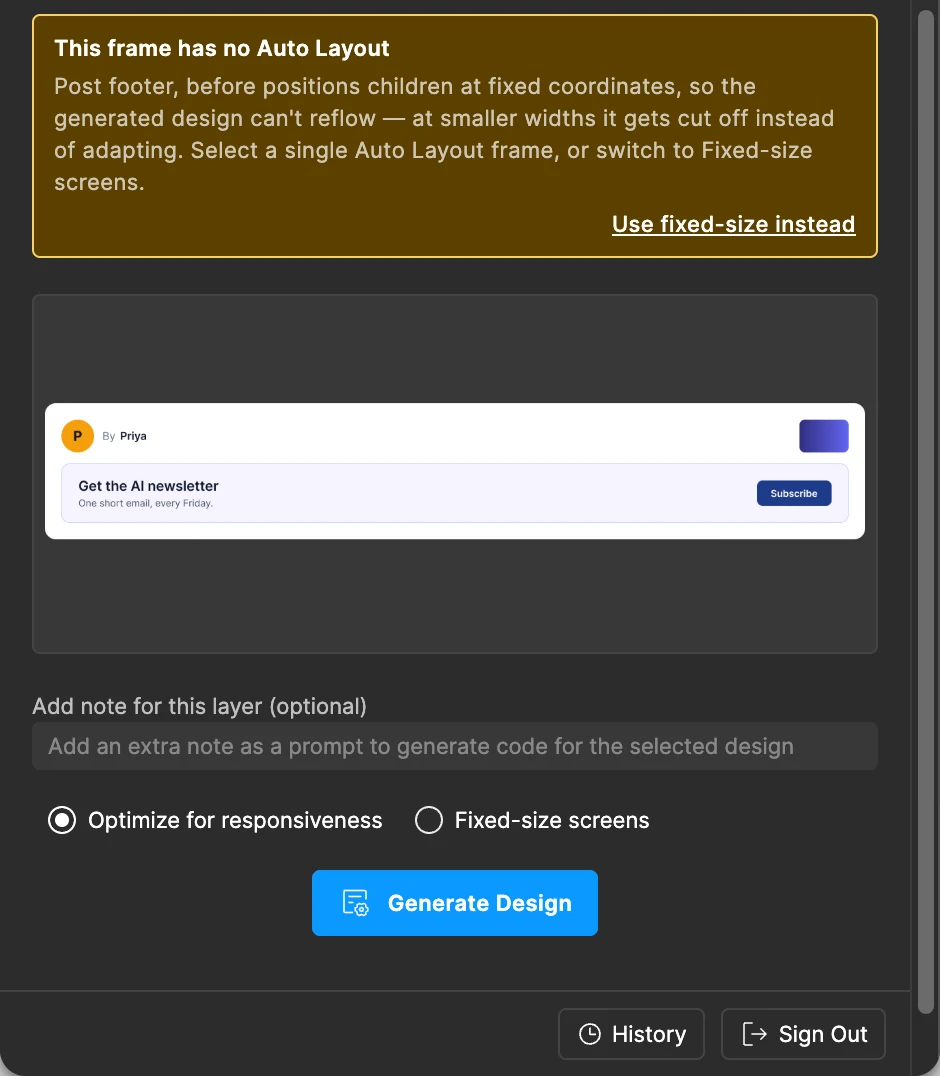
The plugin checks this for you when you choose Optimize for responsiveness, which is the default. In the Blog design file, the frame Post footer, before has no Auto Layout. Select it and the plugin warns "This frame has no Auto Layout". The warning offers a Use fixed-size instead link, which switches the setting to Fixed-size screens. Choose that only when the design is meant for one screen size.
Give other layers an export setting
A layer with an export setting is treated as one image. Vector shapes, and groups that hold only vector shapes, are already treated as one image without one. Add an export setting to any other layer you want kept as a single image, such as a rectangle.
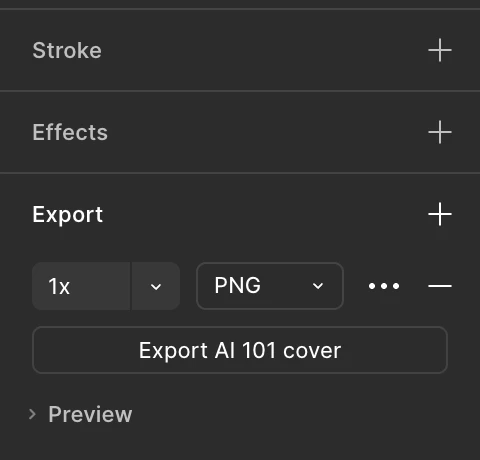
To add it, select the layer and add a setting in the Export section of the right panel. In the Blog design file, the rectangle that holds the AI 101 cover has a PNG 1x export setting.
The plugin exports each image as a PNG at 1x and uploads it to Contentstack.
Name buttons and calls to action clearly
The plugin flags a layer as a call to action when all of these are true:
- Its name contains the word button, btn or cta.
- It holds a visible text label.
- It has a fill, a border or rounded corners.
For a flagged layer, the plugin tells the model to write a link with an empty href, so Studio has a link to bind. The model writes the final element, so a flagged layer can still come out as a Button.
In the Reading list band frame, a layer named Button holds the label "See the list". It has a fill, a border or rounded corners, so the plugin flags it. In the example on Copy and paste from Figma to Studio, it arrives as a Button. Default names such as Frame 12 and Group 4 don't trigger this.
Make repeated pieces Figma components
Component Mapping lists the Figma components in your selection, one row each. A layer that isn't a Figma component isn't listed, so Auto Map has nothing to pair it with.
In the Blog design file, Avatar, Byline and Subscribe banner are Figma components. Select Post footer and open the Component Mapping tab. It lists Avatar, Byline and Subscribe banner, one row each.
Keep a selection to at most 300 elements and 6,000 pixels wide
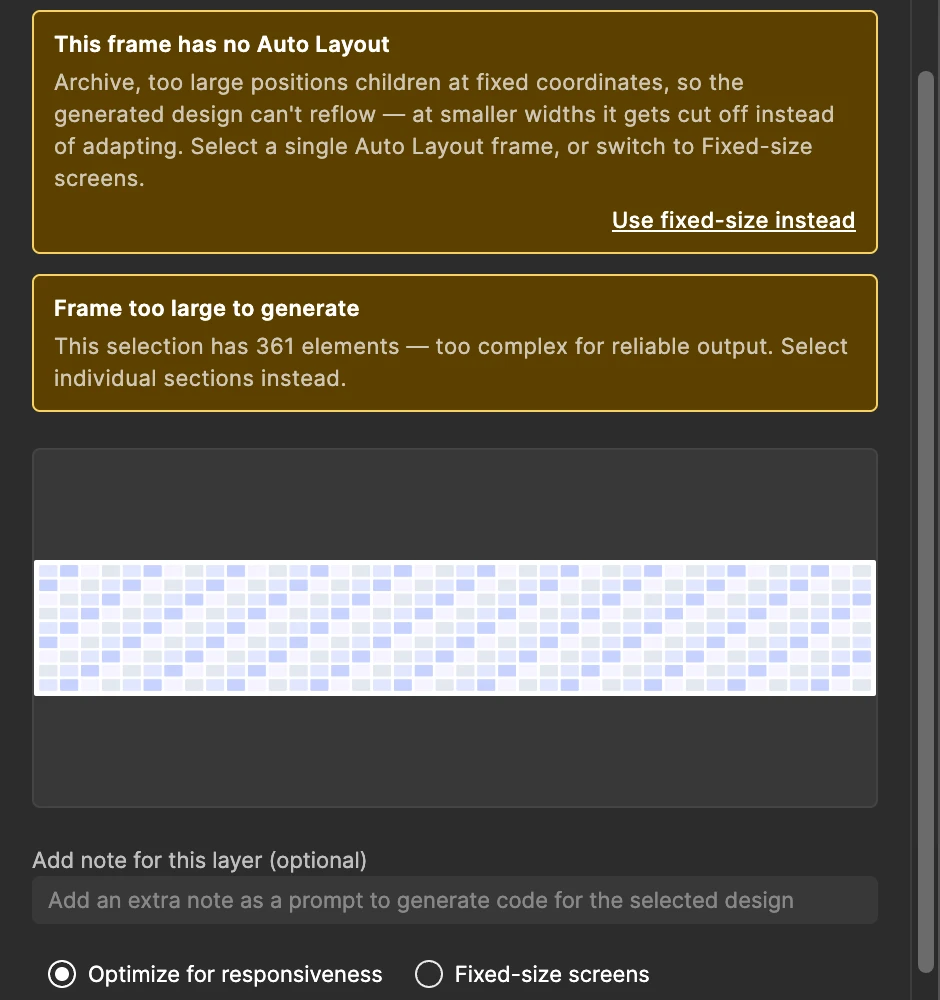
The plugin counts every element inside your selection. A selection of more than 300 elements can't be generated, and the plugin shows "Frame too large to generate". Select smaller parts of the design and generate each one.
A selection wider than 6,000 pixels fails with "Figma node dimensions width exceed 6000px". The plugin sends a taller selection in slices of up to 6,000 pixels.
In the Blog design file, the frame Archive, too large is a throwaway with over 300 elements. Select it and the plugin shows "This selection has 361 elements" under the warning "Frame too large to generate". It also shows "This frame has no Auto Layout", because the Archive frame has none.
If it doesn't work
| Symptom | Why it happens | Fix |
|---|---|---|
| The generated design doesn't reflow at narrow widths | The frame has no Auto Layout, so its children keep fixed positions | Add Auto Layout to the frame and generate again |
| A button comes out as a plain Box | The layer's name lacks the word button, btn or cta, or the layer has no text label or no fill, border or rounded corners | Rename the layer so it contains "button" or "cta". Check that it has a label and a fill, border or rounded corners. Then generate again |
| Component Mapping doesn't list a piece of your design | The layer isn't a Figma component | Turn it into a Figma component, then select the frame again |
| Auto Map leaves a Figma component unpaired | The code component was never synced to the project | Ask your developer to run csdx studio:component:sync --component-path=<file> for it, then run Auto Map again |
| "Frame too large to generate" | The selection has more than 300 elements | Select smaller parts of the design and generate each one |
| "Figma node dimensions width exceed 6000px" | The selection is wider than 6,000 pixels | Select a narrower frame |
What to do next
To turn a prepared frame into a component in your repo, see Generate a React component from a Figma design. To put it on a canvas as ordinary Studio components, see Copy and paste from Figma to Studio.