Your first Studio page
Follow eight steps to put a Studio template on your own site. Use this page when you've read what Studio does and want to see a page of your own render.
The example on this page is the Blog post template, previewing AI 101 at /blog/ai-101. You create a Studio project, connect your app to your stack, and build a template from two of Studio's own components. Then you deploy the template and open it on your site.

You don't register a component or build a section here. A template can hold Studio's built-in components directly, so you can start without either. To see how components, sections and templates fit together, read Components, sections and templates.
What you need before you start
If you have all of this, go to step 1, Create a Studio project for your stack.
- A stack with the Blog post content type. The content type has the fields
title,summaryandslug. It has an entry, AI 101, that's published to the environment below. If your content type uses other fields, use yours wherever this page names these three. - No Studio project on the stack yet. The project you create in step 1 adds a content type with the UID
compositions. If your stack already has a content type with that UID, use another UID in step 1, as the note there explains. - A US-region stack. The code on this page sets no
region, so the Delivery SDK uses its default, the US region. - Live Preview on the stack. Live Preview is a stack setting in Contentstack. The steps were run on a stack with it turned on.
- An environment with an English Base URL that's your app's URL. The example uses an environment called
developmentwith the Base URLhttp://localhost:3006. Use an environment your live site doesn't read, because you deploy to it. Add the Base URL on the environment in Contentstack. If your dev server runs at another URL, use that URL wherever this page sayshttp://localhost:3006. - Credentials. Your stack's API key, a delivery token that covers the
developmentenvironment, and a preview token. Contentstack's documentation explains where to find each one. - A Vite app with React Router 7. The code imports from
react-router-dom, and the steps were run on version 7.18.4. The app runs React 18 or 19, and the steps were run on React 18.3.1. Other setups aren't covered. - Studio. Your organization has access to it.
- Chrome. Chrome blocks an app at
http://localhostinside Studio until you allow the Contentstack site you open Studio from to reach apps on your computer. This page was checked in Chrome only. Other browsers can behave differently.

1. Create a Studio project for your stack
A Studio project connects Studio to one stack. You create it first, because your app needs the UID of the content type the project adds to your stack.
-
In Studio's project list, click New Project. The Create New Studio Project dialog opens.
-
In Name, enter
Blog. -
In Select Stack, pick your stack. Advanced Settings appears.
-
Leave Advanced Settings as it is. It holds the name and UID of the content type that stores your templates and sections. They default to Compositions and
compositions, and Studio creates that content type in your stack's default branch, Main.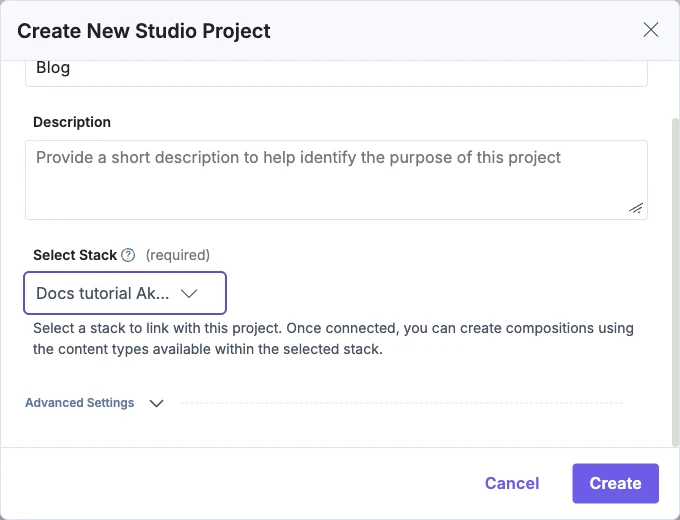
-
Click Create.
Studio opens the project's Compositions list. The list is empty, and it reads "Start Designing with Templates" above a New Template button.
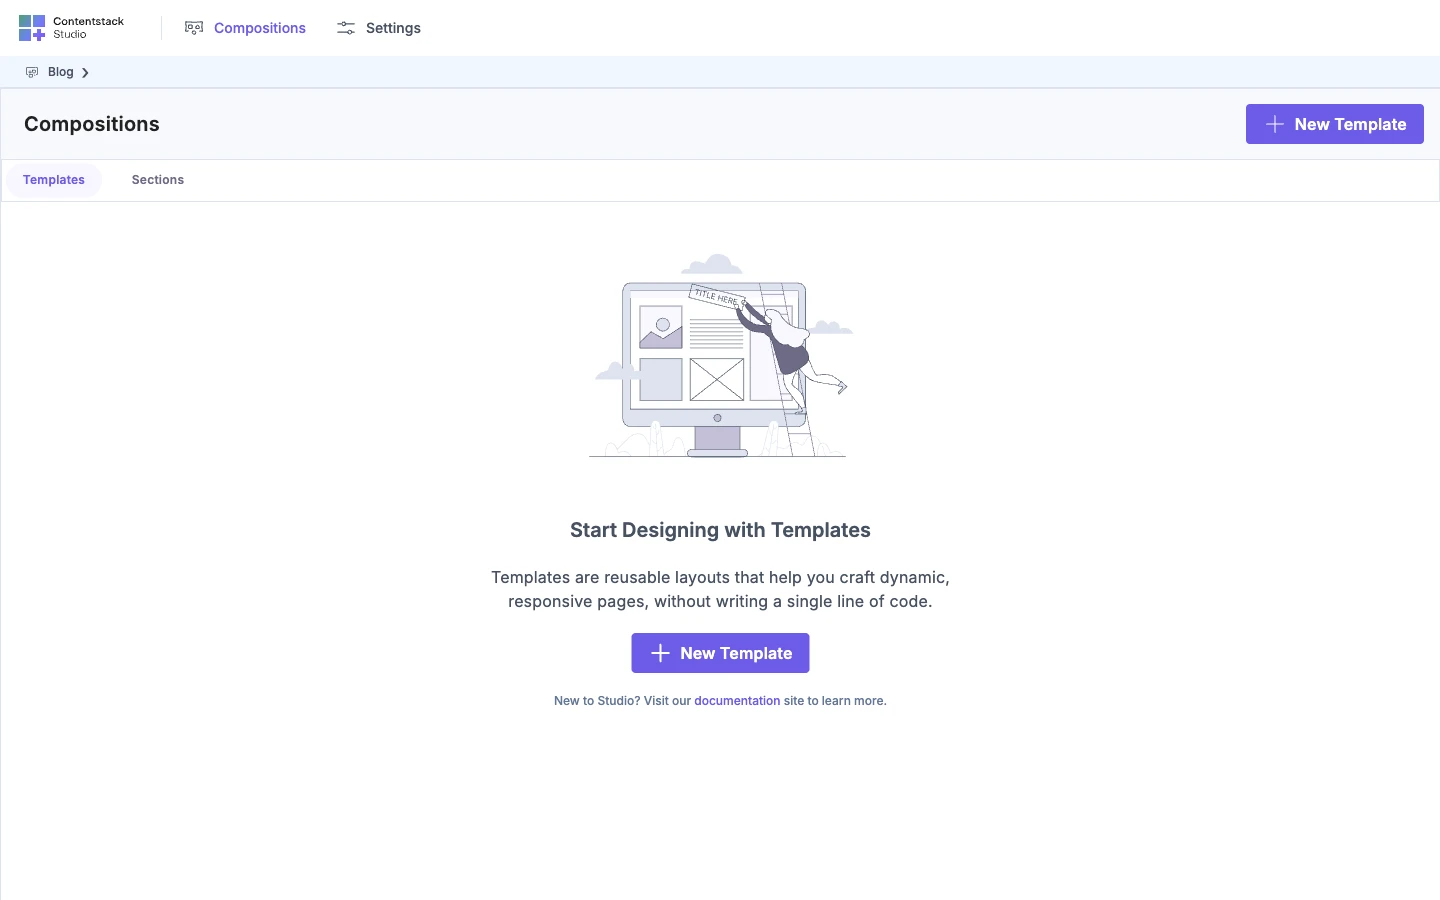
If your stack already has a content type with the UID compositions, Studio says "Content type with this uid already exists in this stack. Please choose a different uid." and keeps Create off. Enter a different Content Type Name and Content Type UID. Then use that UID as contentTypeUid in step 3.
For what Studio adds to your stack, see Your content model in Studio.
2. Set the environment, language and Canvas URL
These settings tell Studio which environment to preview from and where to load your app.
-
Open Settings, then the Configuration tab. Environment and Language are empty in a new project.
-
In Environment, select
development. In Language, select English.Base URL and Canvas URL appear. Base URL shows the environment's English URL,
http://localhost:3006. You can't type in it. Studio loads your app from this URL. -
In Canvas URL, enter
/canvas. Studio requires a value to save. Only sections open at the Canvas URL, so this page doesn't use it, and your app needs no route there. -
Leave Enable Freeform Feature off.
-
Click Save.
Studio shows "Project updated successfully".
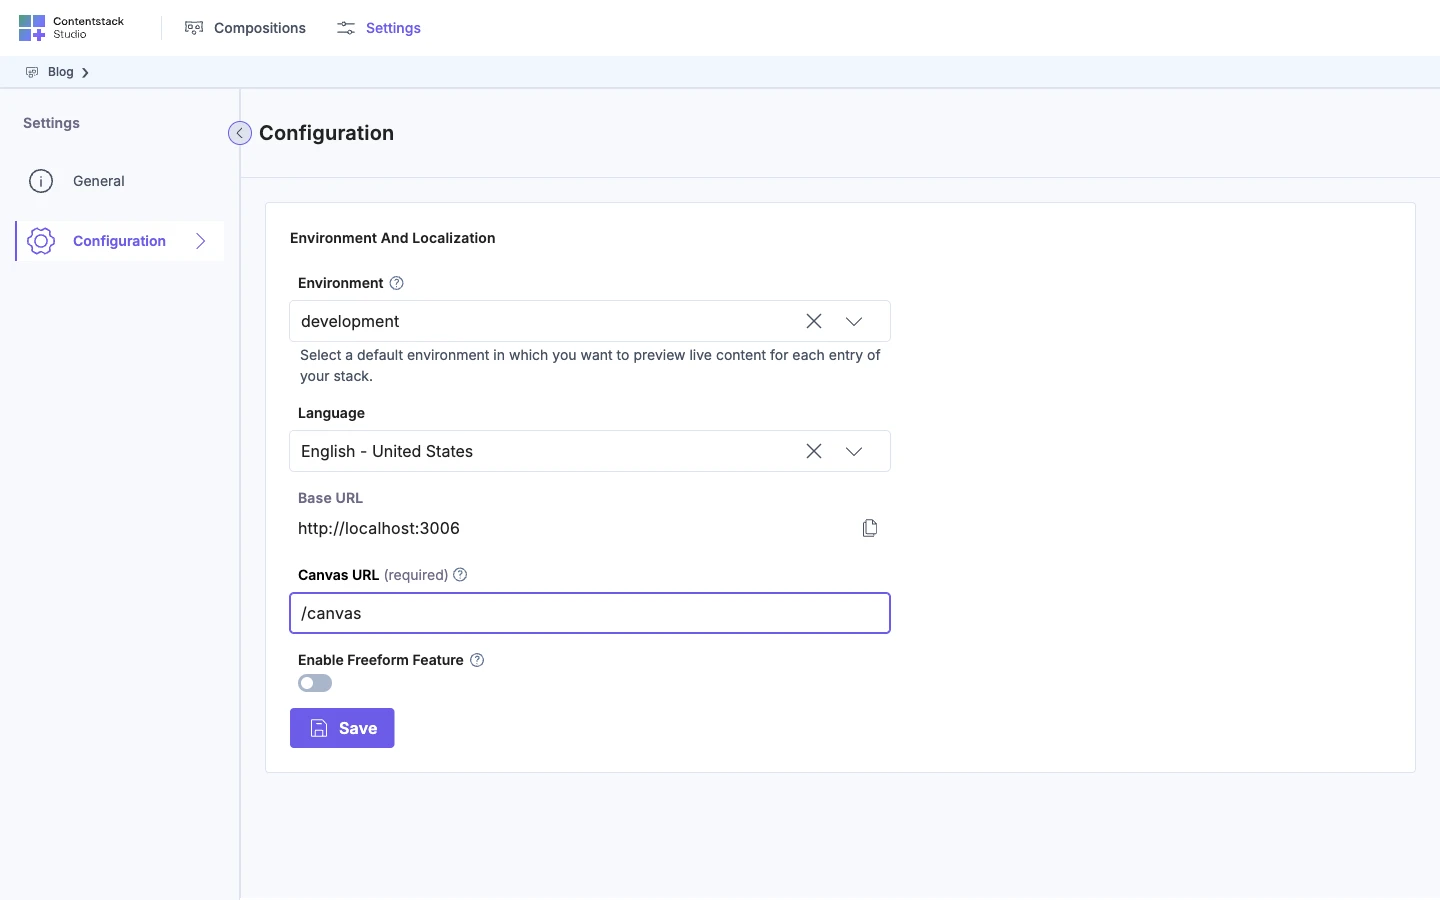
If Base URL says "No base URL found!", the environment has no URL for English. Add one on the environment in Contentstack. You can't save until it has one.
For every field on this tab, see Project settings.
3. Install the SDKs and connect your app to your stack
Your app needs two packages and four values. The Delivery SDK reads your stack, and the Studio SDK connects your app to Studio.
Install both packages. The command pins the major versions this page is written for:
npm install @contentstack/delivery-sdk@4 @contentstack/studio-react@2
live_preview is part of the Delivery SDK, so you don't install @contentstack/live-preview-utils for this page.
Add your credentials and the preview host to your app's .env file:
VITE_CONTENTSTACK_API_KEY=<your-api-key>
VITE_CONTENTSTACK_DELIVERY_TOKEN=<your-delivery-token>
VITE_CONTENTSTACK_PREVIEW_TOKEN=<your-preview-token>
VITE_CONTENTSTACK_PREVIEW_HOST=rest-preview.contentstack.com
Don't commit .env, because it holds your tokens. The preview host is the address of Contentstack's preview API, which isn't the delivery address. The right one depends on your region and on whether your organization runs its own CDN. The value shown is the one this page uses, for a US-region stack.
Warning: Vite includes variables that start with VITE_ in the app's browser build, so anyone who opens a deployed app can read their values. The preview token reads draft content, so this setup is for local development. Don't ship the preview token in a publicly deployed app.
Create src/studio.ts:
// src/studio.ts
import contentstack from "@contentstack/delivery-sdk";
import { studioSdk } from "@contentstack/studio-react";

const stack = contentstack.stack({
  apiKey: import.meta.env.VITE_CONTENTSTACK_API_KEY,
  deliveryToken: import.meta.env.VITE_CONTENTSTACK_DELIVERY_TOKEN,
  environment: "development",
  live_preview: {
    enable: true,
    preview_token: import.meta.env.VITE_CONTENTSTACK_PREVIEW_TOKEN,
    host: import.meta.env.VITE_CONTENTSTACK_PREVIEW_HOST,
  },
});

studioSdk.init({
  stackSdk: stack,
  contentTypeUid: "compositions",
});
The stack comes from your API key, your delivery token and the name of your environment. studioSdk.init connects Studio to the stack. Call it once, before your app renders anything.
contentTypeUid is the UID of your Compositions content type. It's compositions unless you chose another UID when you created the project. The Integration Code on the General tab of Settings fills it in for you.
The live_preview block lets your app read the template you create in step 5 before you deploy it. Without the block, your app reads published content only, and a template you haven't deployed doesn't load in the canvas. The block needs host. Without it, the template doesn't load either.
Import ./studio first in src/main.tsx, so it runs before any route renders. Step 4 shows the whole file. For every option, see SDK API.
4. Add a catch-all route that renders templates
Studio renders a template on a route in your app. One route that matches every URL can serve every template, because each template's URL decides which one shows.
Create src/StudioPage.tsx:
// src/StudioPage.tsx
import { useLocation } from "react-router-dom";
import { StudioComponent, useCompositionData } from "@contentstack/studio-react";

export function StudioPage() {
  const { pathname } = useLocation();
  const { specOptions, isLoading, error } = useCompositionData({ url: pathname });

  if (isLoading) return null;
  if (error || !specOptions) return <p>No template for {pathname}</p>;
  return <StudioComponent specOptions={specOptions} />;
}
Then add the route to src/main.tsx:
// src/main.tsx
import "./studio";
import ReactDOM from "react-dom/client";
import { BrowserRouter, Routes, Route } from "react-router-dom";
import { StudioPage } from "./StudioPage";

ReactDOM.createRoot(document.getElementById("root")!).render(
  <BrowserRouter>
    <Routes>
      <Route path="*" element={<StudioPage />} />
    </Routes>
  </BrowserRouter>,
);
The file above is a whole main.tsx. If your app already has one, add the import lines and the * route to it. If it already has a * route, for example for a 404 page, put StudioPage there instead of adding a second * route.
useCompositionData finds the template whose URL matches the URL you pass it. It returns specOptions, isLoading and error. StudioComponent renders the template from specOptions. The hook runs in the browser, so this is a client-rendered route. The * route matches every URL, so one route serves every template.
You don't register a component. Studio's built-in components load when you import @contentstack/studio-react.
Run npm run dev. The app starts with no error in the terminal. Then open /blog/ai-101 on your app's URL, http://localhost:3006 in the example. Your app shows "No template for /blog/ai-101", because you haven't created a template yet.

5. Create a connected template for Blog post
A connected template renders every entry of one content type. You create one for Blog post, so every Blog post entry gets its page from it.
-
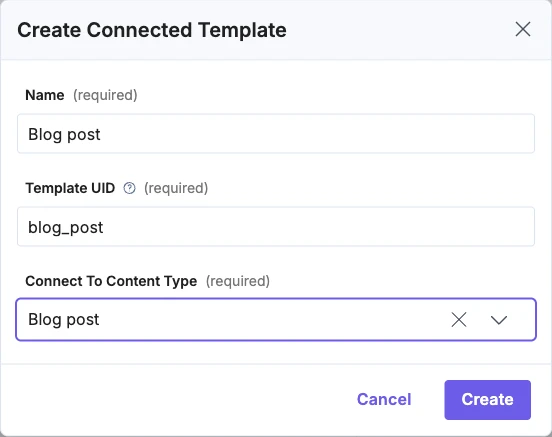
Open Compositions. In the list, click New Template. The Create Connected Template dialog opens, because Enable Freeform Feature is off.
-
In Name, enter
Blog post. Studio fills inblog_postas the Template UID. -
In Connect To Content Type, pick Blog post.
-
Click Create.
Studio shows "Composition created successfully" and opens the template on the canvas. The canvas loads your app and shows Start Building Template. The top bar shows the content type, Blog post, the entry Studio previews and the template's URL.
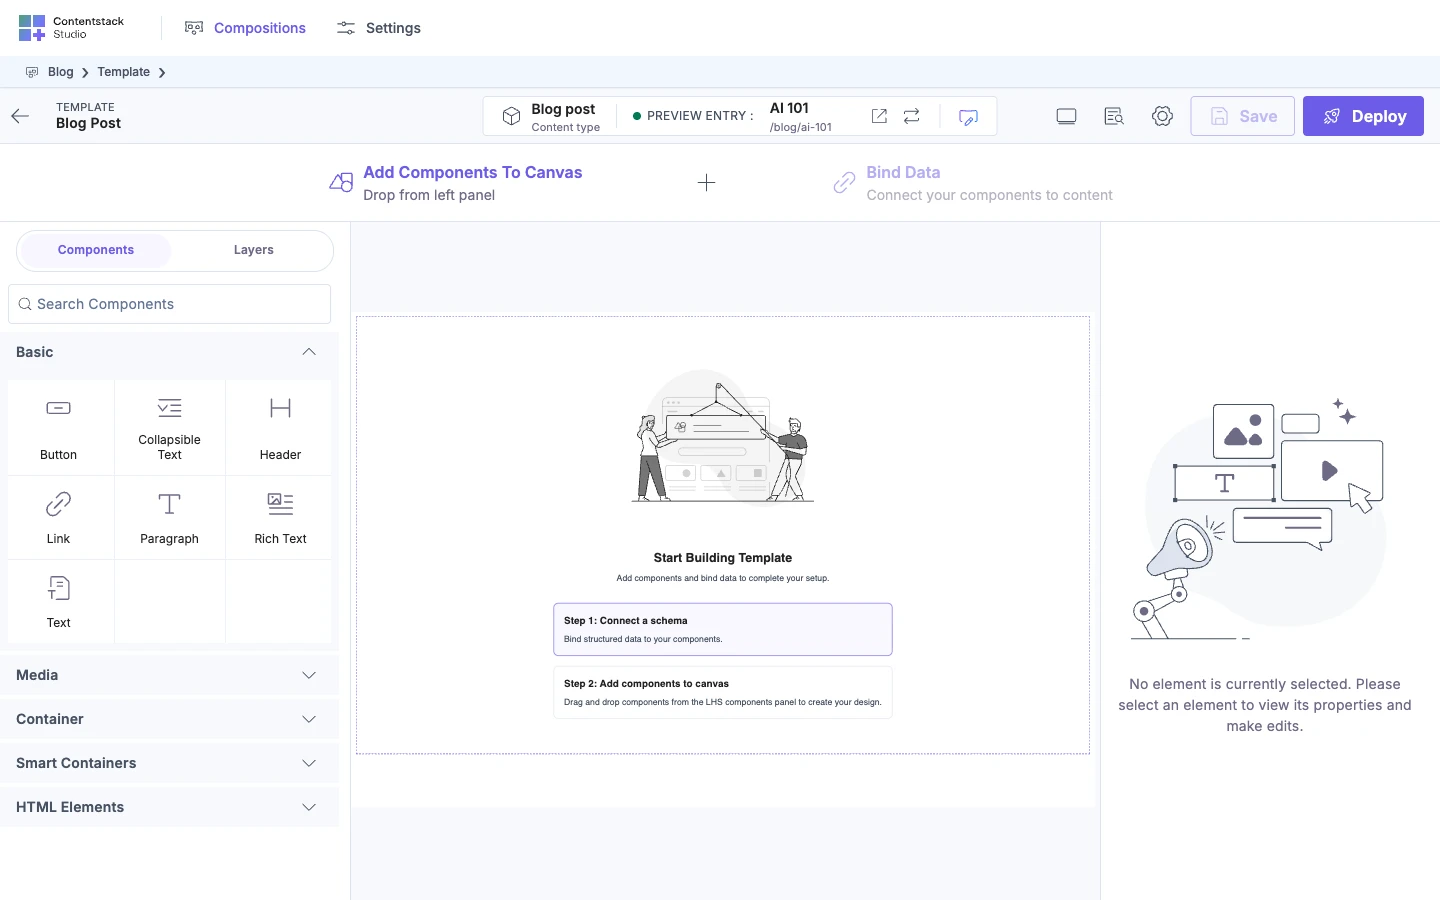
Check the top bar. Studio previews the entry updated most recently that has a value for every variable in the URL.
- If it previews another entry, click the entry's name in the top bar, or the Replace icon beside the URL, and pick AI 101. On a narrow window, Replace entry is in the menu with three dots, at the right of the top bar.
- If the URL isn't
/blog/ai-101, change it. Studio builds a new template's URL from your stack's Custom Preview URL, then the content type's URL pattern, then its own default. To see how, read How template URLs work.
To change the URL:
-
Click Edit URL, the pencil next to the URL.
-
In Preview URL Pattern, type
/blog/{{entry.slug}}.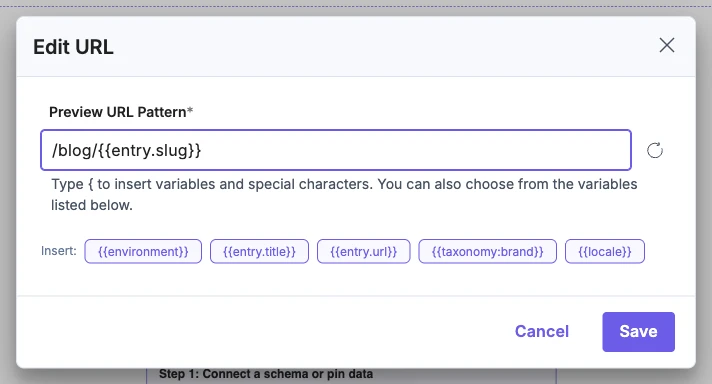
-
Click Save. The URL next to the pencil updates, and the canvas loads the new URL.

For more on the URL, see Edit or reset a template's URL.
6. Add a Header and a Paragraph and bind them to AI 101
Put two of Studio's built-in components on the template, then bind each one's text to a field of the entry you preview. A binding makes a component show a field's value instead of a value you type. For the idea, see How components get content.
-
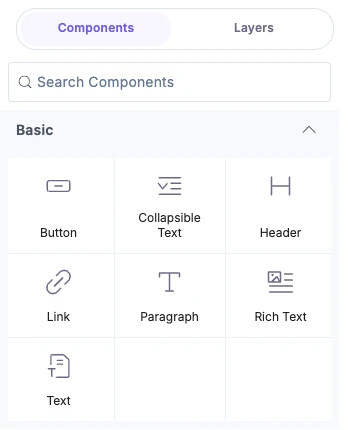
Open the Components tab and expand Basic. It holds Header and Paragraph, among others.
-
Drag Header onto the canvas. Then drag Paragraph below it.
-
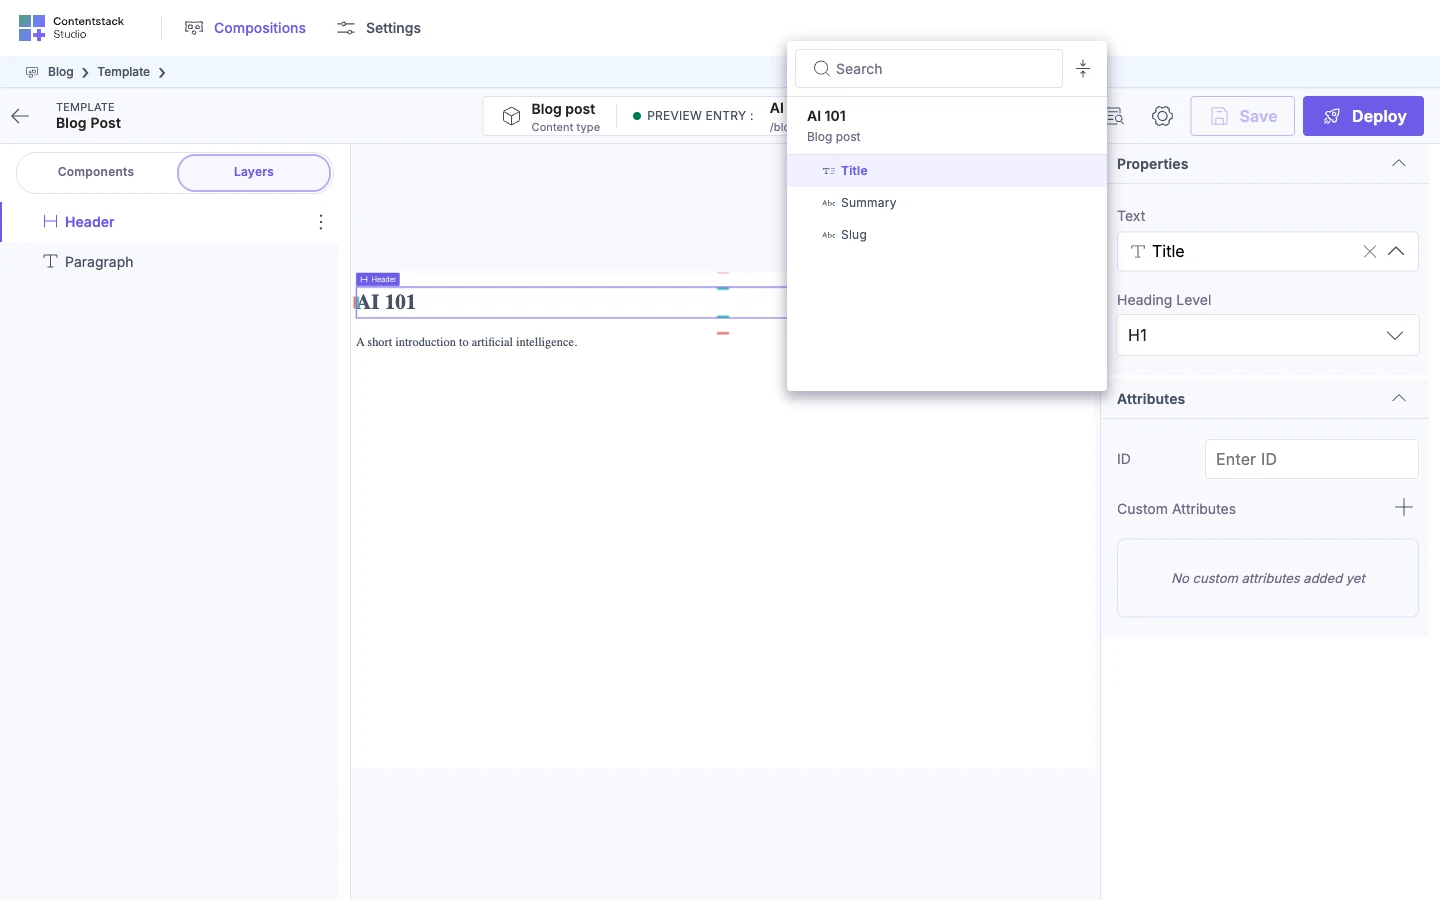
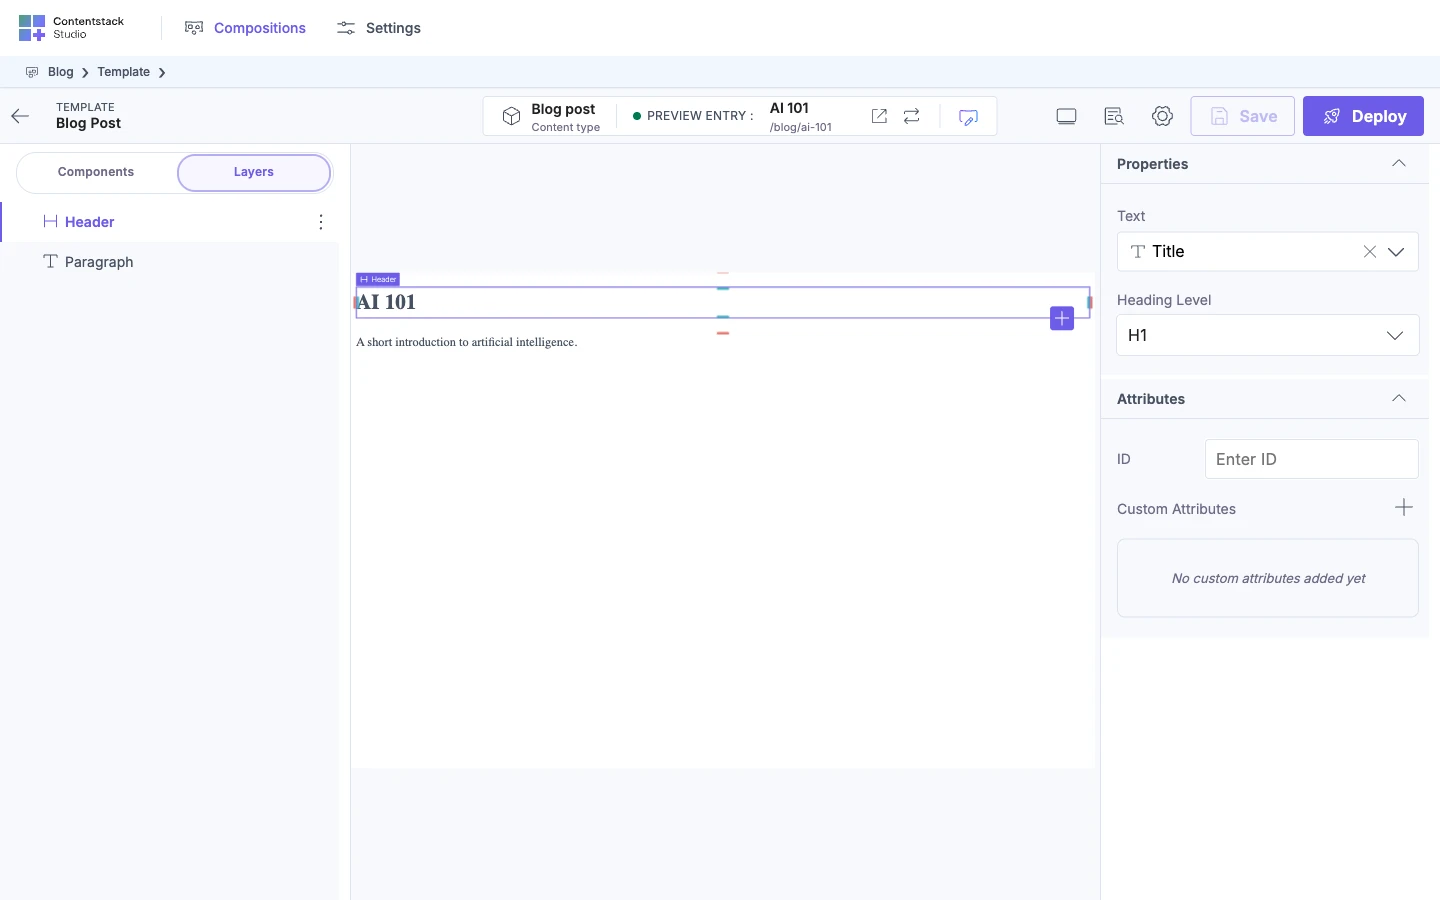
Select the Header. In the right panel, click the Bind Data icon beside its Text property.
The Data Picker opens. It shows the entry you preview, AI 101, with its content type, Blog post, under the name. Below that, it lists the entry's fields.
-
Pick Title. The canvas shows "AI 101" in the Header.
-
Select the Paragraph. Click the Bind Data icon beside its Text property, and pick Summary.
The canvas shows "A short introduction to artificial intelligence." below the Header.
To see what else Studio ships, read Built-in components.
7. Save the template and deploy it to development
Saving changes the template's draft. Deploying publishes the template to an environment, so your app can read it.
-
Click Save. Studio shows "Template Saved Successfully".
-
Click Deploy. The Deploy Template dialog opens, with your environments under Select Target Environments.
-
Tick
development, if it isn't ticked. Both send buttons stay off until you tick an environment.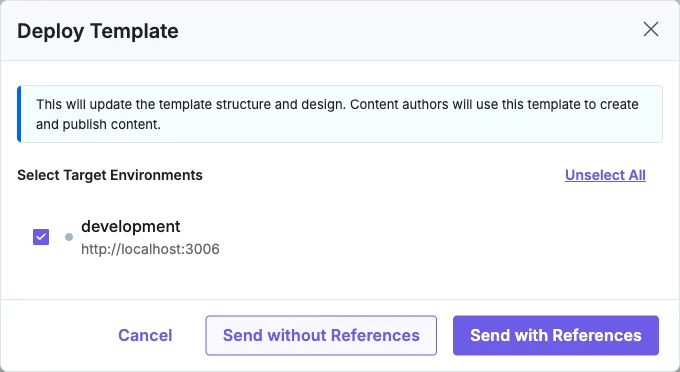
-
Click Send without References. It deploys only this template, and this template uses no sections.
Studio shows "Template Published Successfully".
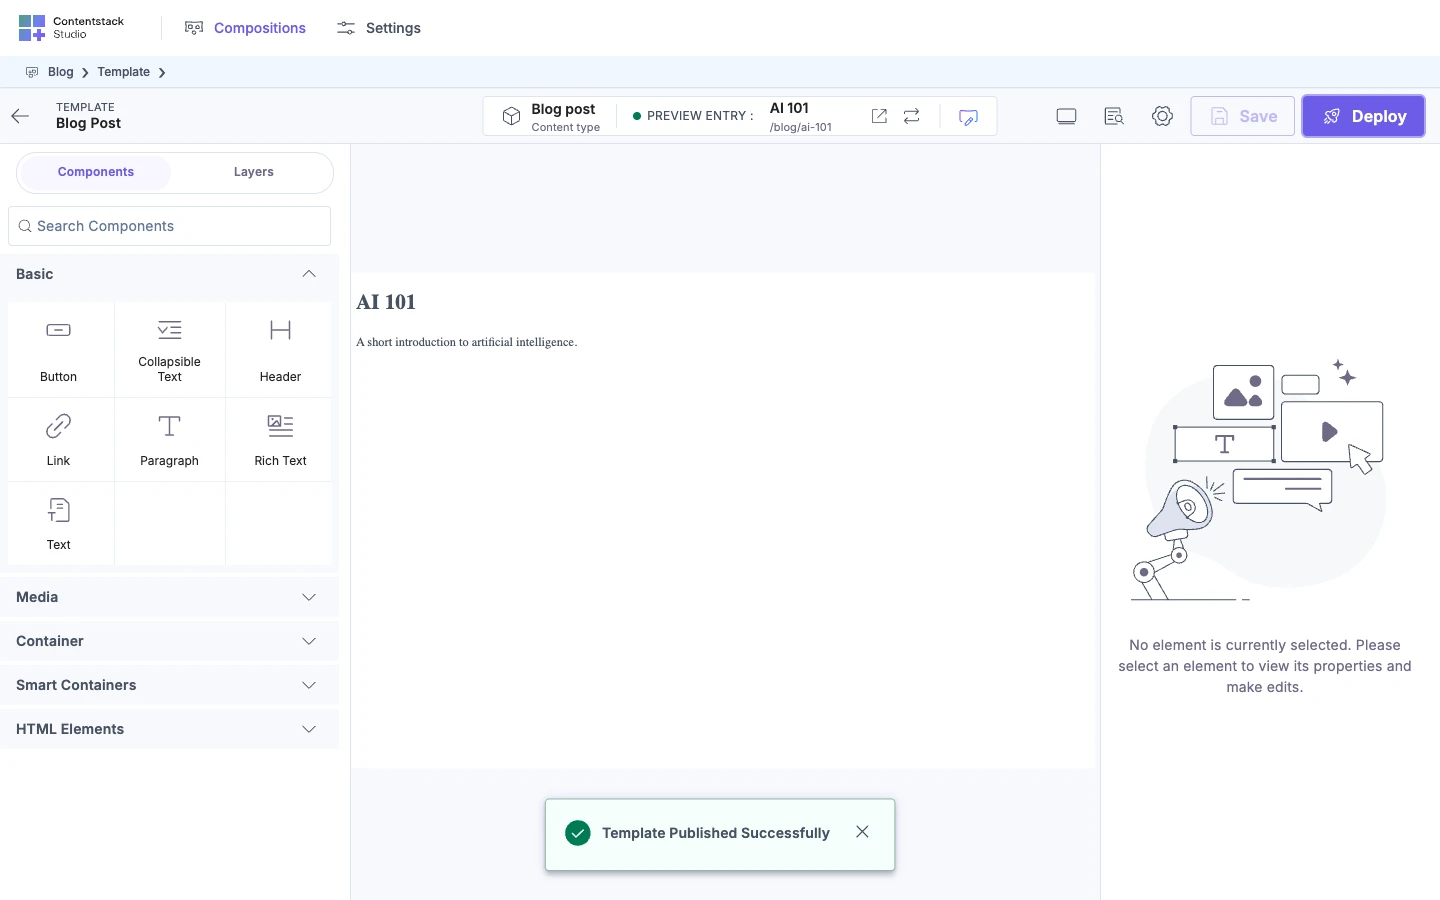
Deploy publishes the template only. It doesn't publish your entries, so AI 101 has to be published to development too.
8. Open the page on your site
Open the page your template renders, as a visitor sees it.
Click Open in new tab, the icon beside the URL in the top bar. On a narrow window, it's in the menu with three dots, at the right of the top bar.
A tab opens on your app, at http://localhost:3006/blog/ai-101. The tab shows what a visitor sees, the last deployed version of the template with published content. It has "AI 101" as the heading and "A short introduction to artificial intelligence." below it. Nothing in your app names this URL. The * route found the deployed template by its URL and rendered it.
If your first page doesn't show up
Find what you see below. The causes are written for the versions this page pins. Other versions of @contentstack/studio-react can show different cards for the same problem.
The canvas stays blank
The canvas stays blank, or shows "We couldn't load your website" after 30 seconds. Your app is running at http://localhost. In Chrome, the Contentstack site you open Studio from can't reach apps on your computer until you allow it, so your app can't load in the canvas. In Chrome's site settings for the address you open Studio from, allow it to reach apps on your computer. Then reload the canvas.
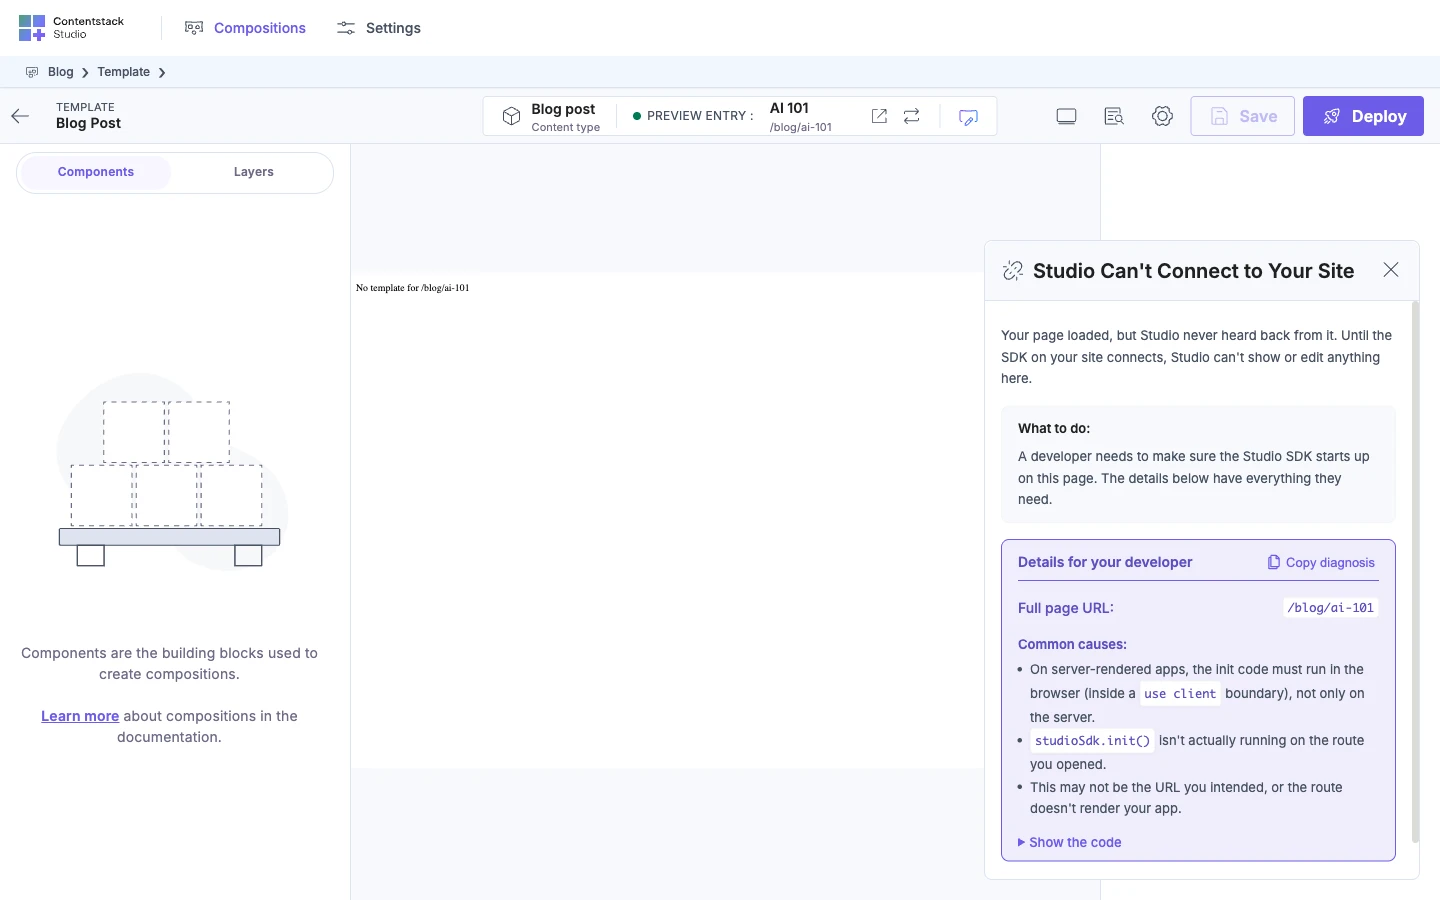
The canvas shows "Studio Can't Connect to Your Site"
Your page loaded, but Studio never heard back from it. The Studio SDK on that page didn't answer. Studio shows this card 30 seconds after the page loads. Check that src/main.tsx imports ./studio first, and that the canvas shows your app and not another page. If your app runs at http://localhost, check Chrome's permission too.
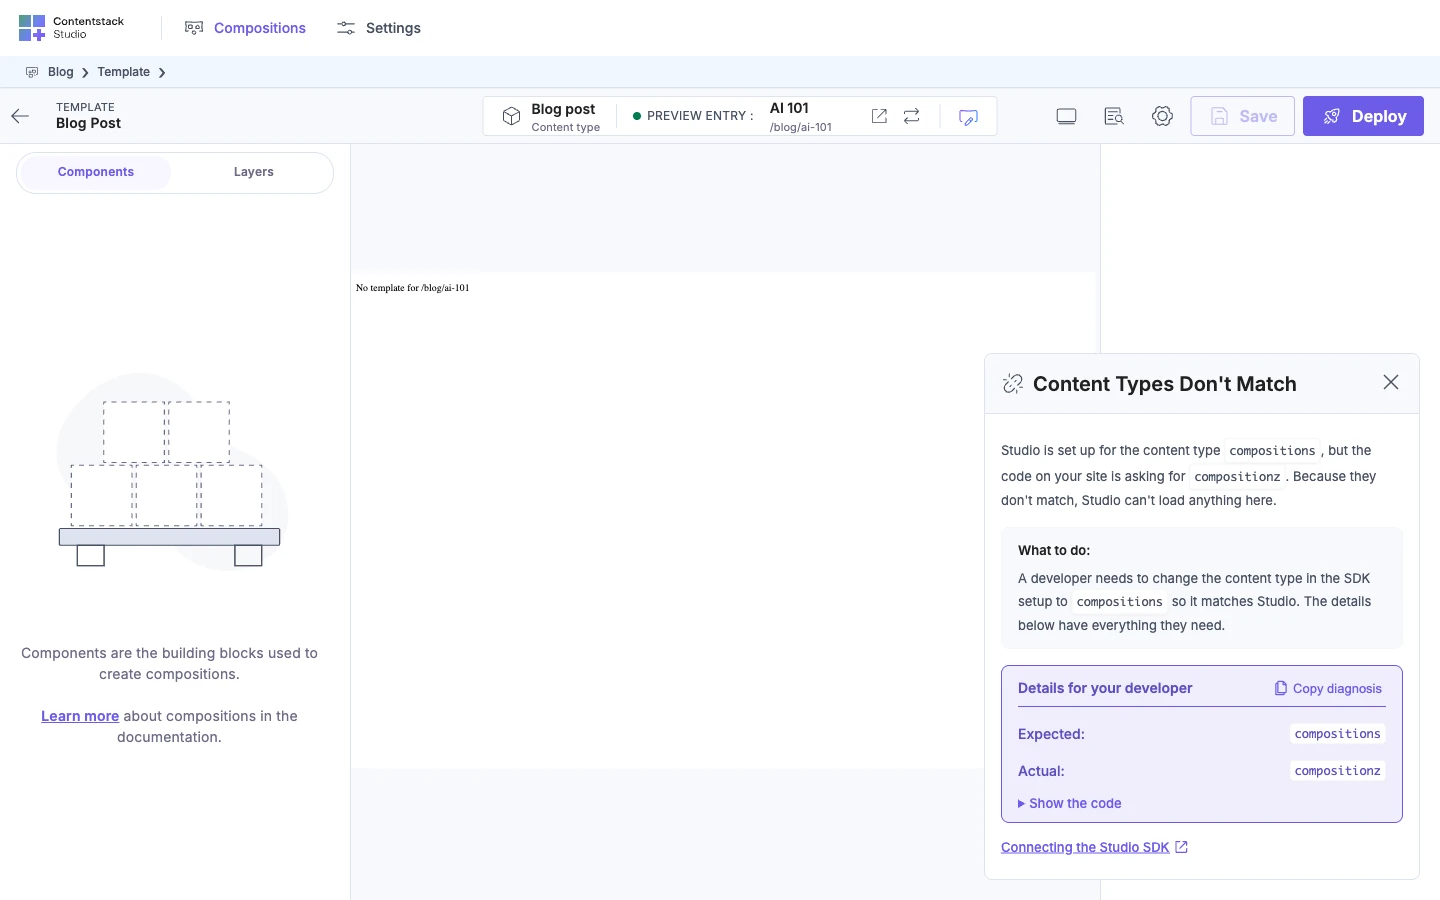
The canvas shows "Content Types Don't Match"
The contentTypeUid in src/studio.ts isn't your project's content type UID. Set contentTypeUid to the UID the card says Studio expects. It's compositions unless you chose another when you created the project.
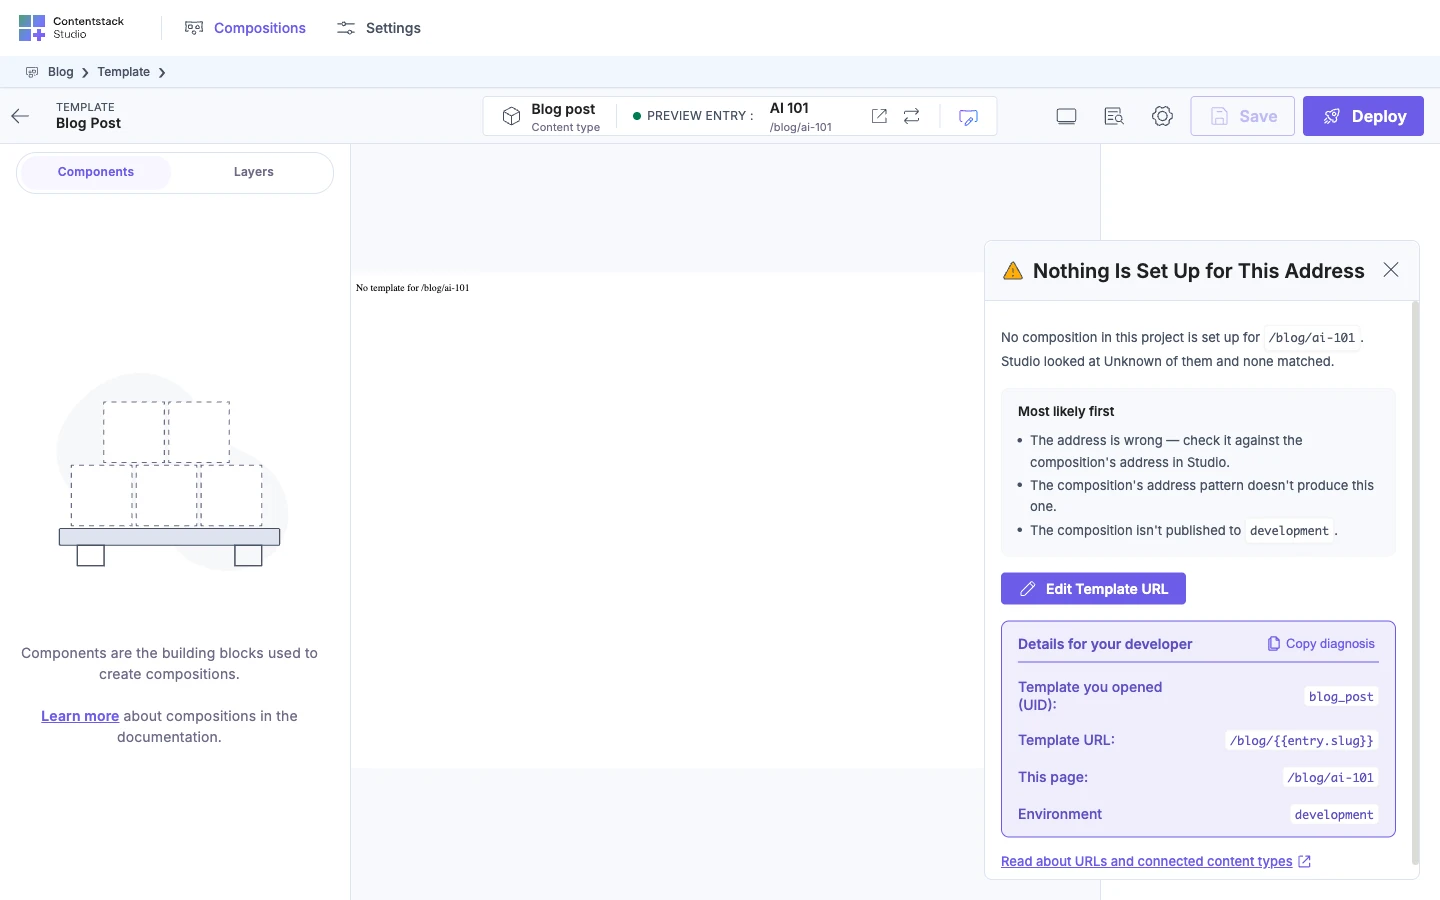
Your app shows "No template" and Studio says "Nothing Is Set Up for This Address"
Inside the canvas, your app shows "No template for /blog/ai-101". The Components tab shows no components. Studio shows "Nothing Is Set Up for This Address". A browser tab at your app's URL shows the same text. Your app can't read the template yet. Without the live_preview block in src/studio.ts, your app reads published content only, and the template isn't deployed. Add the live_preview block as shown, with enable, preview_token and host. Then reload the canvas.
Your app shows "No template" and Studio says "Your Content Didn't Load"
Inside the canvas, your app shows "No template for /blog/ai-101". The Components tab shows no components. Studio shows "Your Content Didn't Load" and the error code UPSTREAM_ERROR. The live_preview block in src/studio.ts has no host, so your app can't read the template. The card says nothing needs changing, but the missing host is the cause. Add host: import.meta.env.VITE_CONTENTSTACK_PREVIEW_HOST to the block, as in step 3. Then reload the canvas.
The canvas says "Create an entry to start building"
The Blog post content type has no entry to preview. Create an entry in Contentstack, then reload the canvas.
Your app shows "No template" after you deploy
Your app shows "No template for /blog/ai-101" in a browser tab after you deploy. The template or the entry isn't published to the environment src/studio.ts reads. Deploy the template to development, and publish AI 101 to development. Check that environment in src/studio.ts is development. To check the URL, see Edit or reset a template's URL.
Deploy and Open in new tab are off
Deploy and Open in new tab are off. The Deploy tooltip says "Deployment is disabled in the playground." The project has no Base URL. The Configuration tab was never saved, or the environment has no URL for English. Open the Configuration tab, pick the environment and language, and save. If Base URL says "No base URL found!", add an English Base URL on the environment in Contentstack.
Where to go next
- Build a section. A section is a reusable part of a layout that templates point at. Studio opens a section at the Canvas URL, so your app needs a route there that renders
<StudioCanvas />. See Components, sections and templates. - Use your own components. Before you register one, check its shape with the Component shape checklist. To replace a built-in with your own, see Built-in components.
- Generate a section from a component you've written. The CLI can do it. See Generate a section from a component.
- Show unpublished changes on your site. This page added one
live_previewblock so the canvas can read a template you haven't deployed. For what Live Preview and Visual Editor each do, see Studio, Live Preview and Visual Editor. - Ask an agent for the setup. A coding agent can set Studio up in your app from a request in plain English. See What are skills?.