Prerequisites
Check this list before you create a Studio project. Studio doesn't create any of it for you: your stack, environment, language and tokens come from Contentstack, and your app is yours.
The example on this page is the Blog stack, with a local environment whose English URL is http://localhost:3106.
Faster ways to check this
- Your app. Ask your agent whether your project fits Studio, and it uses
analyze-project-fit. It reads your project and reports what Studio needs, without changing anything. - Your stack's Live Preview. Ask your agent to turn on the Visual Experience, and it uses
enable-visual-experience. It turns on Live Preview and the Visual Experience for your stack.
No skill creates your stack, environment or tokens. See What are skills?
What you need in your stack
| You need | What it's for | In the example |
|---|---|---|
| A stack | It holds your content. Your project connects to it when you create the project. | Blog |
| An environment with a URL for each language your site uses | Studio loads your site from that URL. | local, with http://localhost:3106 for English |
| At least one language | The environment's URL is set per language. | English, en-us |
| A delivery token | Your site uses it to fetch layouts and content. | |
| A preview token | Optional. Without it, the canvas shows only published content. | |
| A Custom Preview URL for a content type | Optional. Studio uses it as the starting URL for templates connected to that content type. | /blog/{{entry.slug}} for Blog post |
Two settings in your stack matter later, when you wire your template routes. If a content type's URL field has a URL pattern, Studio builds its Template URL from the field's Prefix and {{entry.url}}. Give the field a prefix, such as /blog/. See Put a prefix in front of entry.url. If a Custom Preview URL has transformation rules, Studio doesn't apply them, so your template routes fetch by template and entry. See Fetch by template and entry instead of by URL.
Without a URL for the project's language, Studio shows the Playground canvas and Deploy is turned off. See Try Studio without an app.
Your site doesn't need a management token for Studio.
Contentstack's own docs cover where to create stacks, environments, languages and tokens, and where the Visual Experience settings are.
What you need in your app
- React 18 and up. The Studio SDK supports React 18 and up.
- One copy of React. Two copies of React in your app break the Studio SDK.
- Control of your app's routing. You add a route of its own for the canvas, such as
/canvas. For your templates, you add a catch-all route or one route per template, such as/blog/{{entry.slug}}.
Studio's editor also needs a browser window at least 768 pixels wide. In a narrower window it shows "Your screen is too small".
If your local site needs HTTPS for the canvas, see Serve your canvas over HTTPS locally. Most local setups don't.
Permissions you need to create a project
Studio has no roles of its own. What you can do in Studio follows your role in the stack.
- Your role must be allowed to create content types. Creating a project creates a content type in the stack, as you.
- The stack has to be in your current organization. The stack list in the create form shows the stacks in your current organization, and a project belongs to one organization.
Which Contentstack roles allow creating content types is in Contentstack's docs on roles.
Check that Studio is available to your organization
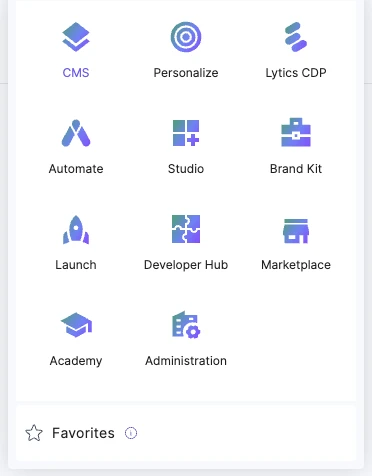
You open Studio from the Contentstack app, where it's listed as Studio. If it isn't listed, your organization doesn't have Studio yet. That isn't a setup error, and nothing in your app changes it.
Checklist before you create a project
Before you continue, check that you have:
- Studio listed in the Contentstack app.
- A stack, such as Blog.
- An environment with a URL for your language, such as
localwithhttp://localhost:3106for English. - A delivery token.
- A stack role that can create content types.
- A React app, on React 18 and up, whose routes you control.
Next, create a project.