Generate a React component from a Figma design
Generate a React component from a Figma design when the design should become a reusable component your team commits and reviews. You run the plugin in Figma, then one CLI command writes the component into your repo.
The example on this page is the Blog design file in Figma. You map the Post footer frame's Avatar, Byline and Subscribe banner to the code components the blog already has. Then you generate TopicBadge from the Topic badge component.
Prerequisites
- The plugin installed, signed in, and a Studio project chosen. See The Studio Figma plugin.
- A Figma file you can edit, prepared as in Prepare your Figma file.
- The CLI set up, with the same Studio project linked. See Set up the CLI.
- For Auto Map, your code components synced to the project. See Push your code into Studio.
What this is and what you get
One run in the plugin makes one component with one Component ID. The plugin records the result in History. csdx studio:component:add then fetches it by that ID and writes React code into your repo, in the styling method your project uses.
Generating isn't the same as pasting. Pasting puts a design on one canvas and needs no CLI. See Copy and paste from Figma to Studio.
| Use generate when | Use paste when |
|---|---|
| The design becomes a reusable component | The layout is used once |
| You want source your team commits and reviews | You want it on a canvas now |
| The component needs refining before use | The design already maps to your components |
Faster ways to do this
- Skill. The
figma-generate-componentsskill walks you through the plugin steps, asks for your Component ID, and runs the CLI half. See figma-generate-components. To install skills, see LLM skills.
What the plugin sends when you generate
A generation runs through five stages, in order.
- Select and note. You select the layers and add a note, then click Generate Design. The plugin exports a PNG of your selection and of each image in it, and uploads them to Contentstack's storage.
- Analyze. The plugin sends the layer data, the image links and your imported design tokens to Contentstack's service. An AI model writes HTML and CSS from them.
- Convert. The plugin converts that result into composition JSON.
- Recorded against your project. The plugin records the result with a Component ID. The entry shows in History.
- Export screen. The plugin shows the export screen, headed "Your Export is Ready!", with Copy to Studio, the command and Regenerate.
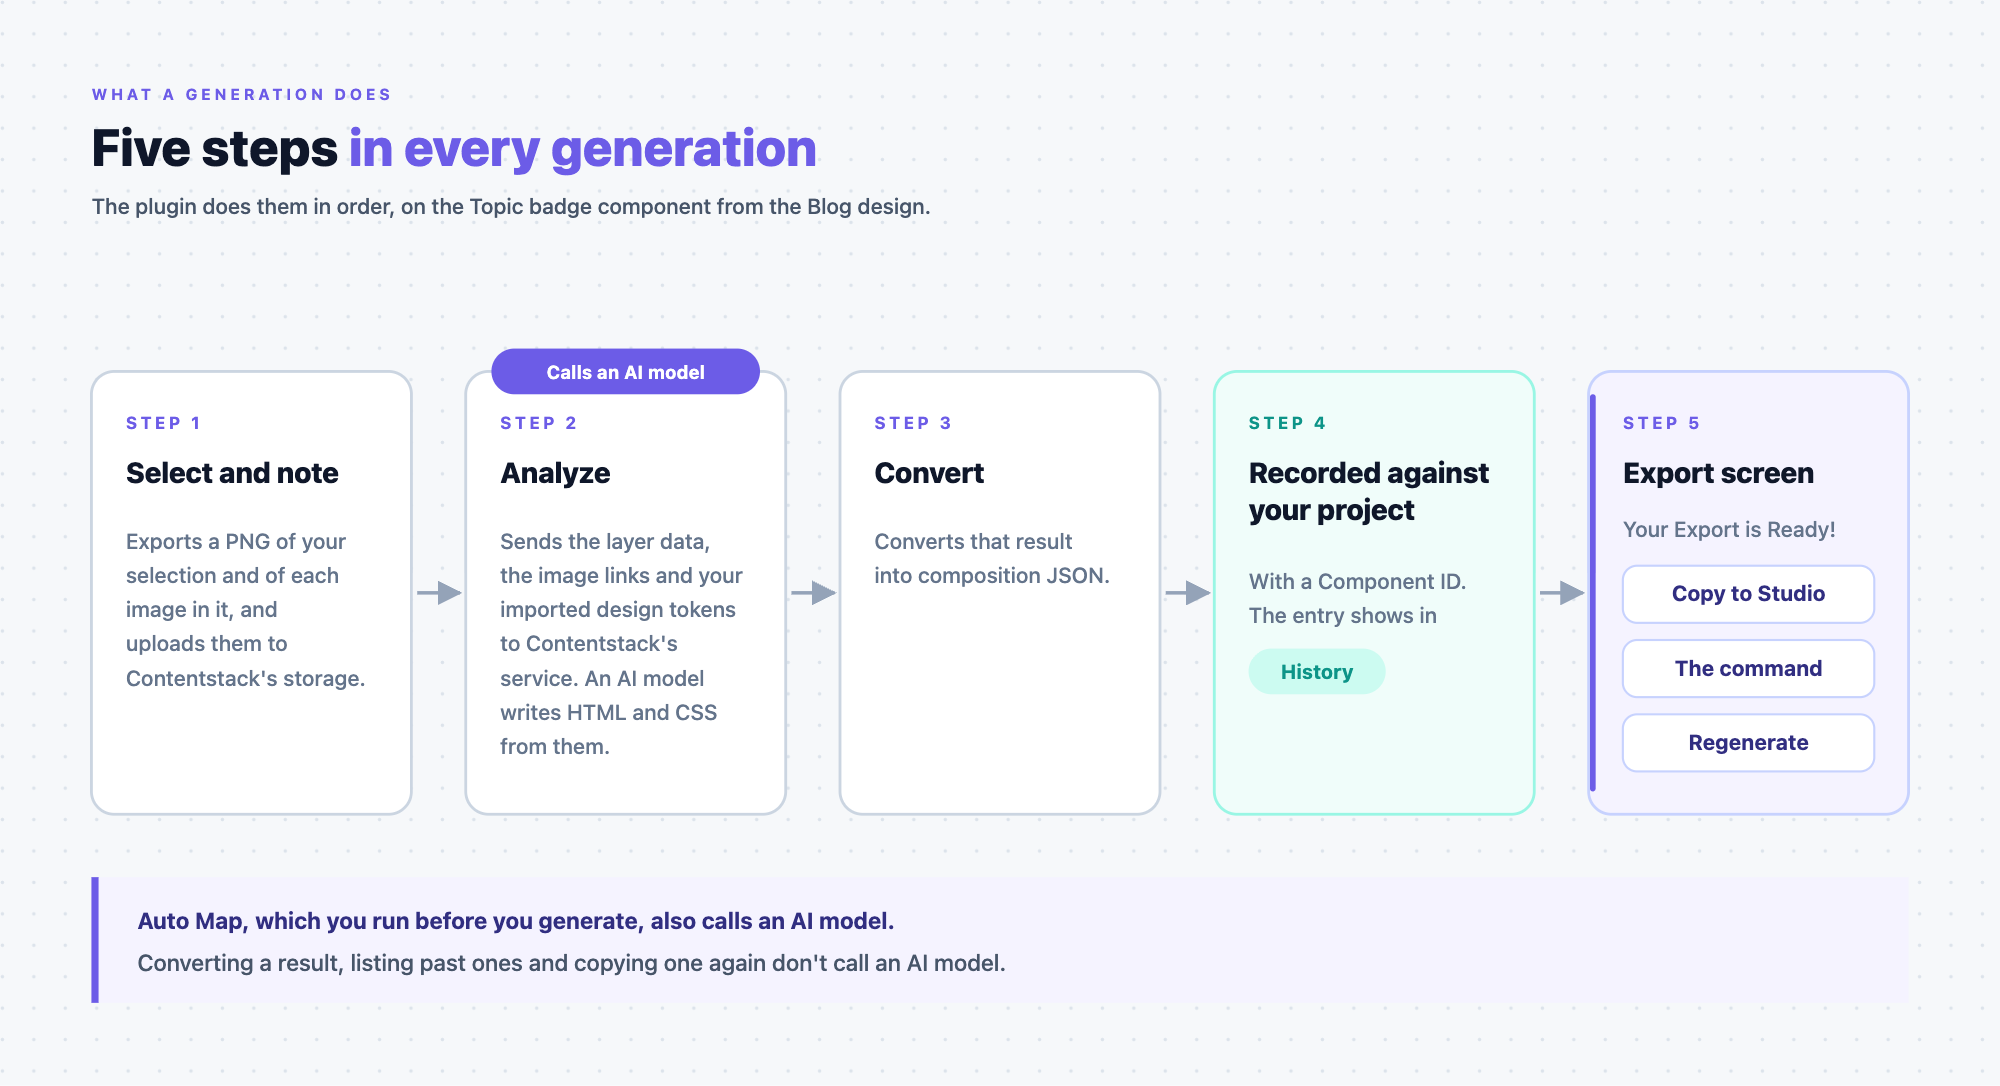
Analyze calls an AI model. Auto Map, a separate step you run before you generate, calls one too. Converting a result, listing past ones and copying one again don't.
Map Figma components to your code components
Map before you generate, so a Figma component that matches one of your code components comes out as yours. A mapped component arrives with its props set from the Figma instance. An unmapped one is rebuilt from the design.
-
Select the Post footer frame in Figma, then open the Component Mapping tab.
The list has one row for each Figma component in your selection, under Figma Components. The Code Components column shows
emptyuntil a row is mapped.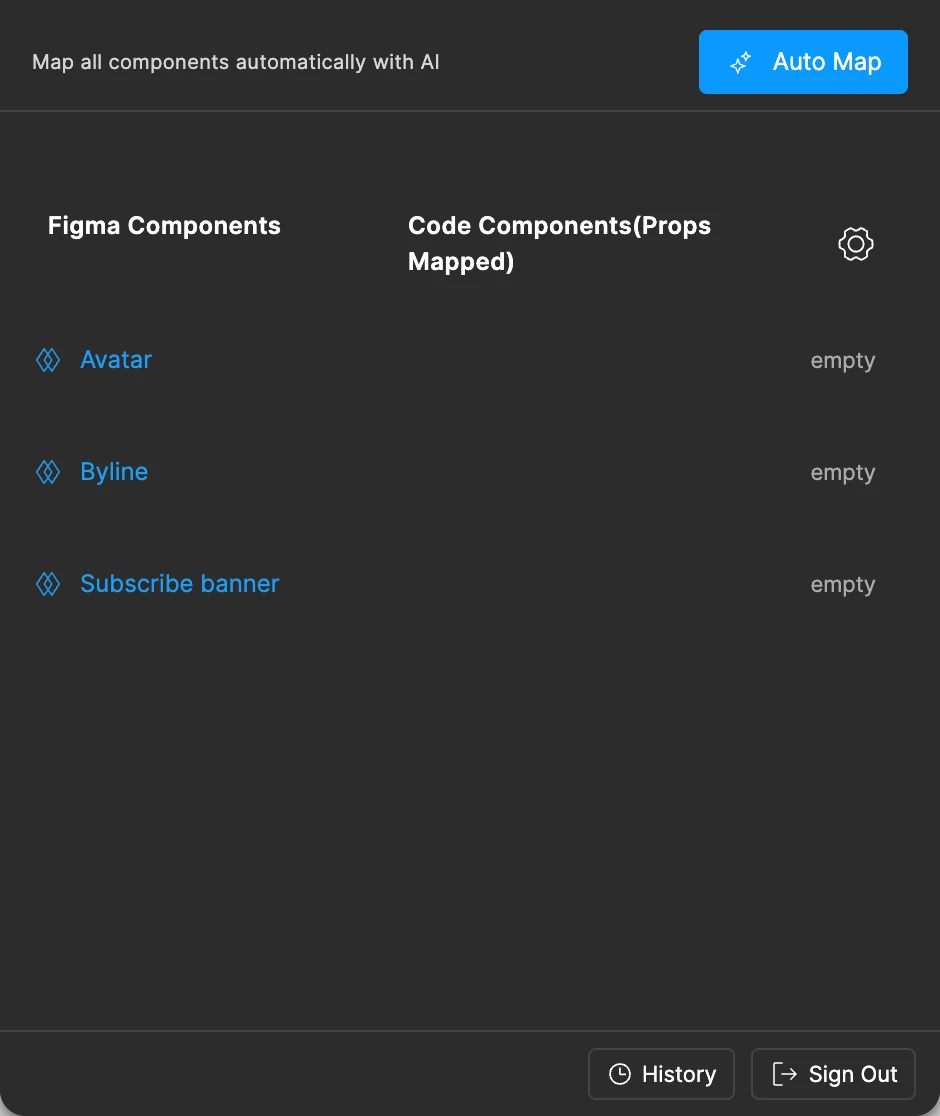
-
Click Auto Map, beside "Map all components automatically with AI".
An AI model pairs each Figma component with a code component synced to your project. It matches on component names and on prop names and types. It reads no descriptions.
Mapped rows show a count of mapped props, such as
1/1. A Figma component with no code counterpart staysempty.These mappings belong to a run that selects the Post footer frame. The generation example below selects the Topic badge component alone, which has none of these three inside it.
-
To fix or set a mapping by hand, click a row, choose a code component, and set each Figma property to a React prop. Click Save.
Before you choose a code component, as for Avatar below, the React Props dropdown beside a Figma property such as Size stays empty.
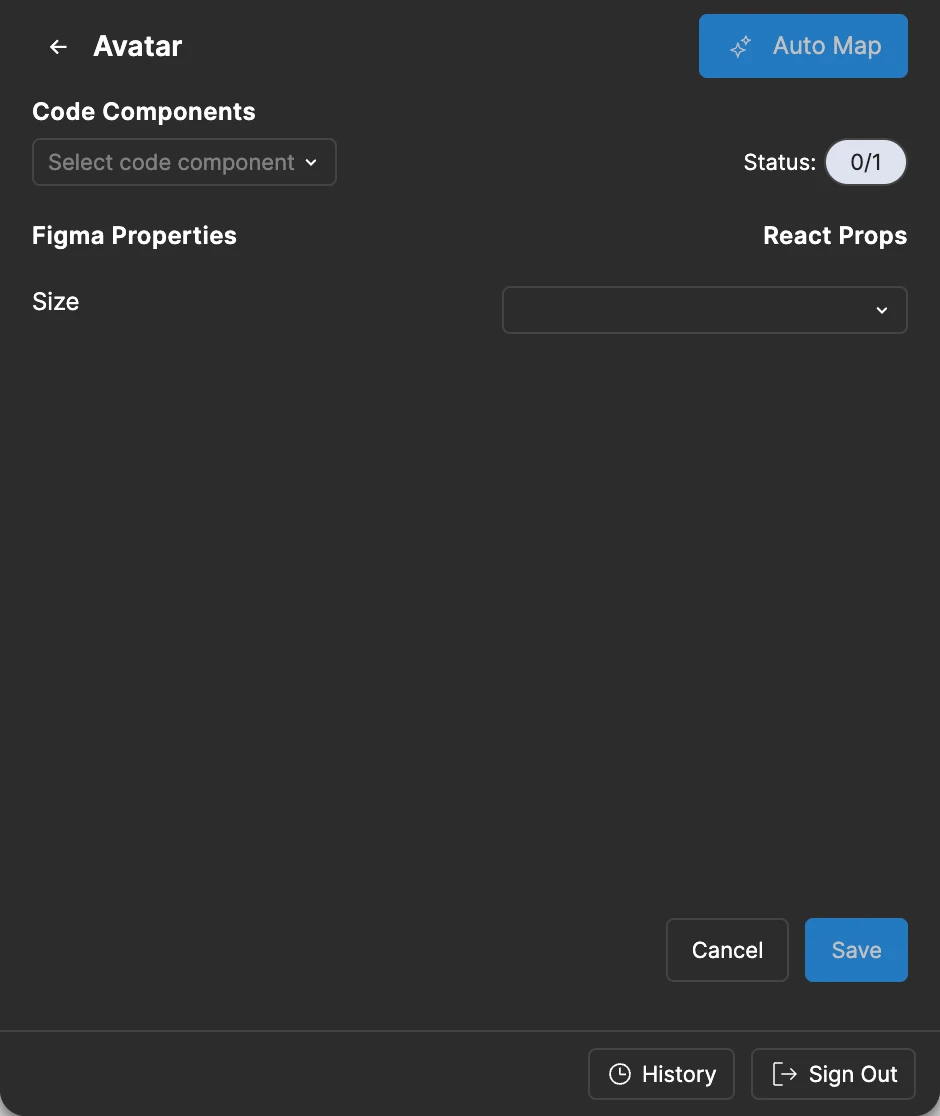
Check every row before you generate. The plugin copies your mappings at that moment, so a wrong match shows up in the result.
If the tab says "No code components found.", nothing is synced to this project yet. Run csdx studio:component:sync, as in Prerequisites.
To remove a synced component for everyone on the project, click the gear beside the column header. In Code Components, click the trash icon. The plugin asks "Delete this code component?" first. A developer can sync it again.
Import your Figma styles first (optional)
Import your styles so every generation gets your design tokens.
-
Open the Design Tokens tab.
It lists your file's local styles under Colors, Typography, Effects and Grids. In the Blog file that's Brand/Primary and the other color styles, Heading 1, and Card shadow. The tab has no spacing tokens.
-
Click Import Design Tokens.
The plugin saves the styles to your project, then shows the
csdx studio:design-token:addcommand to run in your repo. Imported tokens go with each generation after that.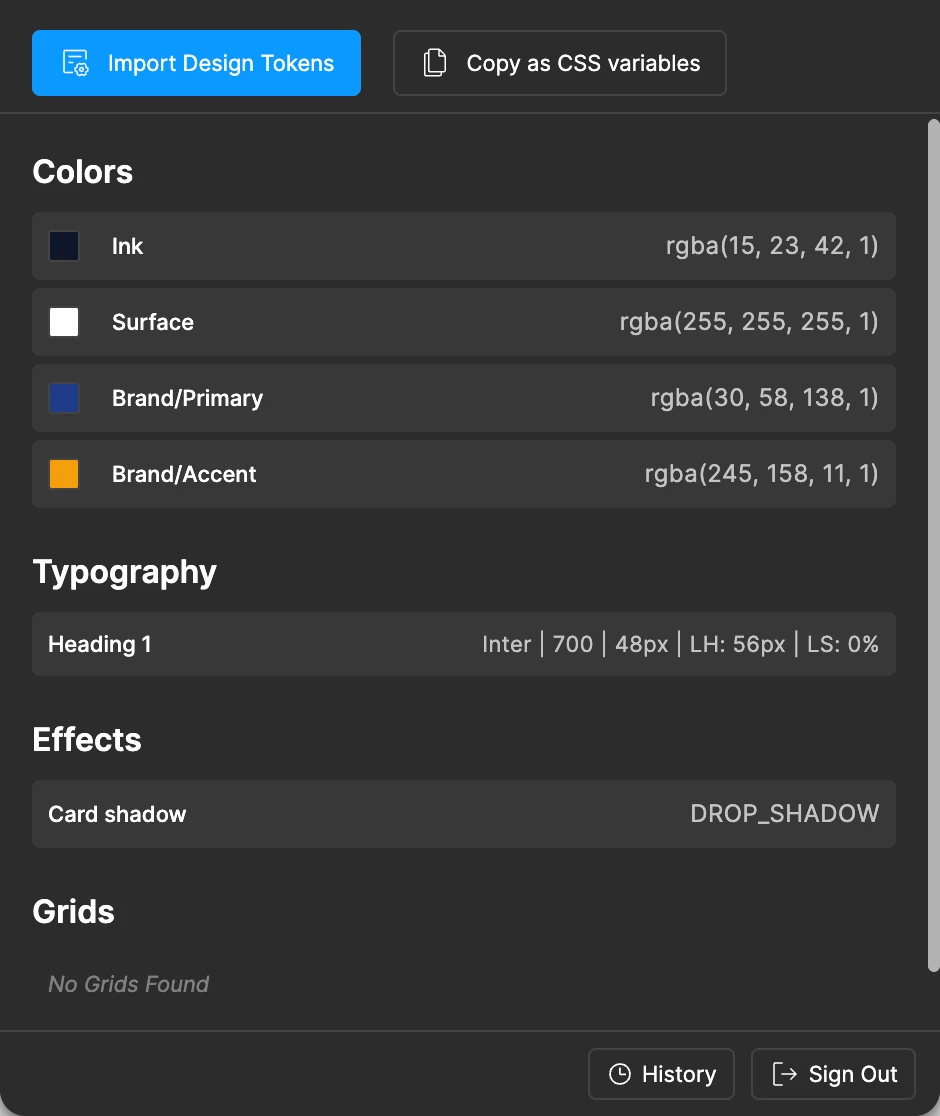
What that command writes, and how Studio uses the tokens, is on Register design tokens.
Generate a design from your selection
-
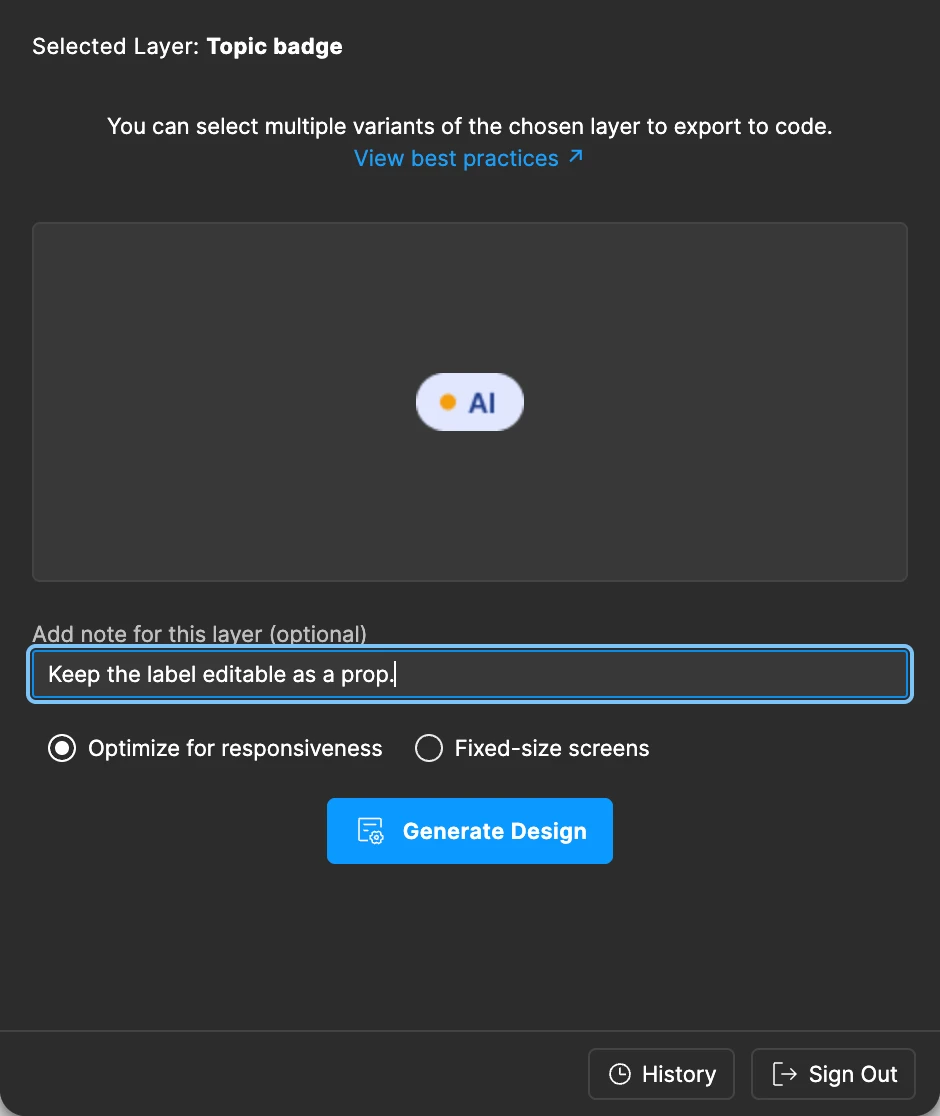
In Figma, select the frame or component. Click for one, Shift-click for several. Here, select the Topic badge component.
The Design tab shows "Selected Layer:" with its name. With several layers it shows the count, and Showing: 1/N with arrows to page between them.
-
Add a note if you want to steer the result.
The field reads "Add note for this layer (optional)". With several layers selected it reads "Add note for layer 2", and so on, so each layer gets its own note. Add a shared note for all layers sends one note for the whole selection. Both are sent.
-
Choose Optimize for responsiveness, the default, or Fixed-size screens. One choice covers every selected layer.
You can't mix the two in one run. To get both, generate twice.
-
Click Generate Design.
The plugin shows loading screens, then the export screen, headed "Your Export is Ready!".
This is the plugin's Design tab with Topic badge selected, a note typed and Optimize for responsiveness chosen, before you click Generate Design.
If a frame has no Auto Layout and you chose responsive, the plugin warns "This frame has no Auto Layout" and offers Use fixed-size instead. Fix the frame instead. See Prepare your Figma file.
If a selection has more than 300 elements, the plugin shows "Frame too large to generate" and disables Generate Design. Select smaller sections instead.
Review the result and fix it
The export screen shows a preview, with a list of viewports to switch between. You have four things to do here.
- Regenerate. Under "Not quite right?", describe what to fix and click Regenerate. It calls the AI model again. Revert to original restores the first result.
- Copy to Studio. Puts the composition JSON on the clipboard, to paste onto a canvas. See Copy and paste from Figma to Studio.
- The command. Under "Incorporate this code into your application", copy
csdx studio:component:add --component-id=<id>. The plugin fills in your ID. - Generate another. Clears the screen. The result stays in History.
Regenerate works only while the same layer is selected in Figma. If you select something else, the plugin says "Reselect this layer in Figma to regenerate."
Write the component into your repo
Run the command from your project root.
csdx studio:component:add --component-id=<id>
If you leave out the flag, the CLI asks "Component ID is required. Provide the Component ID from Plugin:". For every flag, see CLI commands.
-
The CLI shows some hints, then asks "Describe your component (optional):". You can describe how it should look or behave. Press Enter to skip.
-
The CLI writes the component file,
TopicBadge.tsxin the blog example, and its styles.If
@contentstack/studio-reactis in yourpackage.json, it also adds a register entry for the component. Where that entry goes is on Push your code into Studio.If the SDK isn't in your
package.json, the CLI writes the component and its styles only. It adds no register entry and doesn't say so. Install the SDK and run the command again, or register the component yourself with Register a component. -
The CLI asks "Make changes to the generated component?". Answer no to move on. If it registered a component in this run, it then asks "Create a Section with TopicBadge?". Answer yes to build a Section around it. If you answer yes to the first question, the CLI asks what to change and doesn't offer the Section. See Generate from a design.
Check the generated code
Read the generated component before you commit it. It's a starting point.
- Look for
studioAttributeson the root element, andwrap: falsein the register entry. The CLI adds both when it can, and prints a line saying so. If a component's root can't take the attributes, it keeps Studio's wrapper<div>. - Replace hard-coded numbers and colors with your design tokens.
- Add the behavior the design can't show, such as handlers and state.
- Check it at every breakpoint you support.
This is a trimmed example of the kind of file the CLI writes for TopicBadge. The CLI also writes the component's styles in a separate file, so your file will differ. Look for these two things:
import type { StudioAttributes } from "@contentstack/studio-react";
// The CLI also adds an import for the component's styles here.

type TopicBadgeProps = StudioAttributes & { label?: string };

export function TopicBadge({ studioAttributes, label }: TopicBadgeProps) {
  return (
    <span {...studioAttributes} className="topic-badge">
      {label}
    </span>
  );
}
registerComponents([
  {
    type: "topic-badge",
    component: TopicBadge,
    displayName: "Topic Badge",
    wrap: false,
    props: {
      label: { type: "string", displayName: "Label", defaultValue: "AI" },
    },
  },
]);
When your canvas loads the new registration, a Topic Badge tile appears in the Components tab. With no sections set, it sits in the Registered Components group. See Group components and add thumbnails.
Copy an earlier generation again
To get a past result back without generating again, open it from History.
-
Click History in the plugin footer. When nothing is selected, Home lists the same entries.
The list is shared with your project team. All shows everyone's, and Created by me shows yours. It loads 25 rows at a time. Click Load more for the next 25.
-
Hover a row and choose an action.
Action What it does Copy to Studio Rebuilds the composition JSON and puts it on the clipboard. It doesn't call the AI model again, and the plugin shows "No credits used". Copy CLI command Puts csdx studio:component:add --component-id=<id>on the clipboard for that row.Remove from history Takes the row out of the list for everyone on the project. Only the person who made it sees this action. 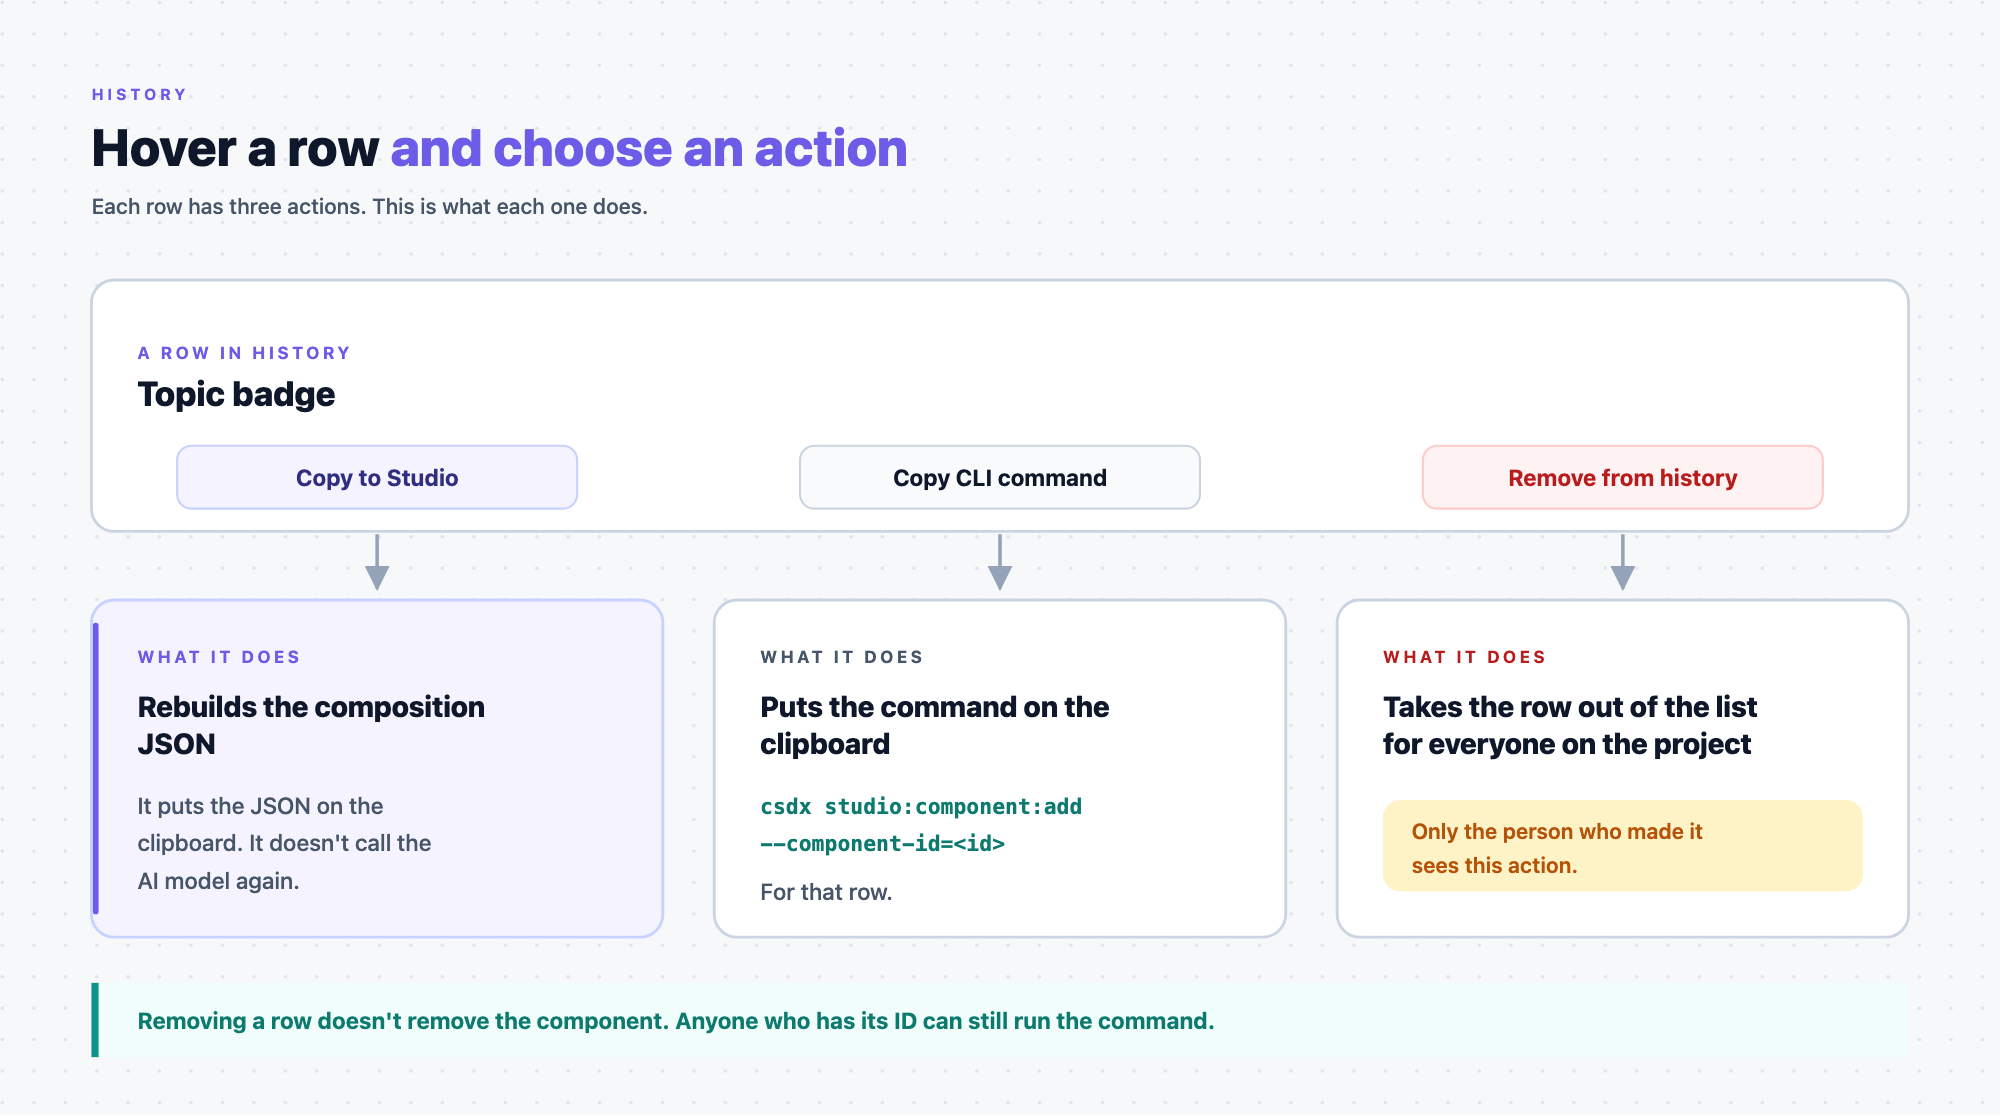
What the plugin can't do
| Limit | Workaround |
|---|---|
| A selection over 300 elements can't be generated | Select individual sections and generate them one at a time |
| A selection wider than 6,000 pixels fails | Select a narrower frame. Taller selections are sent in slices |
| Responsive and fixed-size can't mix in one run | Generate twice, once for each |
| The plugin doesn't read prototype interactions | Add the behavior in the generated component |
| Auto Map sees only synced components | Run csdx studio:component:sync again whenever your components change |
| The Design Tokens tab has no spacing tokens | Register spacing in your own tokens. See Register design tokens |
| History is shared with everyone on the project | Generate in a project whose members should see the work |
| The plugin needs a file you can edit, to add a temporary frame for the preview | Open the file with edit access, or duplicate it into a file you own |
If it doesn't work
| Symptom | Cause | Fix |
|---|---|---|
| "Frame too large to generate" | The selection has more than 300 elements | Select a smaller section |
| "Figma node dimensions width exceed 6000px" | The selection is wider than 6,000 pixels | Select a narrower frame |
| The output doesn't reflow | The frame has no Auto Layout, so its children keep fixed positions | Add Auto Layout and generate again. See Prepare your Figma file |
| The Component Mapping tab says "No code components found." | No code component is synced to this project | Run csdx studio:component:sync, then open the tab again |
A Figma component stays empty after Auto Map | No synced component matched its name and props | Sync the code component if it's missing, or map the row by hand |
| "Generation didn't finish" | The service couldn't finish. The plugin shows the reason under the title | Read the reason and try again. If an earlier run worked, copy it from History |
| "One generation wasn't saved" | The run finished but the plugin couldn't record it | Click Finish saving. The plugin says saving again is free |
| Regenerate is disabled | The layer you generated from isn't selected | Select that layer in Figma again |
The CLI prints Component with ID <id> not found | The ID is mistyped, or the CLI is set to a different project or region | Run csdx studio:project:set or csdx config:set:region. See Set up the CLI |
What to do next
To turn the new component into a Section, see Generate from a design. To see how the routes compare, see Choose your starting point.