Make bound values editable in Visual Editor
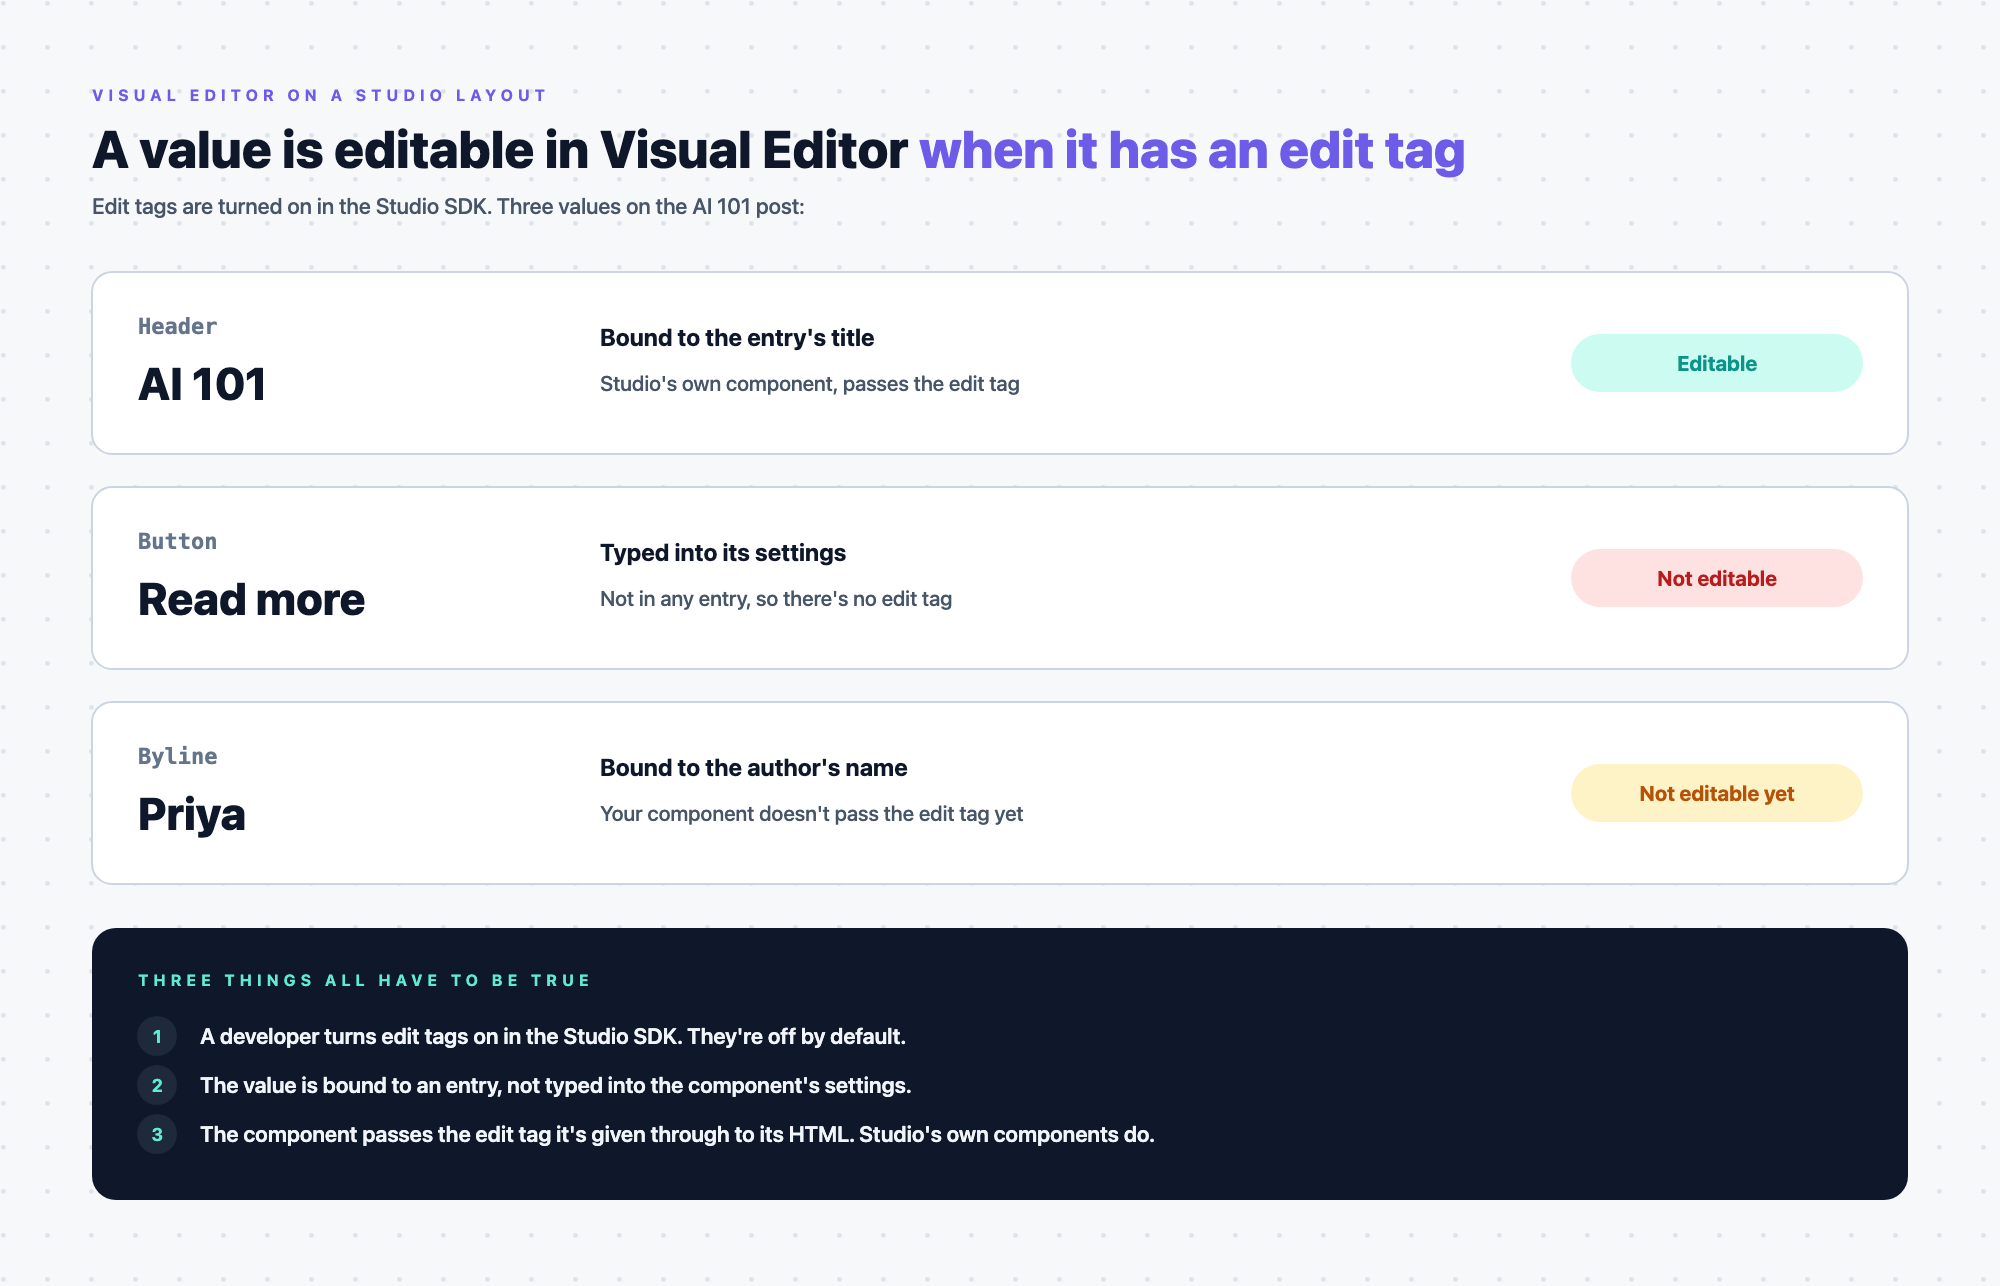
Visual Editor edits a value in place only when the value carries an edit tag, a data-cslp attribute. Turn edit tags on in the Studio SDK and pass them through your components, so authors can edit your Studio layouts in Visual Editor.
The example on this page is the Blog post template previewing AI 101, entry UID blt5c1d9e0a7f3b2e41. Its Post hero section has a Header bound to title, and an Avatar and a Byline bound to the fields of Priya, the post's author.
Prerequisites
- The Studio SDK and Live Preview are installed. See Install Live Preview and Install the Studio SDK.
- Visual Editor is set up for your stack. That's done in Contentstack, not in Studio, and Contentstack's own docs cover it.
What this is and what you get
Visual Editor finds editable values through data-cslp attributes on the page. The Studio SDK adds no edit tags by default. With them off, your page renders and nothing logs an error.
Two things decide whether a value gets an edit tag:
- It's bound to an entry. Only values bound to an entry get edit tags. A value typed into a component's settings has none.
- Its component passes the tag through. Studio's built-in components already do. Your registered components have to do it themselves.
Faster ways to do this
- Skill, for the init. Ask your agent to install Studio, and
install-studiowrites the init with edit tags on. It also installs all three SDKs, so use it on a new app. - Skill, for your components.
register-component-cslpchecks that your components pass each edit tag to the element that shows the value. It checks other parts of the component contract too.
See Install the skills. No CLI command does either half.
Turn on edit tags in the Studio SDK
Add cslp: { appendTags: true } to studioSdk.init. In lib/contentstack.ts:
export const sdk = studioSdk.init({
  stackSdk: stack,
  contentTypeUid: "compositions",
  cslp: { appendTags: true },
});
Nothing turns it on for you, not even the Studio canvas or Visual Editor.
Call studioSdk.init once. A second call logs Studio SDK already initialized and keeps the first call's options. So if another module calls init first, add the option there.
Pass edit tags through your components
For each bound prop, your component also gets a $ prop with the same name, such as $title for title. The $ prop is an object with one attribute, data-cslp. Its type is Cslptag, exported from @contentstack/studio-react.
Spread the $ prop on the element that shows the value. In BlogHero, that's the <h1> for the title, the <p> for the summary and the <img> for the image:
import type { Cslptag, StudioAttributes } from "@contentstack/studio-react";

type BlogHeroProps = StudioAttributes & {
  title?: string;
  summary?: string;
  image?: string;
  $title?: Cslptag;
  $summary?: Cslptag;
  $image?: Cslptag;
  className?: string;
};

export function BlogHero({
  studioAttributes,
  title,
  summary,
  image,
  $title,
  $summary,
  $image,
  className,
}: BlogHeroProps) {
  return (
    <section {...studioAttributes} className={className}>
      <h1 {...$title}>{title}</h1>
      <p {...$summary}>{summary}</p>
      {image && <img {...$image} src={image} alt="" />}
    </section>
  );
}
Both halves are needed. With the option off, the $ props are missing. With it on, a component that doesn't spread them shows no tag.
Props for slots don't get a $ prop.
A tag reads <content type UID>.<entry UID>.<locale>.<field path>. For AI 101's title, it's blog_post.blt5c1d9e0a7f3b2e41.en-us.title.
For the rest of the component contract, see Register a component and the Edit rules in the component shape checklist.
Edit tags for references, groups and files
A prop bound to a text or number field gets a tag for that field.
A prop bound to a whole group, file or reference gets one tag, for the field itself. The fields inside carry their own tags, in a $ object on the value, such as author[0].$.title. That's the same as in Live Preview without Studio.
A referenced entry's tags use its own content type and UID. For Priya's title, the tag is author.blt8a2f6c4d1e9b3a70.en-us.title.
If the prop maps the bound value's fields onto the prop's own shape, the $ object inside doesn't reach your component. To give each inner value its own tag, bind a separate prop to each field. Post hero does this: Avatar's Photo is bound to the Author's photo.url and Byline's Name to the Author's title, so each gets its own tag.
Edit tags on a Personalize variant
When an entry is fetched with a Personalize variant, a field the variant changes gets a different tag. The tag starts with v2: and adds the variant to the entry UID:
v2:<content type UID>.<entry UID>_<variant UID>.<locale>.<field path>
Fields the variant doesn't change keep the usual tag.
You don't change anything in your components for variants. The tag changes inside the $ prop. To fetch a variant, see Fetch a Personalize variant.
Check that values are editable
-
Open
http://localhost:3000/blog/ai-101and inspect the title in your browser's DevTools.The
<h1>has the attributedata-cslp="blog_post.blt5c1d9e0a7f3b2e41.en-us.title".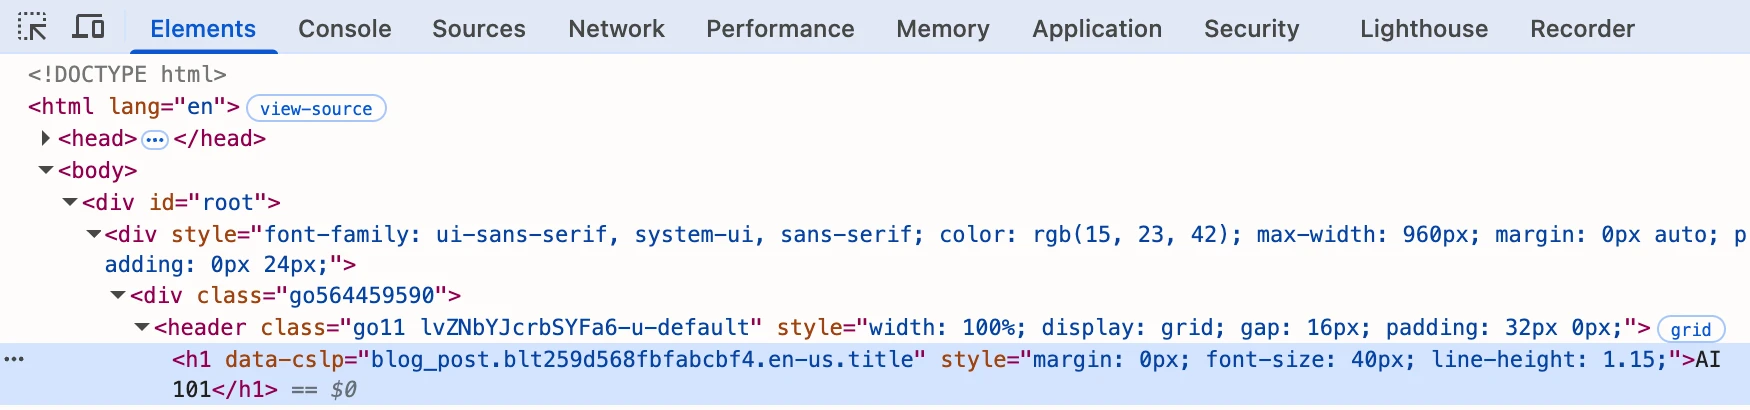
-
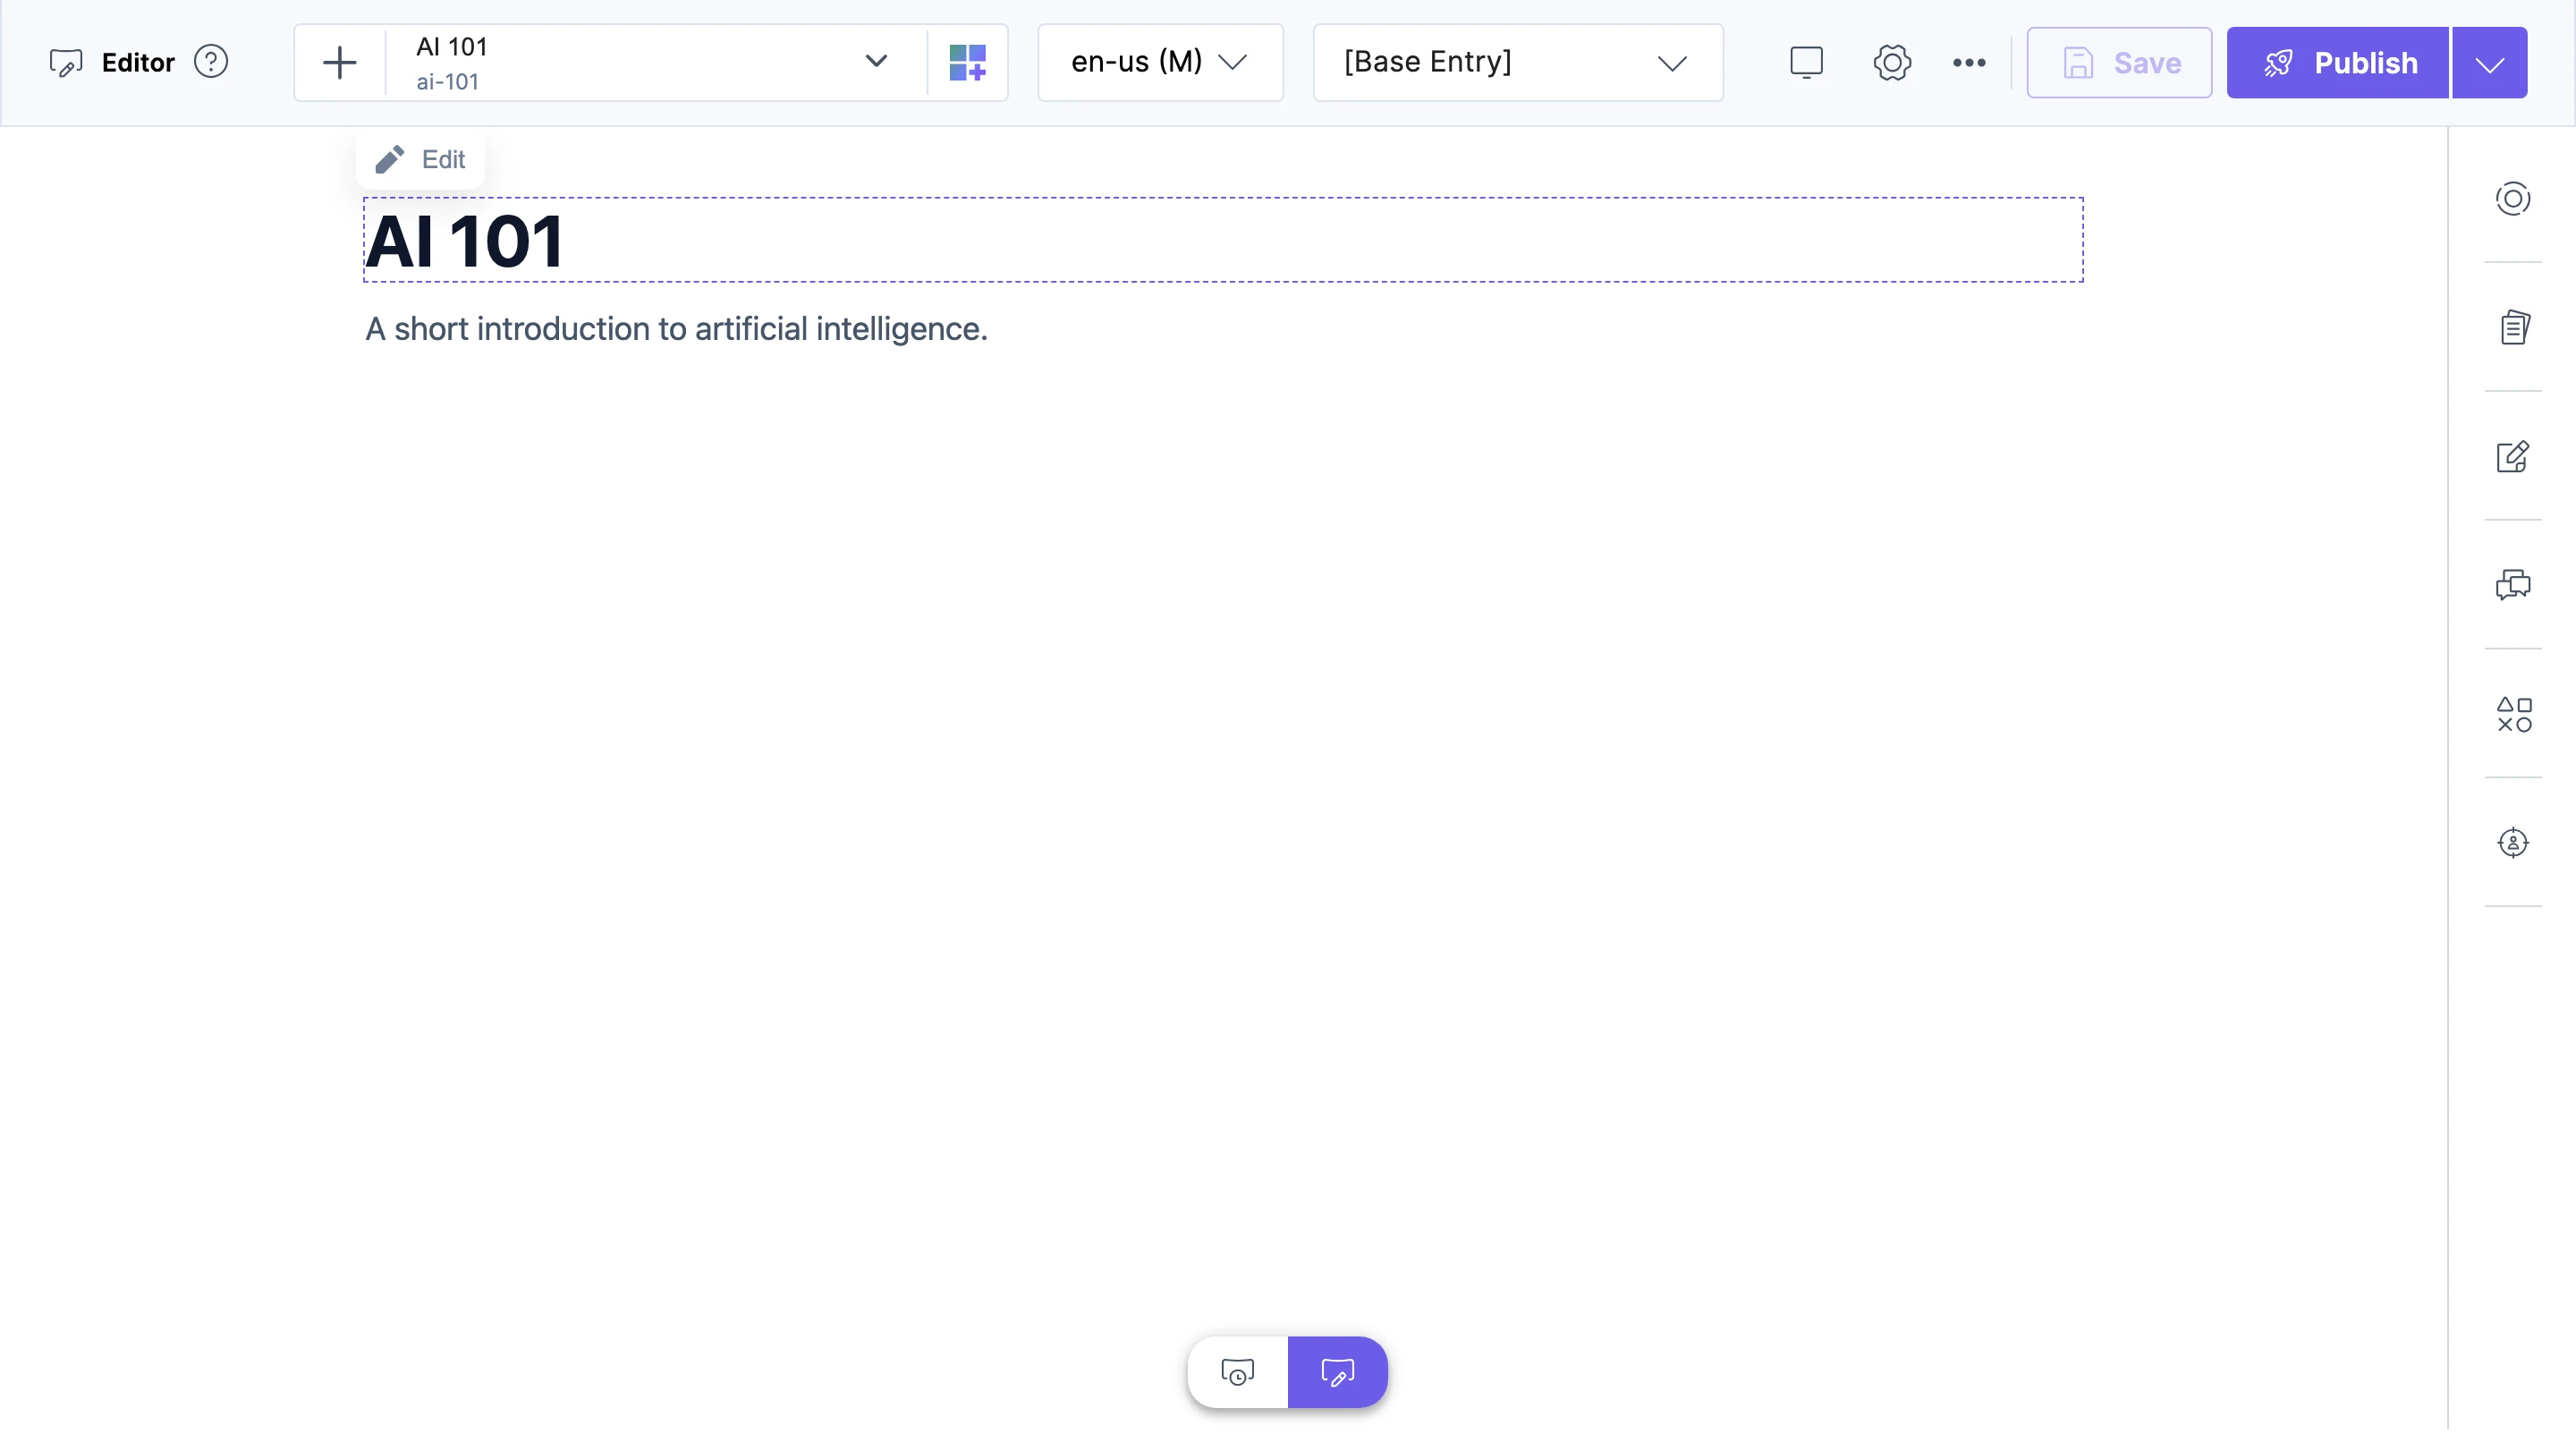
Open the Blog post template in Visual Editor, as in Open a template in Visual Editor, and hover the title to check you can edit it.
If it doesn't work
No data-cslp anywhere on the page
The option isn't on, or studioSdk.init ran earlier without it. See Turn on edit tags in the Studio SDK.
In Visual Editor, the pointer over the title shows no outline and no Edit button.

Some values have edit tags and others don't
Those components don't spread their $ prop, or those values aren't bound to an entry. See Pass edit tags through your components.
The edit tag is on a wrapper, not on the value
Move the spread to the element that shows the value, such as the <h1> for a title.
Tags are in the HTML, but Visual Editor can't edit the value
Studio's part ends at the tags. Check that Visual Editor is set up for your stack, in Contentstack's own docs.