Push your code into Studio
Studio can only place a component on the canvas if it knows about it, and the same goes for your design tokens and your breakpoints. Each command below pushes one of those things from your code into the project.
Run the ones that match what you want Studio to know about, before you generate anything, and re-run one whenever the thing it covers changes.
| Command | What it pushes | When to run it |
|---|---|---|
studio:component:register | Your components, into the Studio palette | Once per project, then whenever a component's props change |
studio:design-token:add | Your colors, spacing and typography, into the Design controls | Once per project, then whenever your tokens change |
studio:design-token:config | Nothing. It edits the generated token file in place | When you want to change what authors may pick |
studio:responsive-options:sync | Your breakpoints, into the canvas breakpoint switcher | Once per project, then whenever a breakpoint changes |
studio:component:sync | Your components, into the Figma plugin's mapping list | Only if your team designs in Figma |
Prerequisites
You need the CLI installed and a project linked. See Set up the CLI. Every command on this page writes to your active project, so confirm the right one is set before you start:
csdx studio:project:get
Register your components
Registering puts a component in the Studio palette, exposes its props in the Properties panel, and makes those props bindable. What registering buys you, and how to shape a component for it, is covered in Registering components; this is the command.
Scan one file:
csdx studio:component:register --component-path=src/components/BlogHero.tsx
Or a whole directory:
csdx studio:component:register --component-dir=./src/components
| Flag | Alias | Description |
|---|---|---|
--component-path | -p | Path to the component file to register |
--component-dir | -d | Path to the component directory to register |
If you leave both flags out, the command asks you for a path. It reads the props from your component, whether you declare them with TypeScript types, PropTypes or JSDoc, and your earlier registrations stay in place.
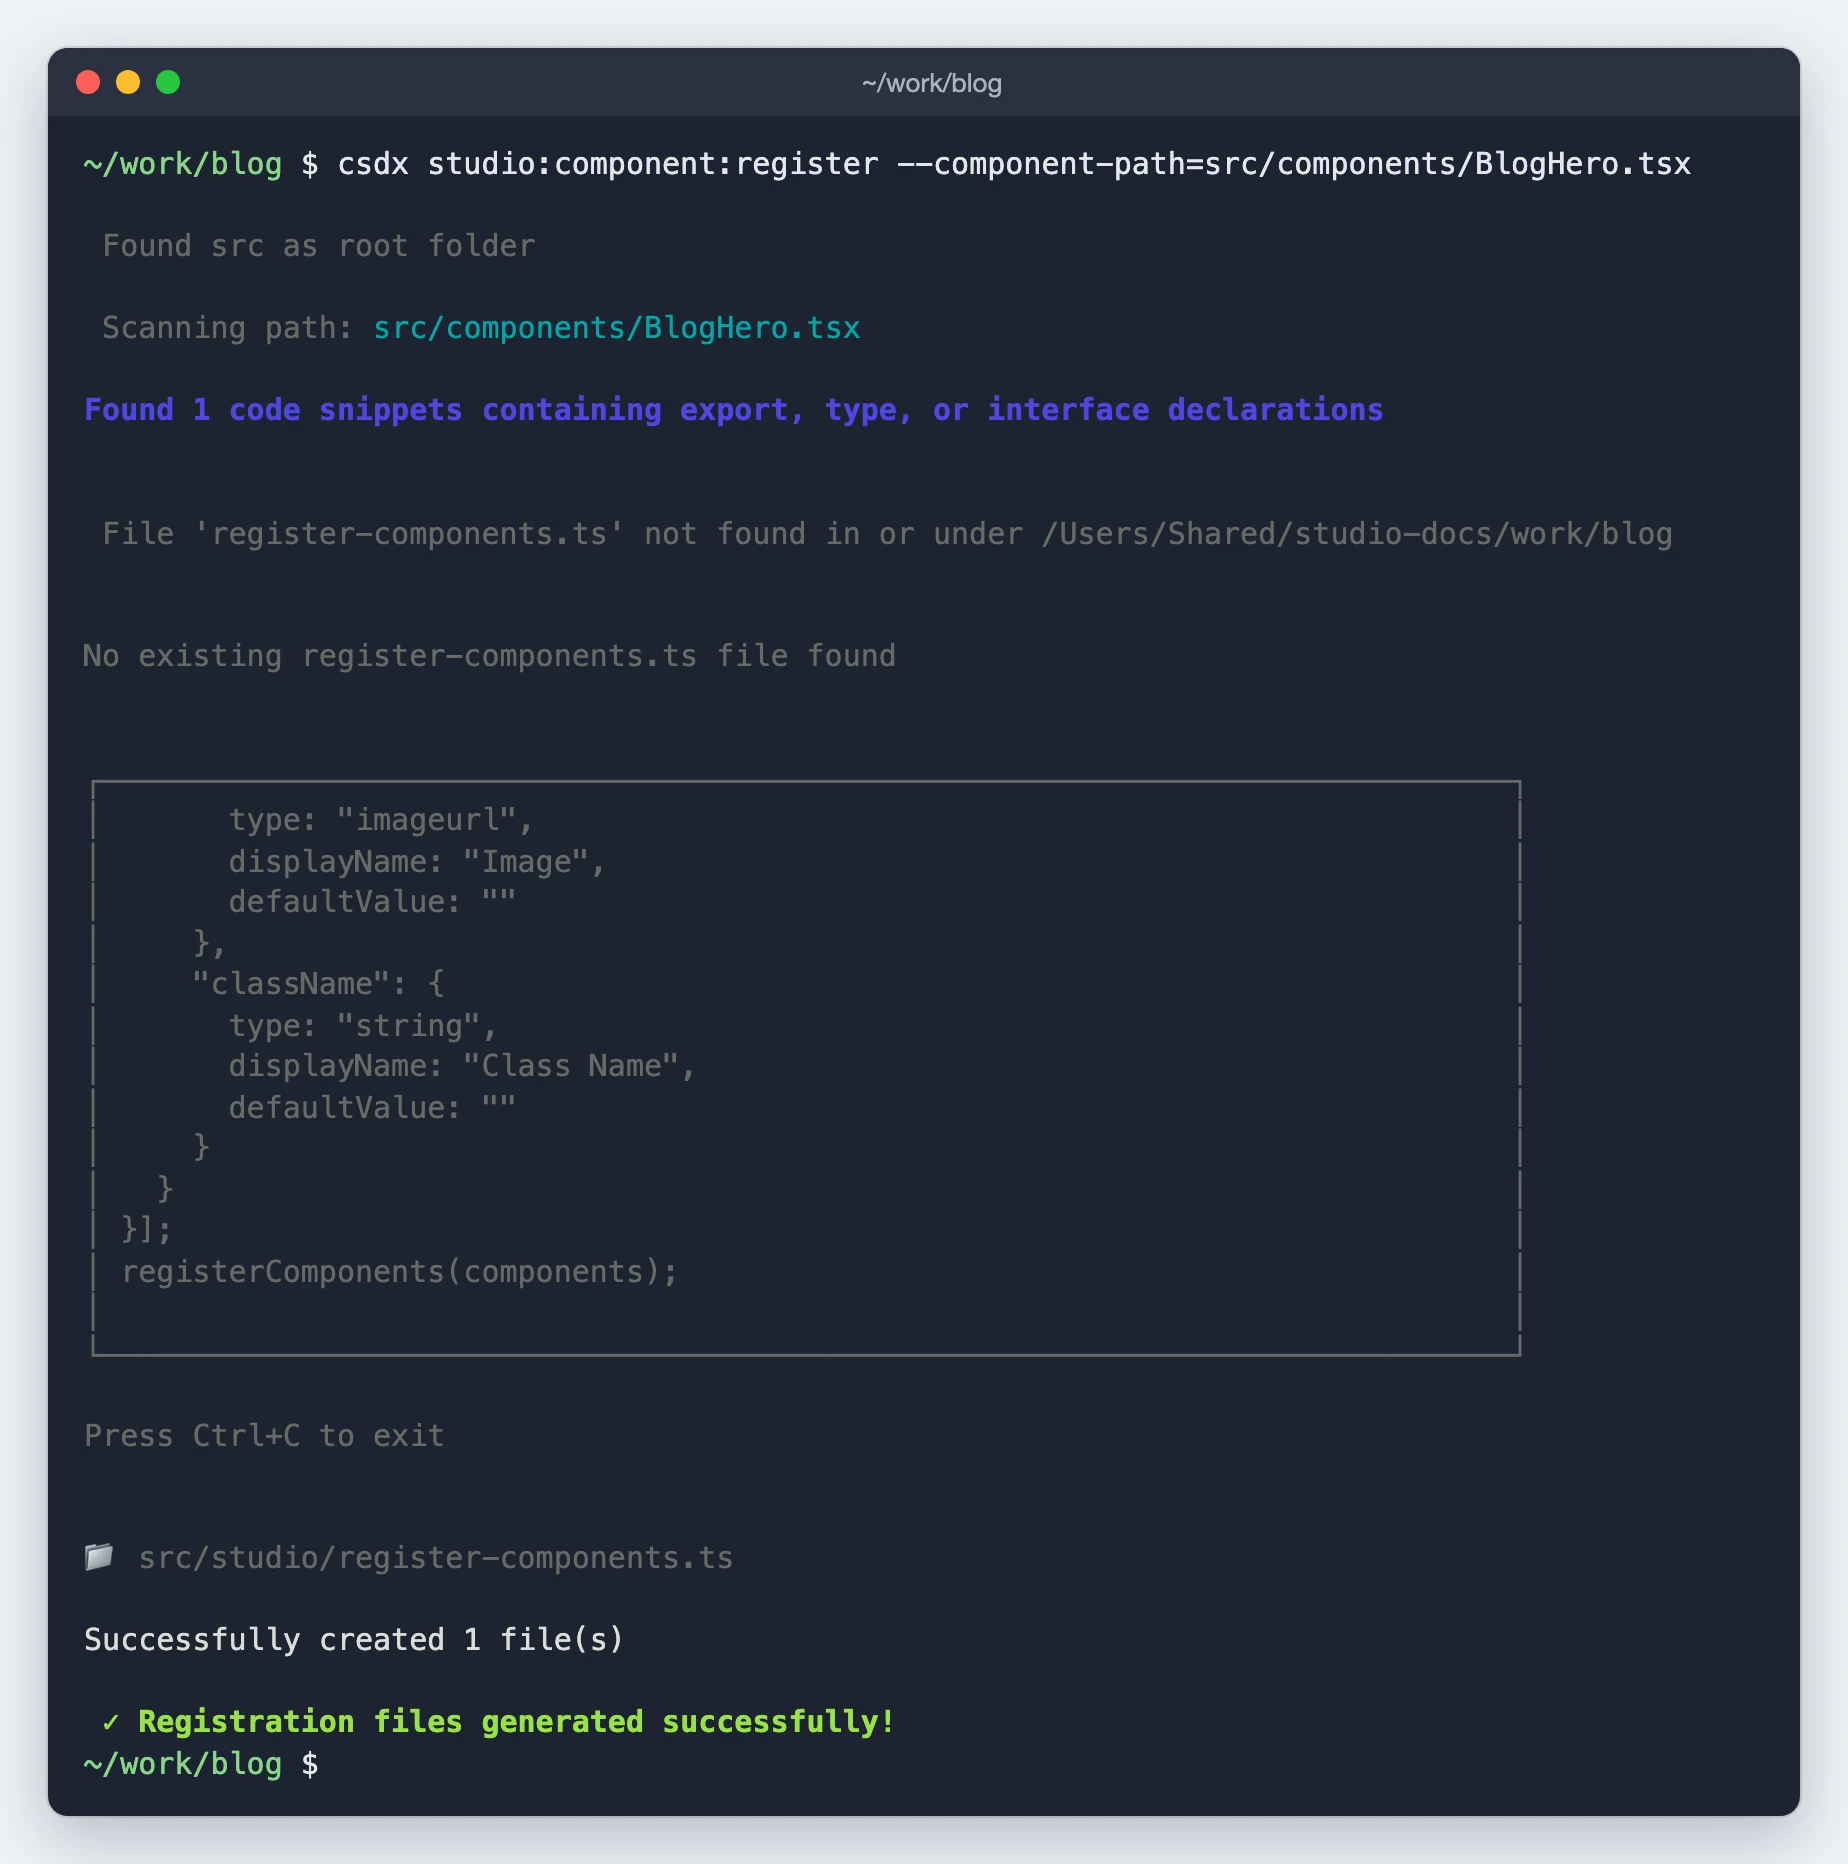
The run reports what it found, streams the generated code, then lists the files it wrote:
Then import the register file
The command writes the registration code. It does not wire it into your app. Import the file it wrote from your app's entry point (main.tsx, index.tsx, and so on), so the registrations run at boot:
import './studio/register-components'
Without that import the command still succeeds and the palette stays empty. It is the most common reason a registered component never shows up.
Add design tokens
This command adds your design tokens to the active Studio project, so the Design controls in the Properties panel offer your brand's colors, spacing and typography instead of Studio's neutral defaults.
There are two ways to run it. Pass a design token ID and the tokens come from the Figma plugin's Design Token export. Leave the ID out and the CLI analyzes your project and generates the tokens for you.
csdx studio:design-token:add --design-token-id=<id>
csdx studio:design-token:add
| Flag | Alias | Description |
|---|---|---|
--design-token-id | -i | ID of the design tokens to fetch from Figma. If not provided, analyzes the project to generate tokens |
The Figma path writes src/studio/figma-design-tokens.ts and wires it into your register-design-tokens file. The files are created under the src/studio.
The two questions it asks
The first time you run this command, it asks you two questions and saves your answers in the generated token file.
| Question | What you are deciding |
|---|---|
| Use Studio's default design tokens? | Whether Studio's neutral token set stays available alongside yours. Answer no and authors see only your values. Defaults to no |
| Select the allowed values level | How far outside your token set an author may go. Defaults to dynamic |
The allowed values level has three settings. Each one is a superset of the one above it:
| Level | An author can pick |
|---|---|
dynamic | Values linked from entries |
tokens | Values linked from entries, plus the design tokens in your project |
arbitrary | Values linked from entries, your design tokens, and any value typed by hand |
Later runs do not ask again. The command finds the existing file, keeps the config already in it, and refreshes only the tokens, so re-running to pick up new Figma values never reopens what authors are allowed to do. To change those two answers, use design-token:config.
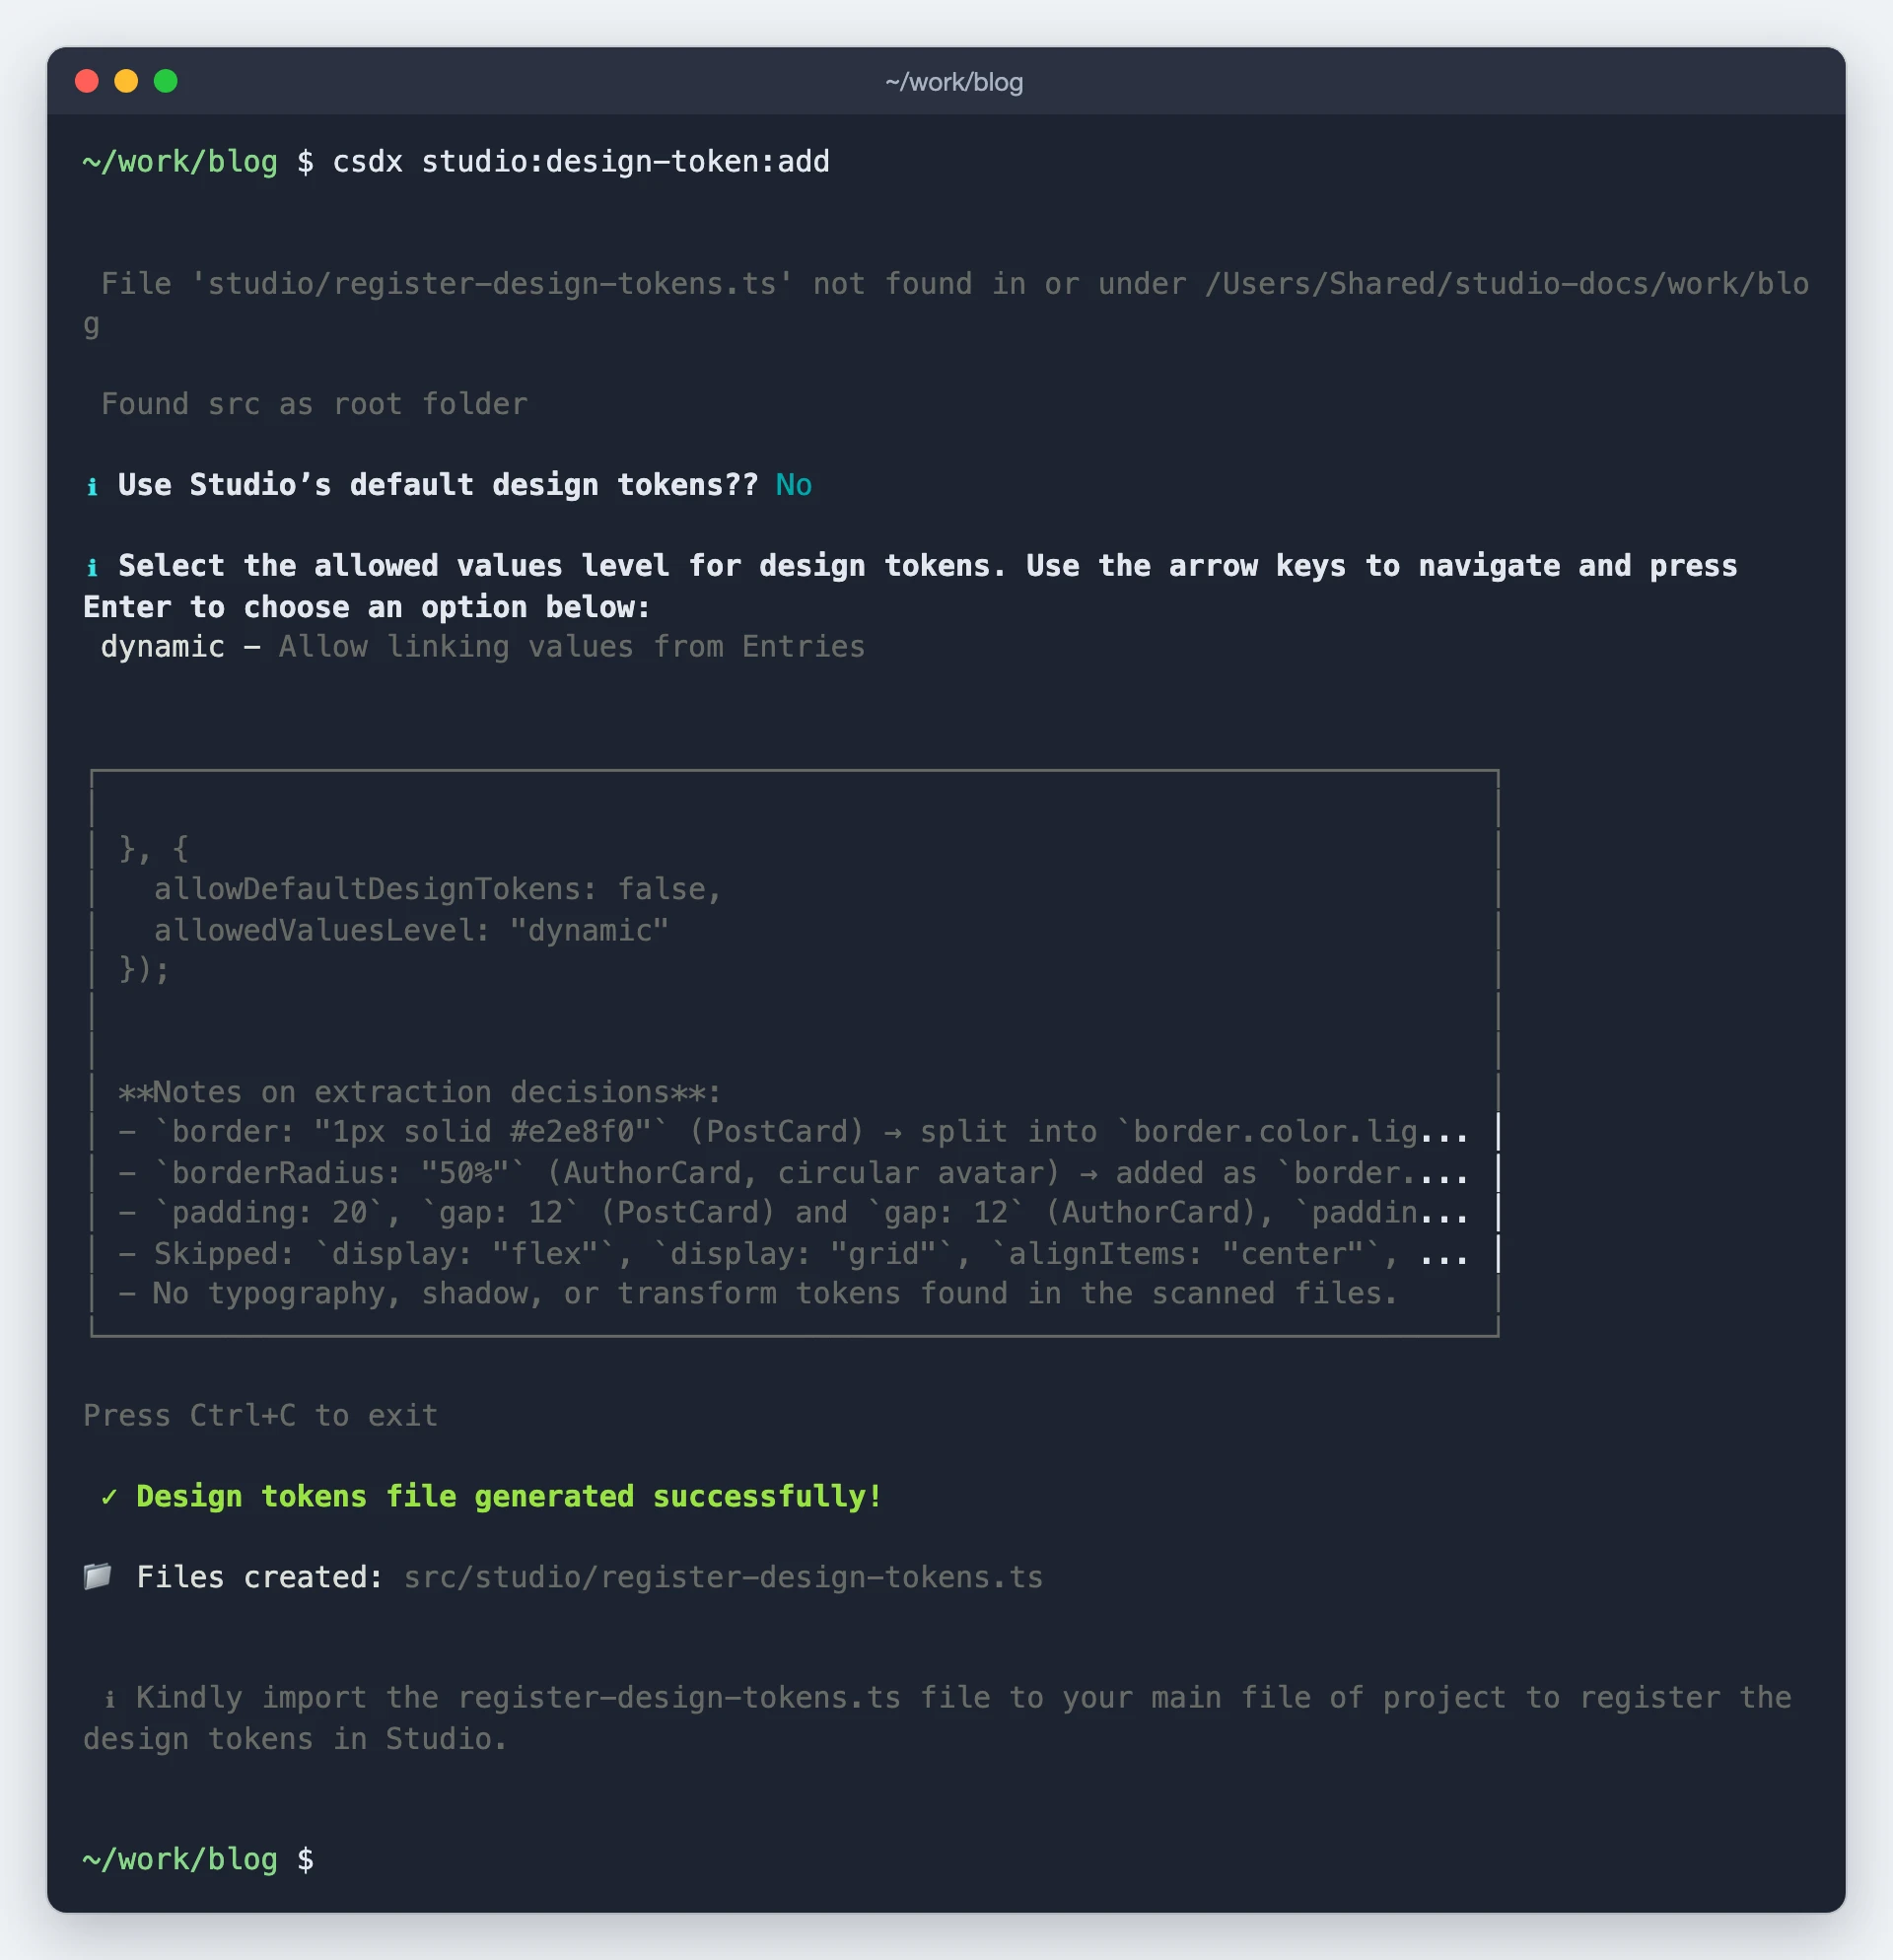
A first run with no ID, end to end: the two questions, then the token file it wrote.
Then import the token file
As with registration, the generated register-design-tokens file has to be imported from your app's entry point for the tokens to register at boot.
What tokens are and how Studio uses them is in Design tokens.
Change how tokens behave
This command changes the two config values in the generated token file. It does not touch the tokens themselves.
csdx studio:design-token:config
It takes no flags. It shows what is set today, asks the same two questions again, and updates two values in your token file:
allowDefaultDesignTokens— whether Studio's default tokens stay available alongside yoursallowedValuesLevel— how far outside your tokens an author may go
The new values reach Studio when your app next boots.
It prints what is set now, asks, then prints what it wrote:
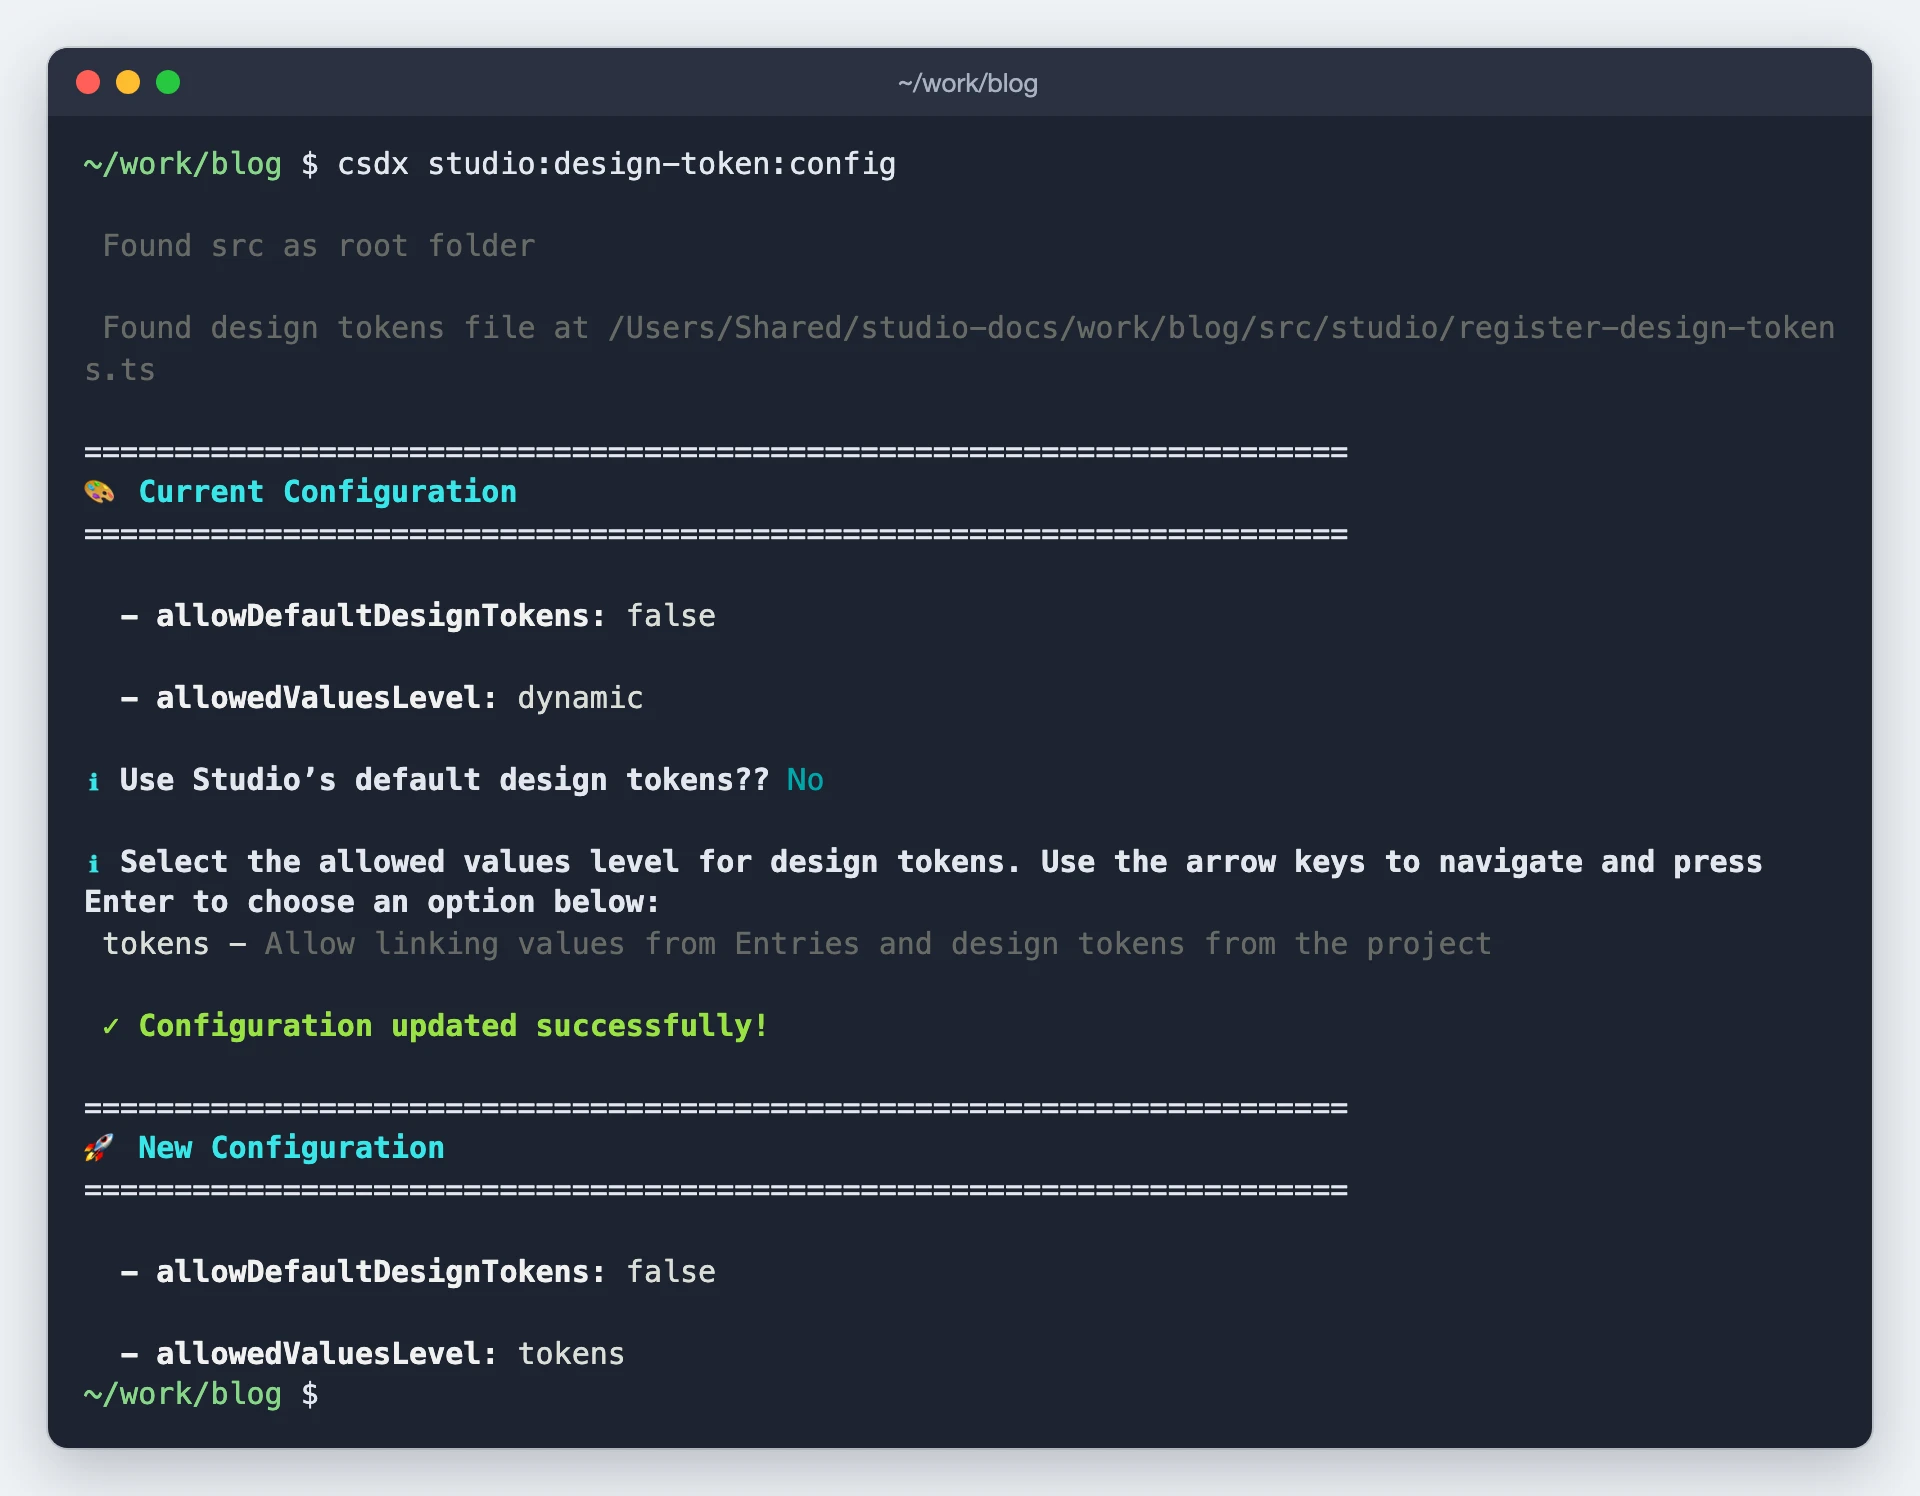
Answer both questions exactly as they already stand and nothing is written. The command prints ℹ No changes made to the configuration instead.
The file has to exist first. If it does not, the command stops and tells you to generate it. Run
studio:design-token:addbefore this one.
Sync responsive breakpoints
This command reads the registerBreakpoints function in your code and pushes those breakpoints to the active Studio project, so the canvas shows a breakpoint switcher and authors can design for each of your viewports.
csdx studio:responsive-options:sync
csdx studio:responsive-options:sync --file-path=src/register-breakpoints.ts
csdx studio:responsive-options:sync --file-dir=./src
| Flag | Alias | Description |
|---|---|---|
--file-path | -p | Path to file containing registerBreakpoints function |
--file-dir | -d | Directory to search for registerBreakpoints function |
For the command to read your breakpoints:
- Write them inline in the
registerBreakpoints([…])call, as literal values. An array built from variables, imported or spread cannot be read. - Give each breakpoint the full shape, including a
previewSizewith a numericwidthandheight. See Breakpoints for the fields and an example.
If anything is missing, the run stops and nothing is synced.
A successful sync lists every breakpoint it pushed:
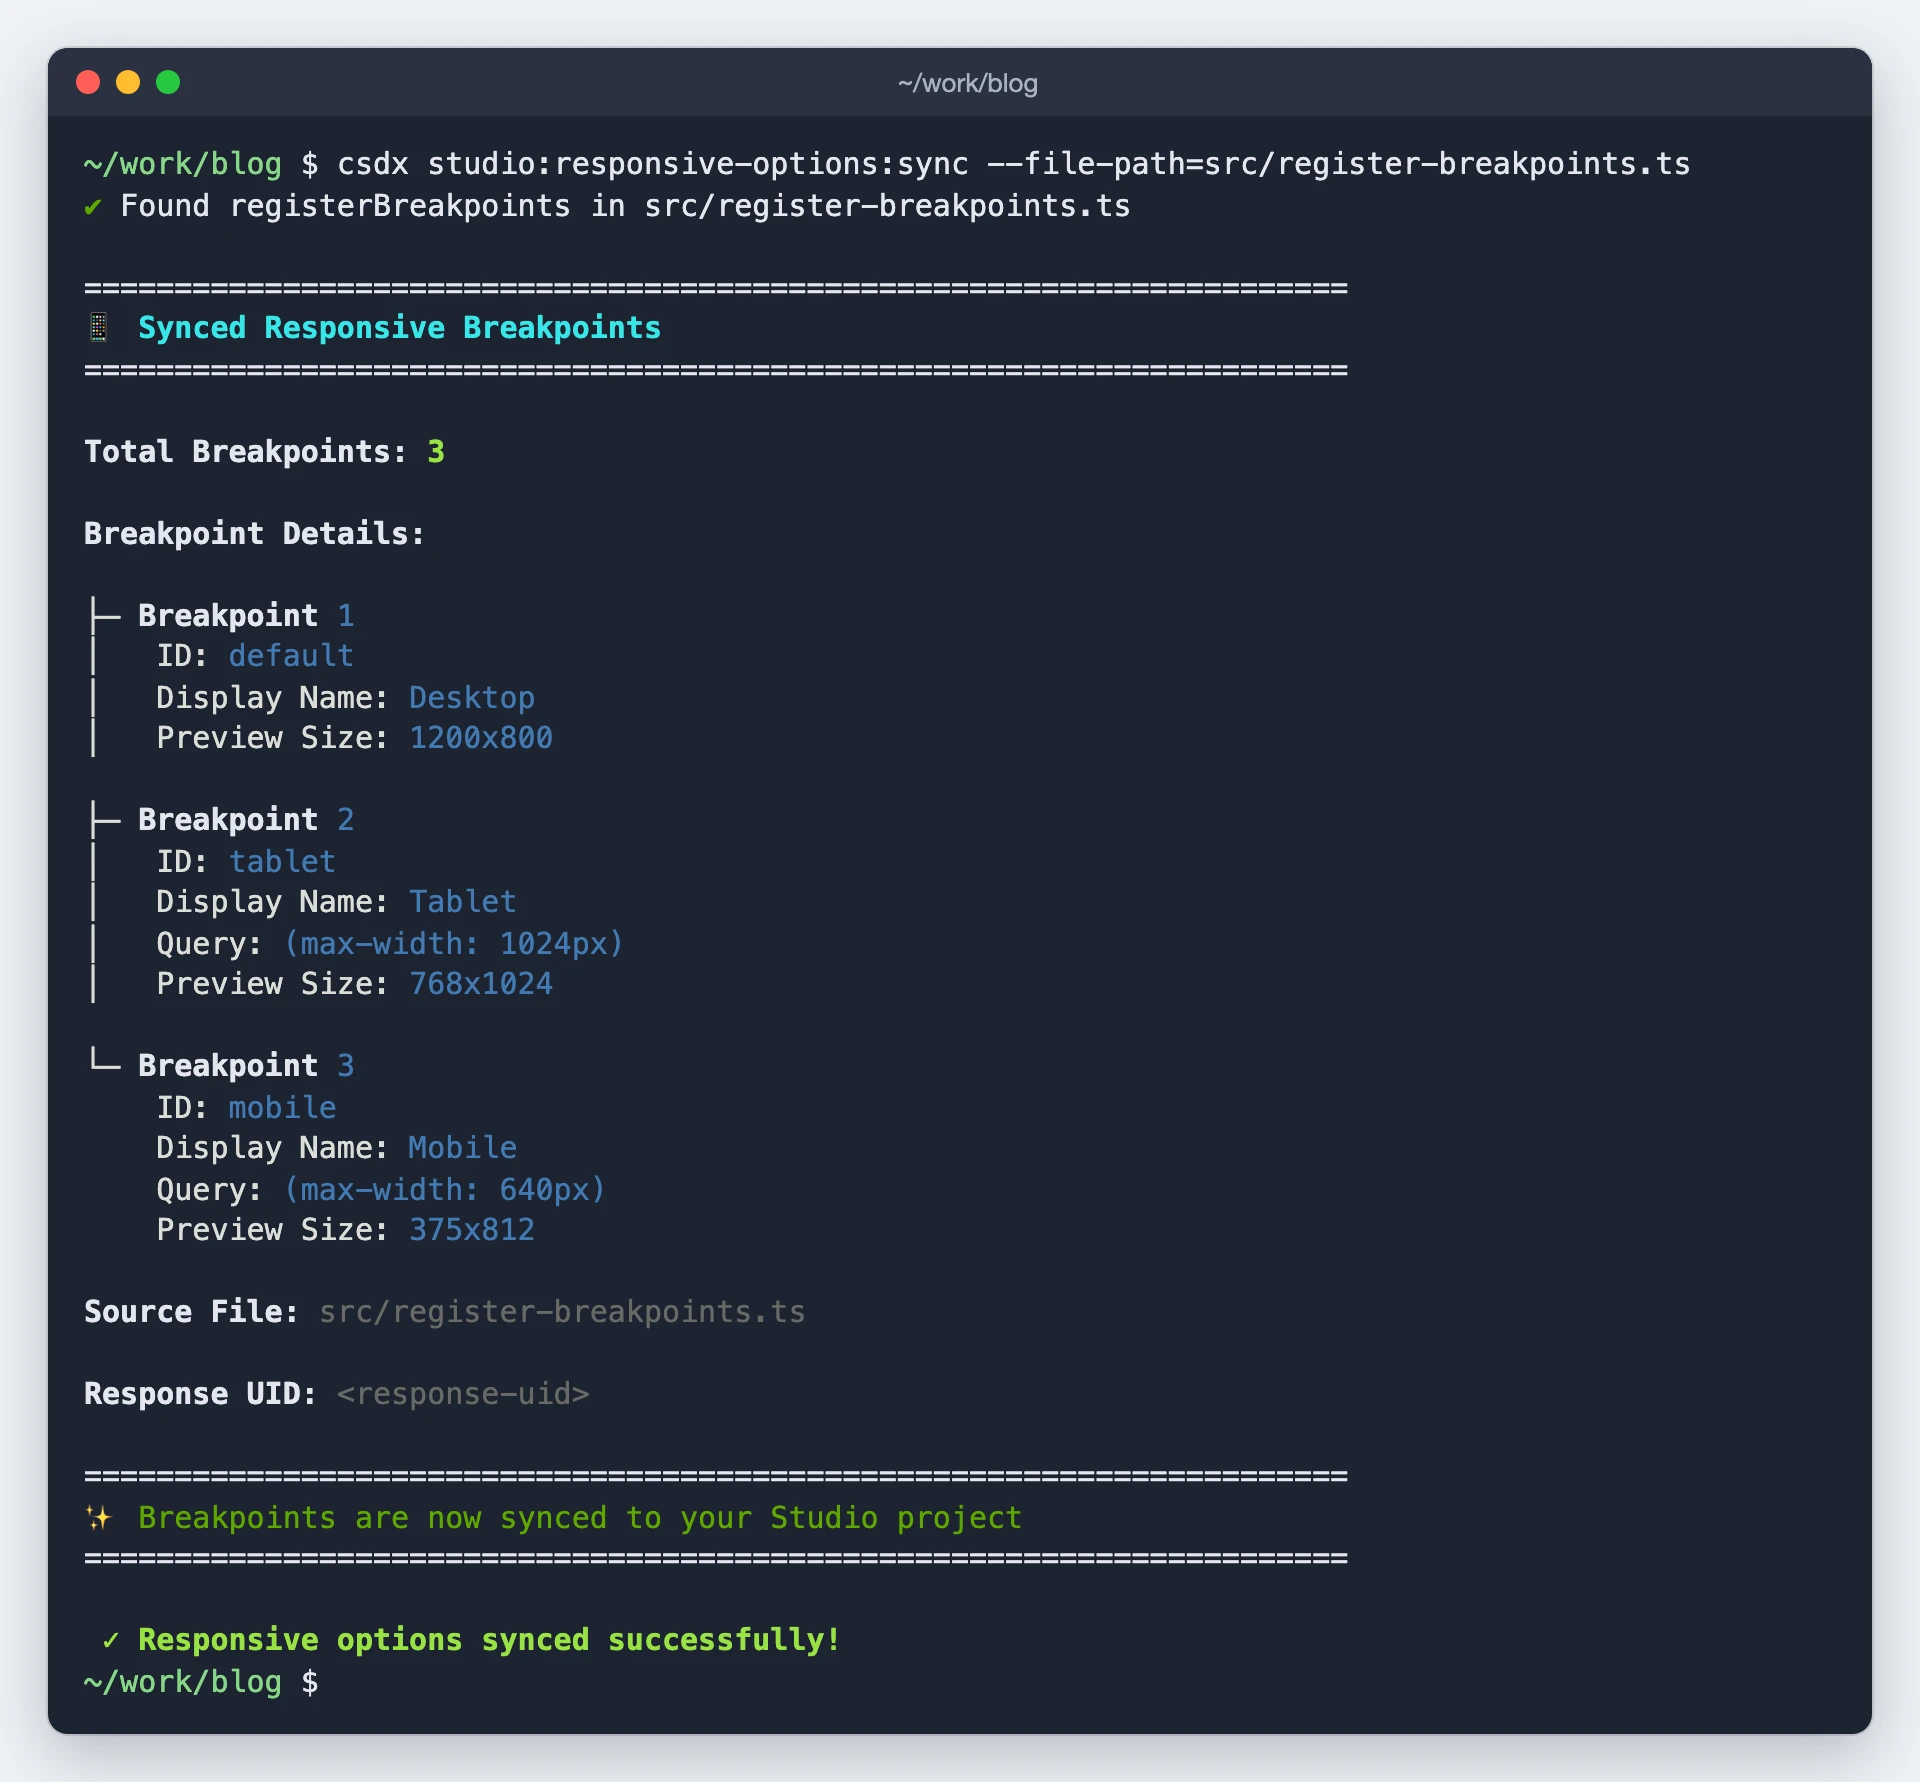
Read that list back before you move on. It is exactly what the canvas will offer, so if a breakpoint is not listed, it was not in the registerBreakpoints call the command read.
The push is a full replace, not a merge. A breakpoint you deleted from your code is gone from the canvas too.
The direction is one-way, code to project. Nothing in your repo is touched, so your code stays the source of truth for breakpoints.
Sync a component to the Figma plugin
This command makes one of your code components visible in the Figma plugin's mapping list, so a designer can point a Figma layer at a component you already have instead of asking for a new one.
csdx studio:component:sync --component-path=src/components/PostCard.tsx
| Flag | Alias | Description |
|---|---|---|
--component-path | -p | Component file to sync (required) |
Every component in the file you point at is synced, not just one. Your code is not sent, only each component's name, props and import path.
Sync is also what the plugin's Auto Map button matches against. Auto Map pairs each Figma component with one of the code components synced to your project, by name and props. A component you have not synced is not in that list, so Auto Map cannot pair it. A layer left unmapped is rebuilt from the design, instead of coming through as your component with its props filled in.
The summary names each one, so you can check the list against what you expected that file to hold:
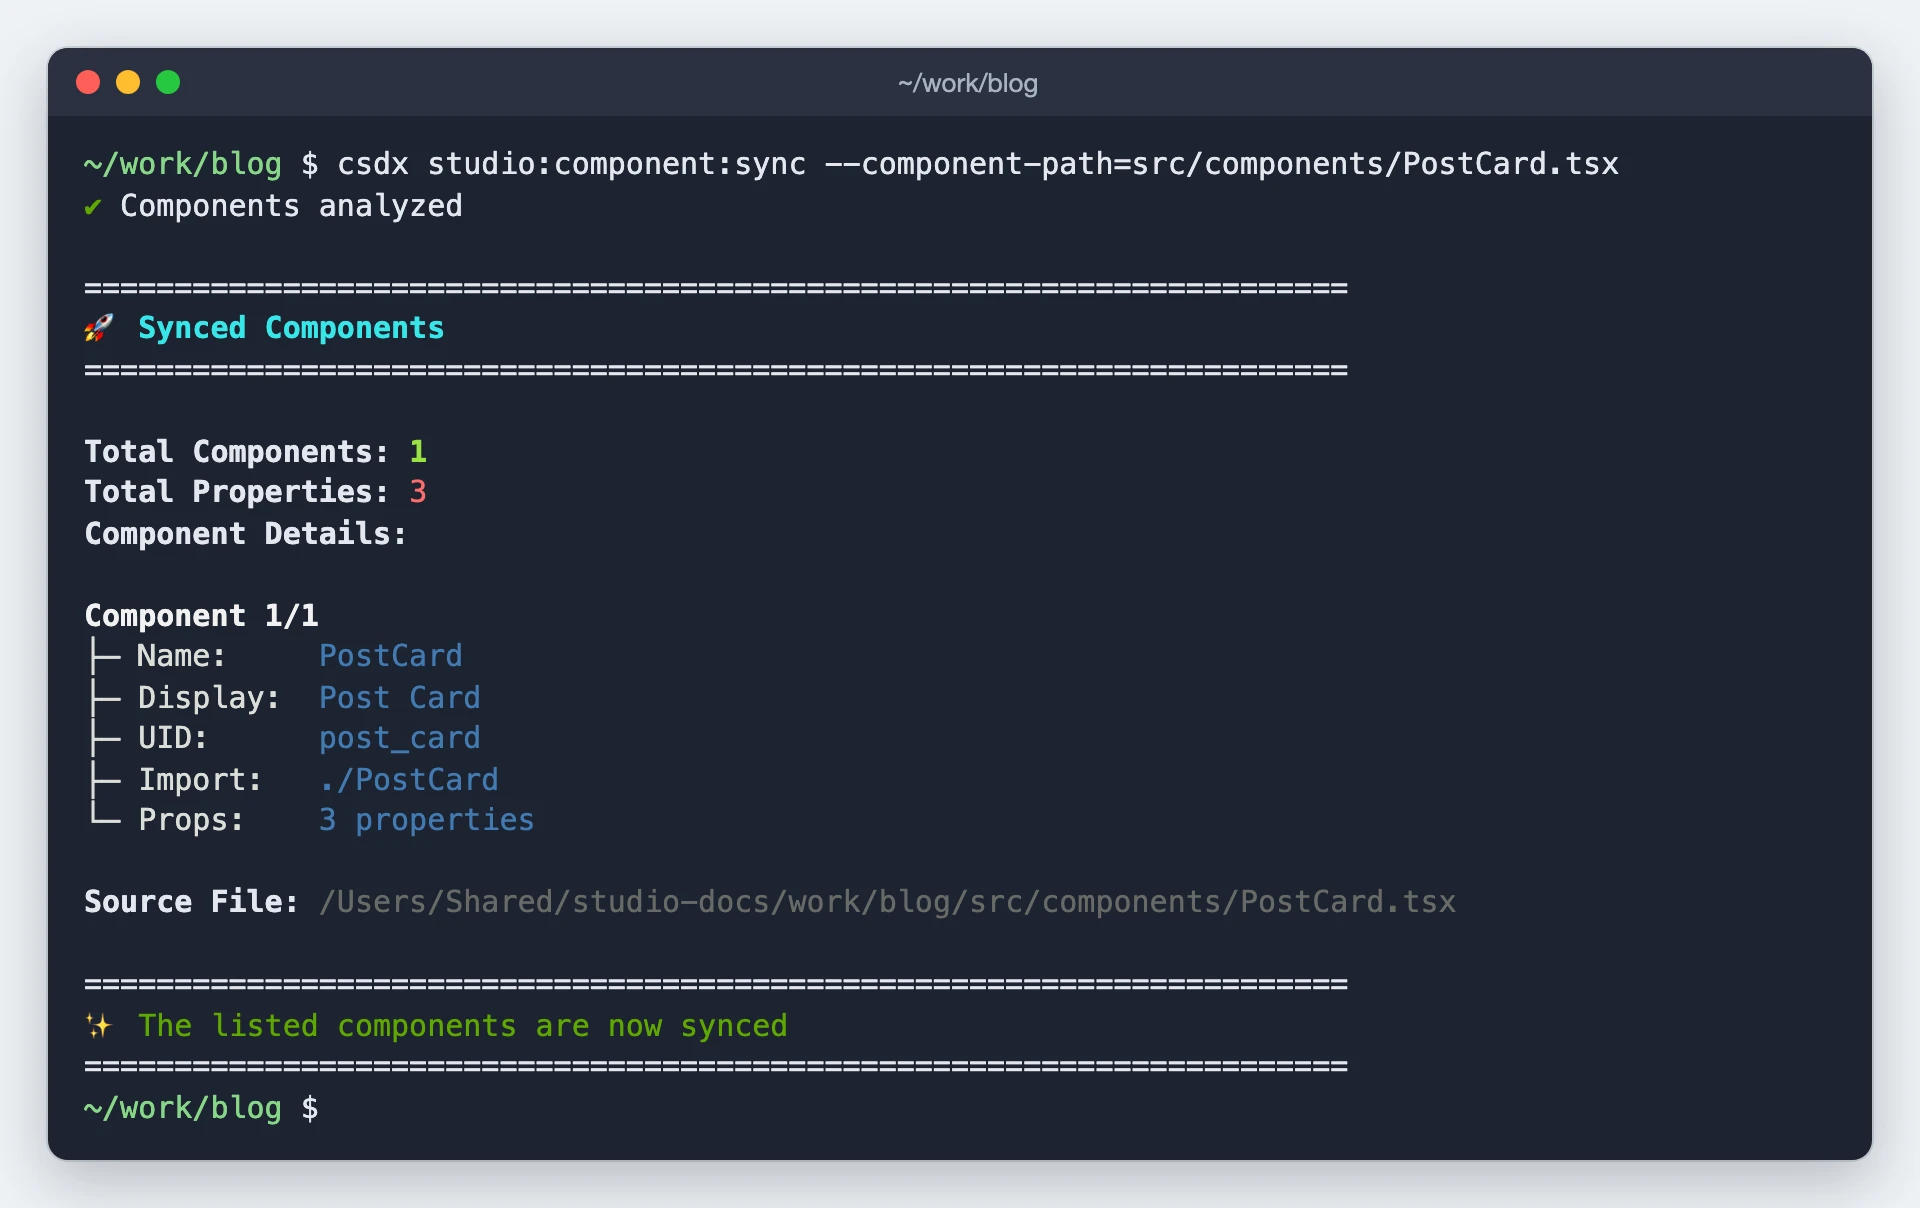
This does not put the component in the Studio palette. The palette comes from
component:registerand the registrations your app imports at boot. This syncs the component to the Figma plugin.
Where registrations get written
Every command that registers a component writes to the same place: your register-components file, or an existing file that already registers components. The CLI decides in this order:
- A conventional
register-components.*file exists. Write there. - Otherwise, a module that already registers components, can be edited safely, and is demonstrably imported by your app. Write there.
- Otherwise, create
studio/register-components.tsor.js, matching your project's language.
The third case is the one that catches people out. If your app registers from a file the CLI did not recognize, the CLI creates its own file beside it and your app never imports it. See If it doesn't work.
Verify
Open your project in Studio and check the palette. A registered component appears there by name, with its props in the Properties panel.
Tokens and breakpoints show up elsewhere. Your values appear under the Design controls in the Properties panel, and the canvas offers a breakpoint switcher with the viewports you synced.
Palette empty, or missing what you just registered? The registrations were likely written to a file your app does not import. See If it doesn't work below.
If it doesn't work
| Symptom | Cause | Fix |
|---|---|---|
| The command succeeds but the component never appears in the palette | Registrations were written to a file your app does not import. The CLI created studio/register-components.ts while your app registers from somewhere else | Import the file the CLI wrote, or move your registrations into your register-components file so the CLI finds that one first |
| Registered components don't appear in Studio's palette, and your app does import the register file | Your app registers the components after Studio's canvas has loaded, so the canvas never sees them | Register at app boot, before the canvas mounts, in the same module that initializes the Studio SDK |
Path not found from component:register | The path did not resolve, and the search through your project did not find it either | Pass a relative or absolute path rather than a bare filename |
Found 0 code snippets from component:register | The scan found no export, type or interface declarations, so there are no props to read | Check you pointed at the component source, not a barrel file, a build output, or a folder of styles |
registerBreakpoints function not found, with the call in front of you | The array was not written inline in the call, or the search stopped at another file first | Inline the array as literal values in the registerBreakpoints([…]) call, and name the file with --file-path |
No register-design-tokens file found from design-token:config | The token file has not been generated yet | Run csdx studio:design-token:add first |
No register-design-tokens file found, but the file is there | design-token:config reads it from your project root, src/studio or app/studio. A Figma token fetch always writes under src/studio, so in a project rooted at app/ the two disagree | Move the generated file under your project root, or regenerate it there with csdx studio:design-token:add |
design-token:add does not ask the two config questions | The token file already exists, so your existing config is kept | Expected. Use csdx studio:design-token:config to change those values |
error while registering components — NO_REQUEST_LISTENER_FOUND in the browser console | Your app loaded outside Studio's canvas, so there was no Studio frame listening for the registration notice | Nothing to fix. Registration still succeeds, and inside the canvas the notice goes through without an error |
| Auto Map in the Figma plugin leaves a layer unmapped, though you have a component for it | The component was never synced, so it is not in the plugin's list of code components | Run csdx studio:component:sync --component-path=<file>, then run Auto Map again |
No project is currently set | No project linked on this machine | Run csdx studio:project:set. See Set up the CLI |
What to do next
With your components in Studio, build from them: generate a section from a component you already have, or generate from a design. Not sure which? Choose your starting point.
Do it with a skill
register-component, import-design-tokens and register-breakpoints do in conversation what studio:component:register, studio:design-token:add and studio:responsive-options:sync do at a prompt. The CLI is the repeatable path; a skill reads your component and infers the decisions.
Related
- CLI commands: usage, flags and output for every command.
- Registering components: the concept behind
component:register. - Design tokens: what the token commands operate on.