Render a list (Repeater)
Use a Repeater when a field has a list and you want one copy of a layout, repeated for each item in it.
The example on this page is the Blog post template, previewing AI 101. Its Related posts section lists one PostCard for each post in the Related posts field. The steps show how that Repeater is built. You then build the Post chapters section, which nests one Repeater inside another.
Prerequisites
- You have a template or a section open on the canvas.
- You have a field that has a list, such as the Related posts reference on Blog post.
- You have a preview entry with items in that field. If the field is empty, the canvas has nothing to repeat. AI 101 has related posts, so it works for this example.
What this is and what you get
When you expand a multiple-value field under Repeater Data, the Data Picker tells you to use a Repeater. It says:
Direct binding isn’t supported for multiple-value fields—use a repeater to bind it to the schema.
A Repeater doesn't render an element of its own, so it doesn't change your layout. On your live site, it always lists every item. Design and Preview only change what the canvas shows.
Add a Repeater and bind its items
-
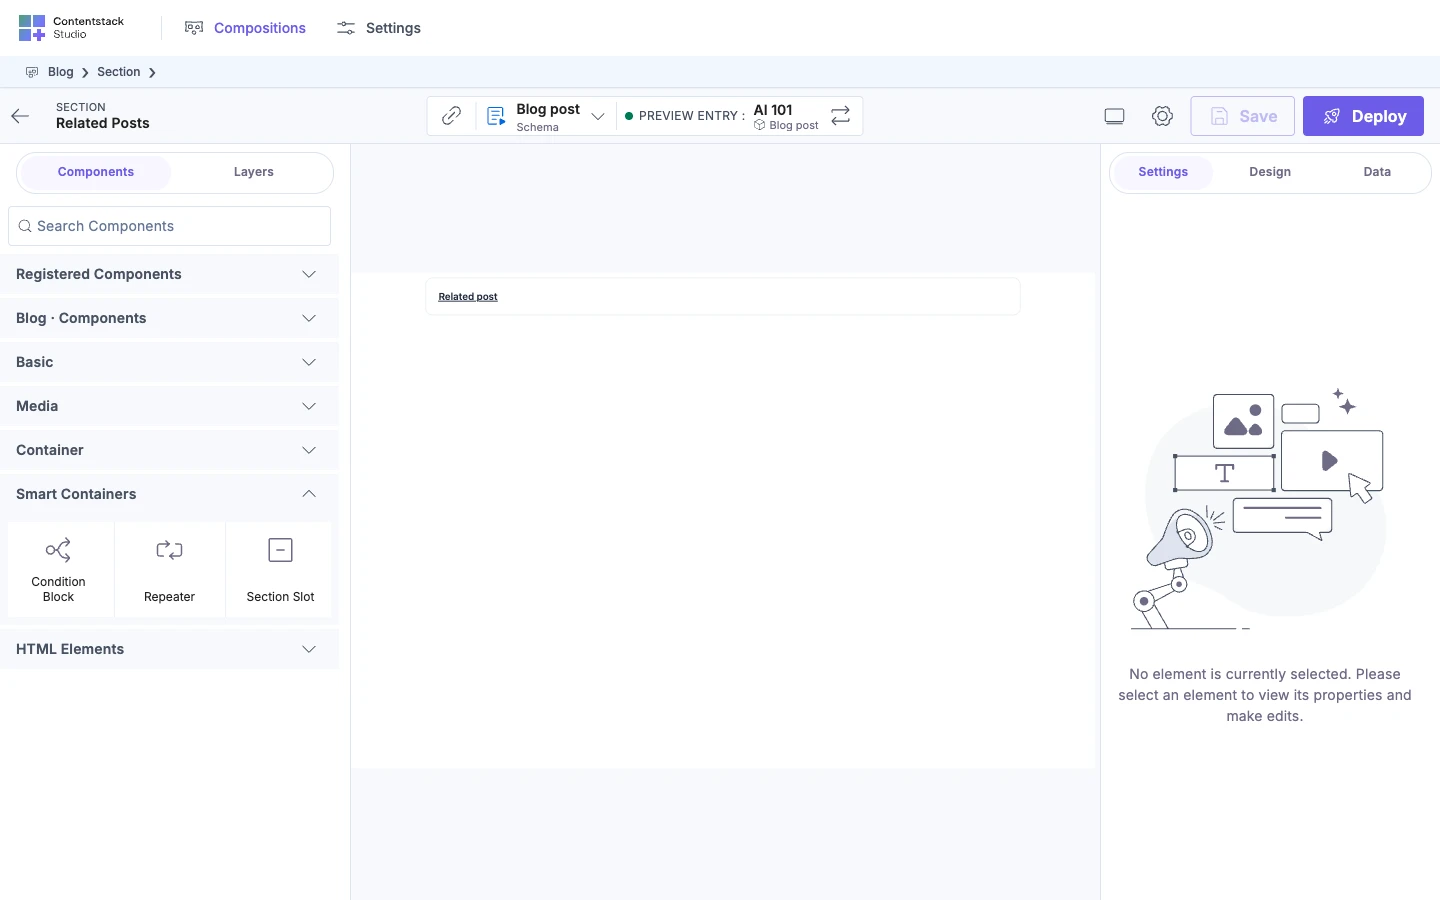
Open the Components tab, open Smart Containers, and drag Repeater to where the list goes.
A Repeater row appears in Layers. If you drop it next to another element, or into a container that already has content, Studio puts it inside a new Box.
-
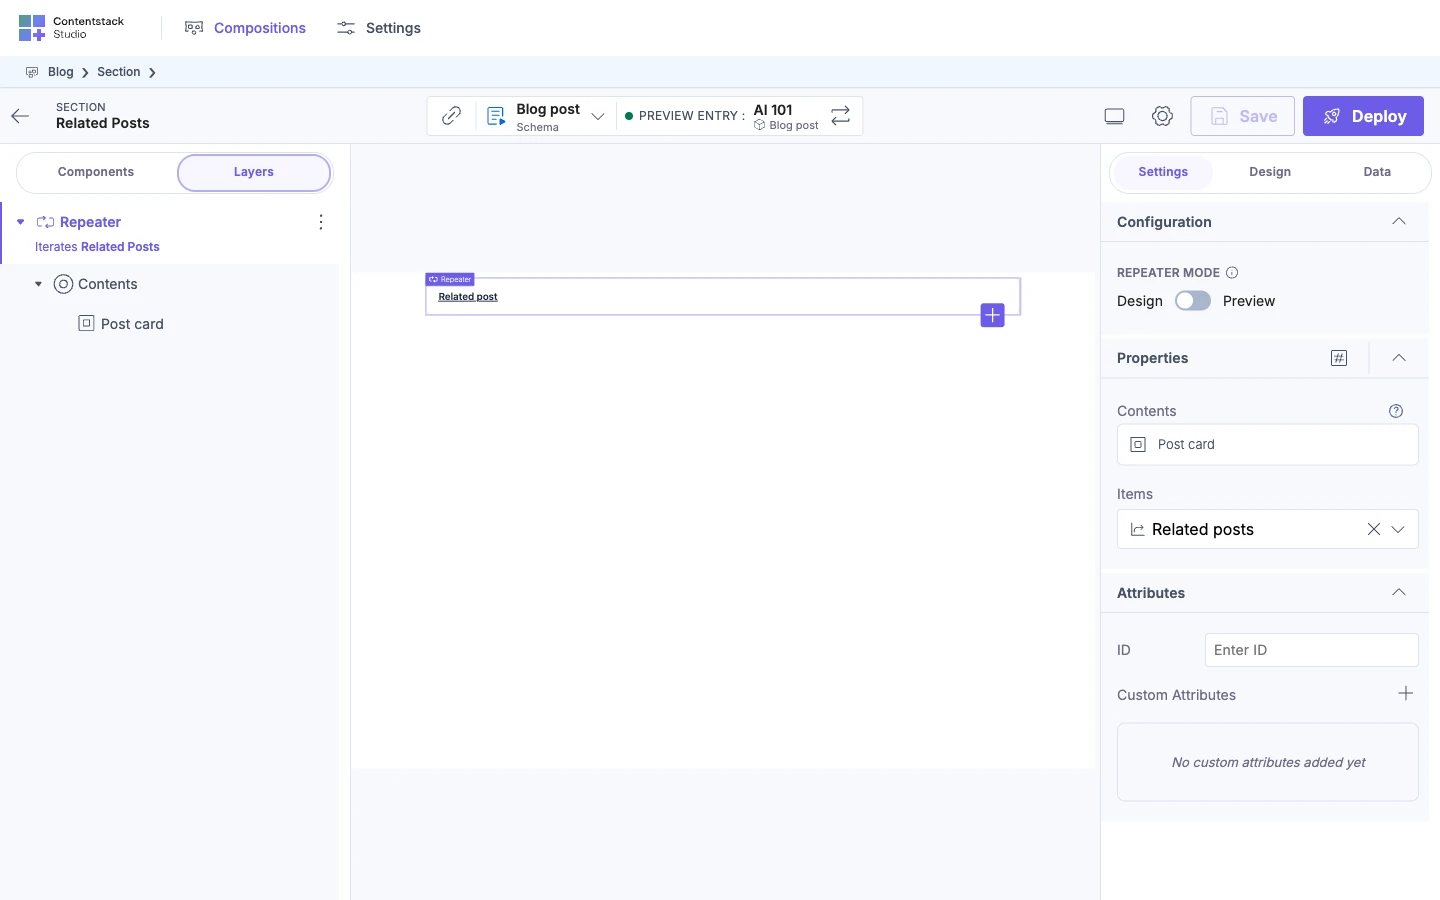
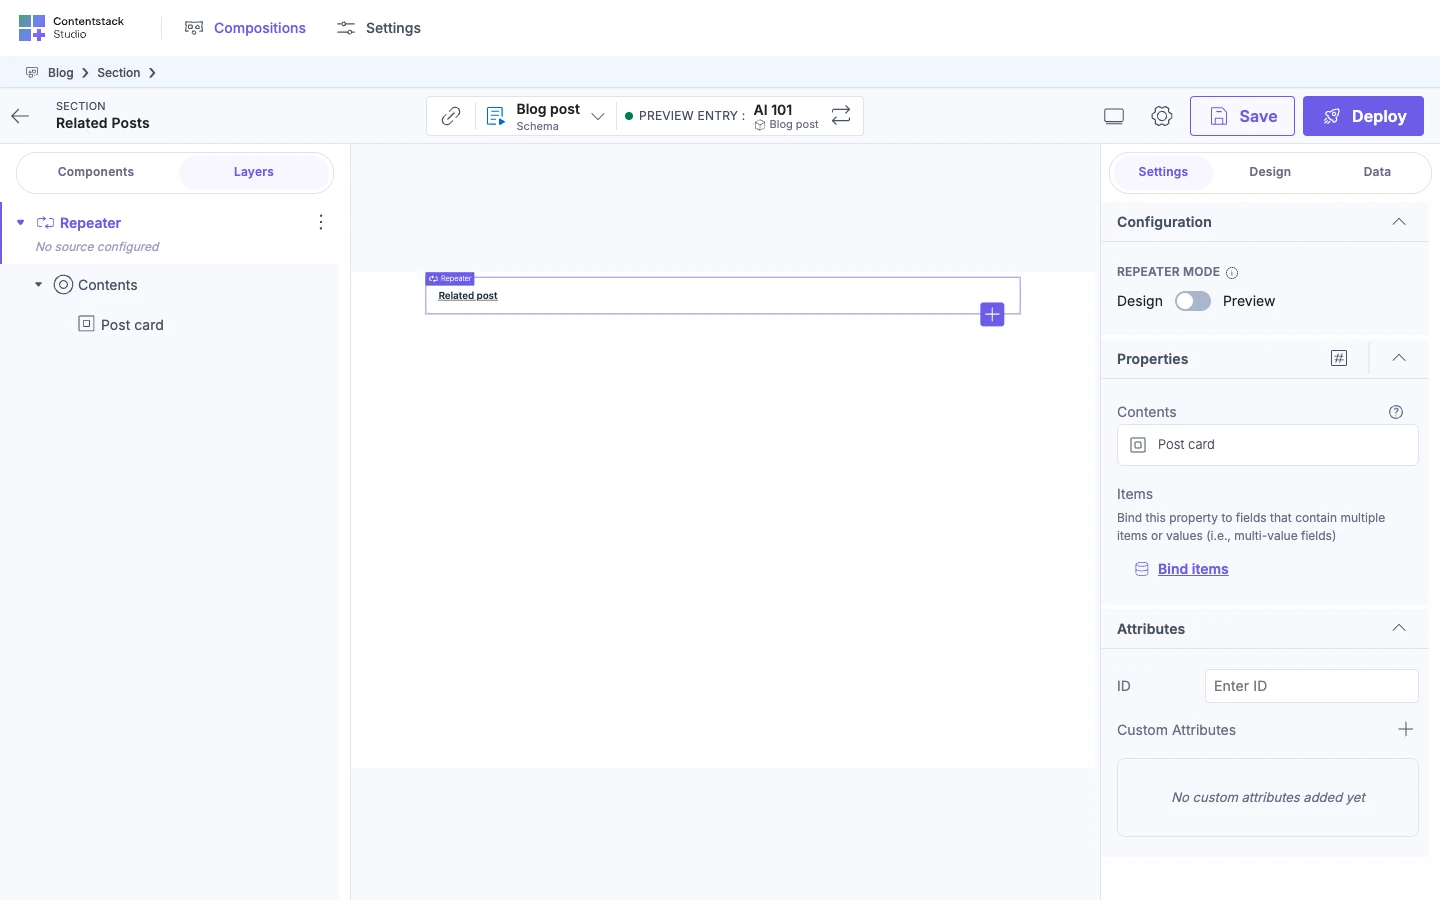
Open the Layers tab and select the Repeater's row. A Repeater doesn't render an element on the canvas, so you select it in Layers. For more on selecting, see Select and arrange elements.
The canvas outlines all of the Repeater's items together. A Repeater with no Items binding reads "No source configured" in Layers.
-
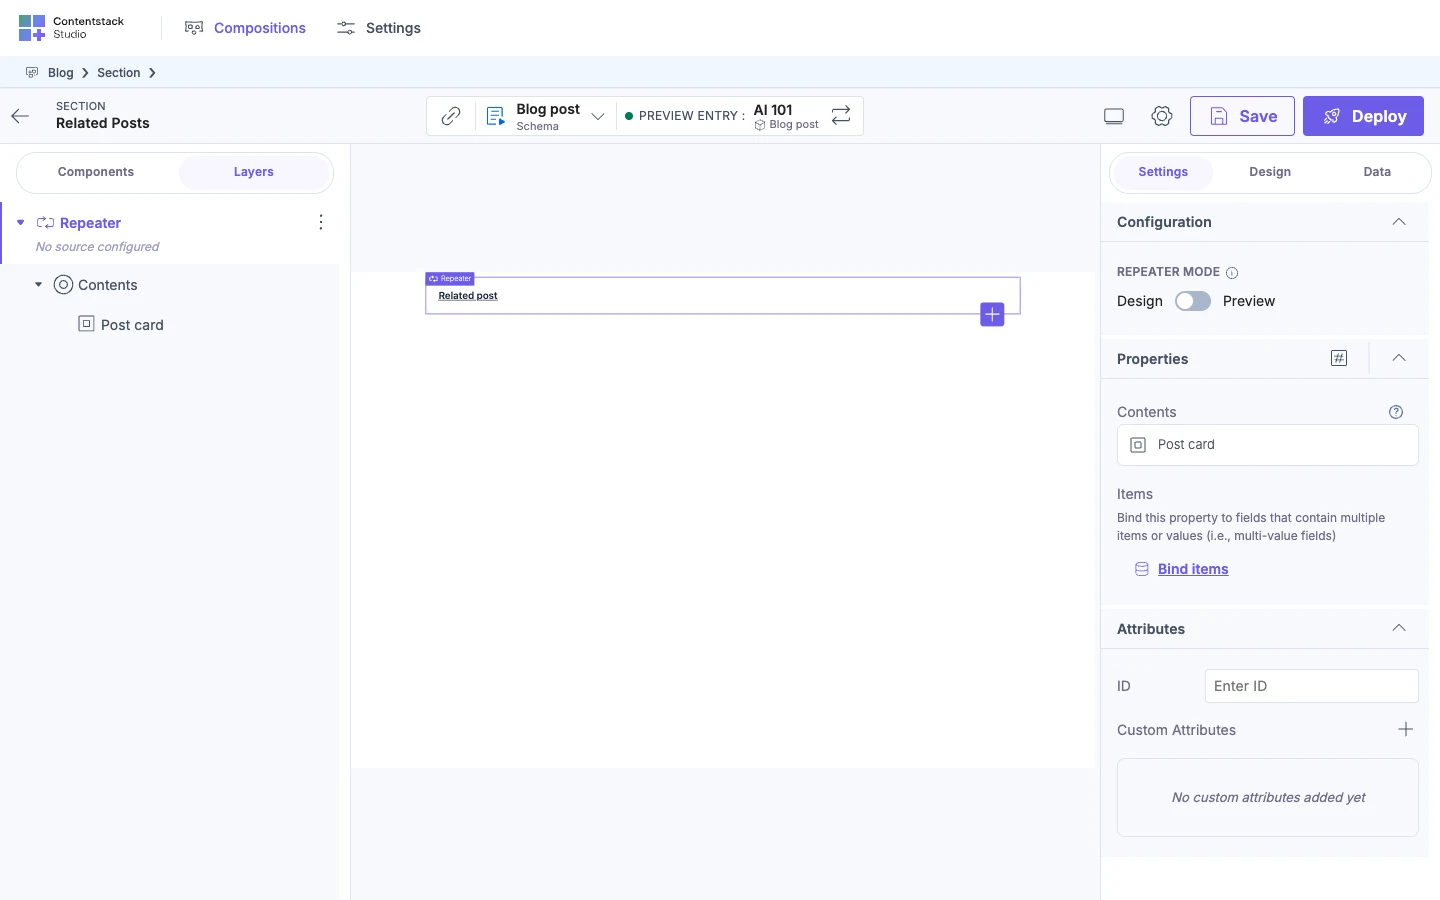
Open the Settings tab. Under Properties, an unbound Items shows this hint and a Bind items link:
Bind this property to fields that contain multiple items or values (i.e., multi-value fields)
-
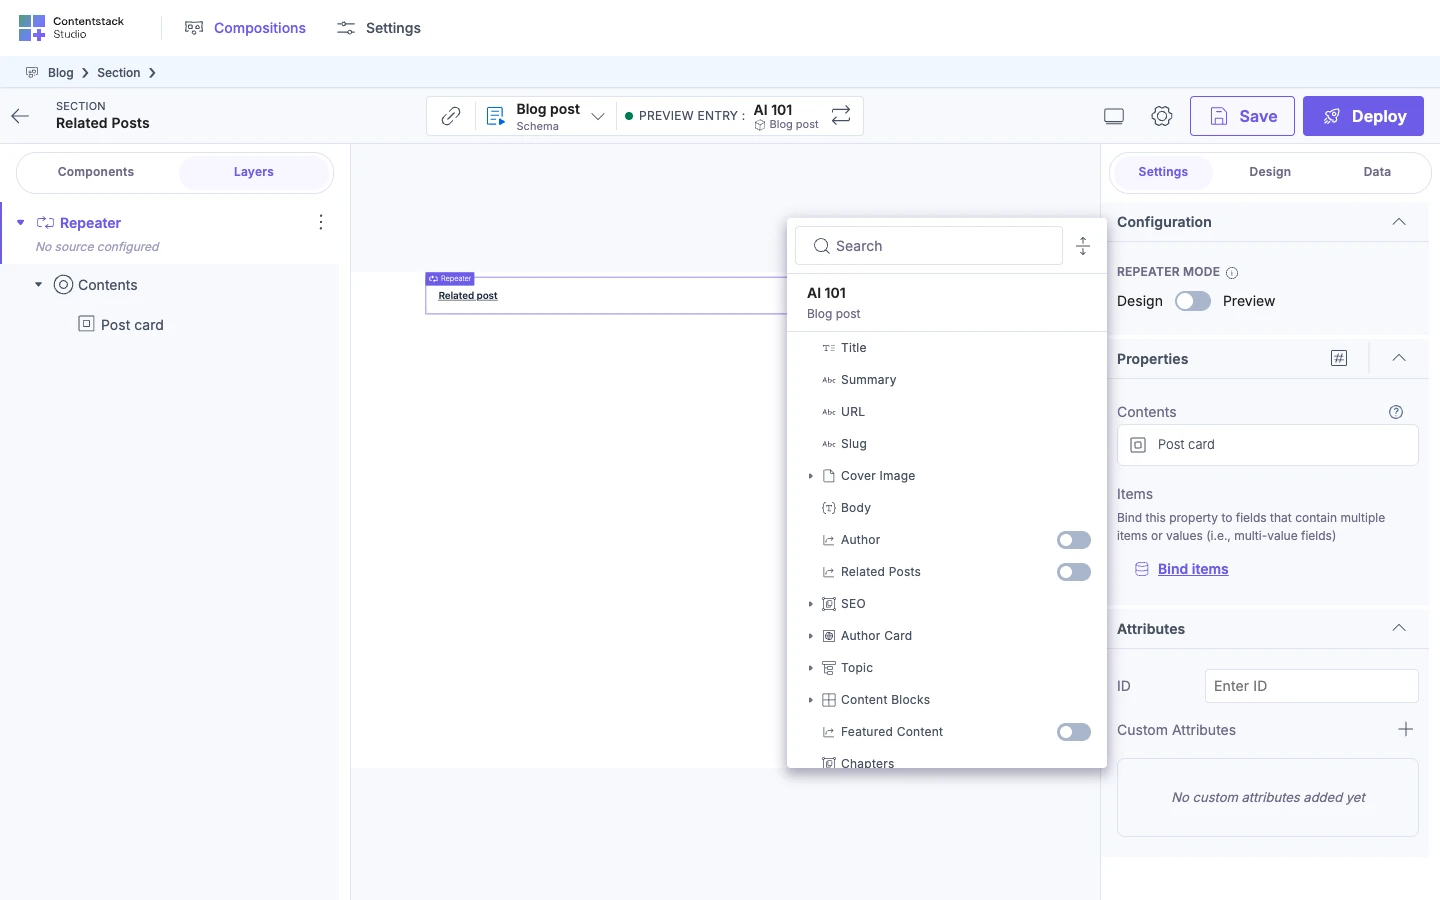
Click Bind items, then select the list field, such as Related Posts. Items accepts reference, modular blocks and multiple-value fields. For any other list field, the picker closes and Items shows the field.
-
When you select a reference or modular blocks field, Studio opens the Add Condition dialog. The field's content type, such as Blog post, is already checked. Click Add.
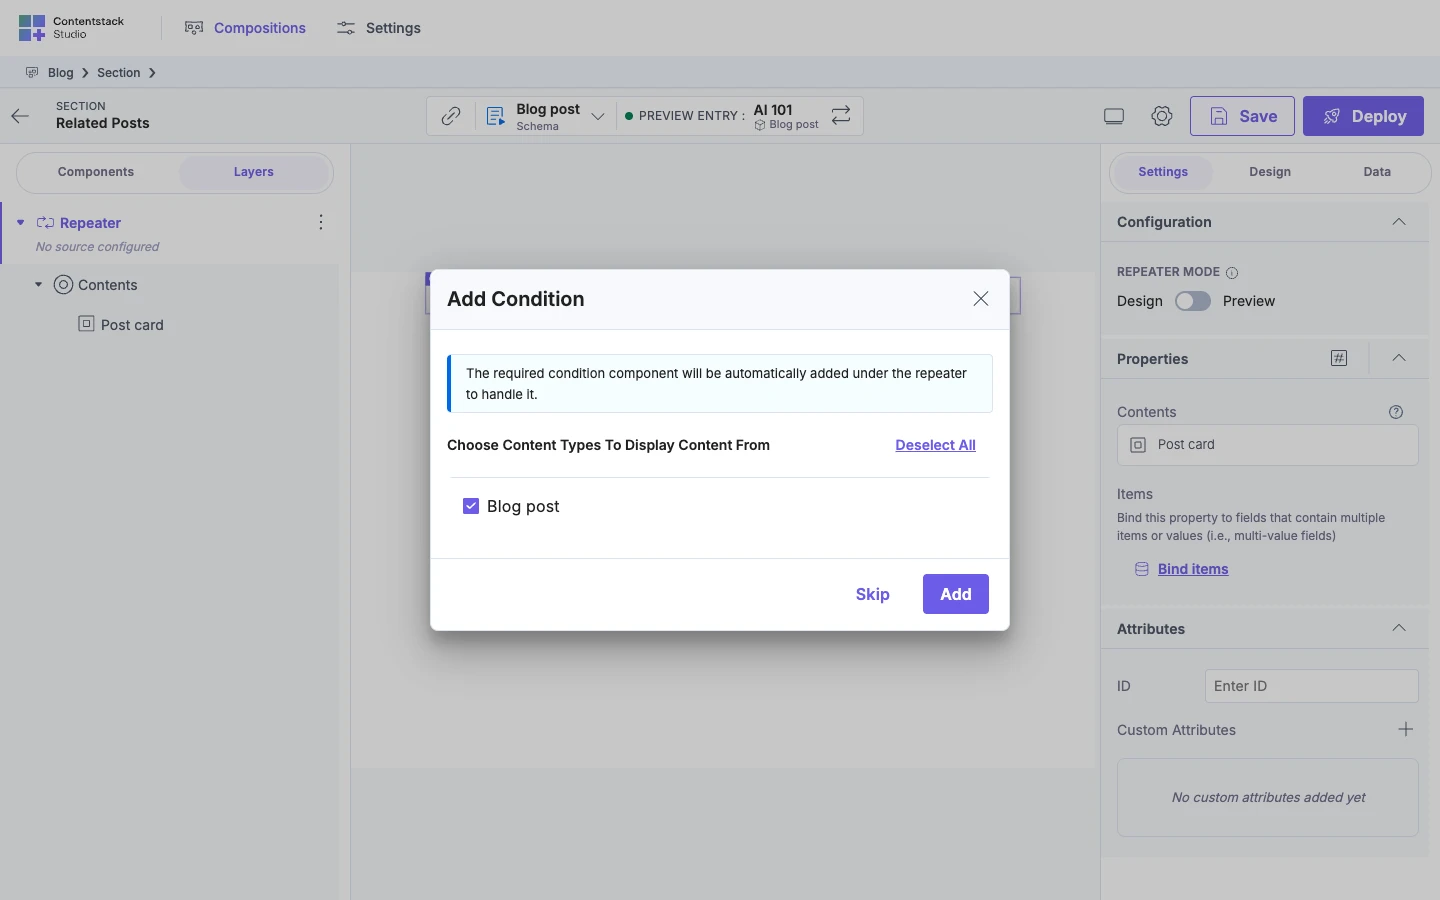
The Repeater now contains a Condition Block, and the Condition Block contains a Box. In Layers, the Repeater's row reads "Iterates" and the field's name, such as Related Posts.
-
Drag PostCard from the Components tab into the Box. In Design, the canvas shows one PostCard.
For what the dialog does and what to select, see Render a list of mixed things.
In a section, connecting a field that has many items opens an Add Repeater dialog. Click Add to have Studio place the Repeater for you. See Build sections.
Bind a component to each item
-
Select a component inside the Repeater, such as the PostCard.
-
Click the bind icon beside a prop.
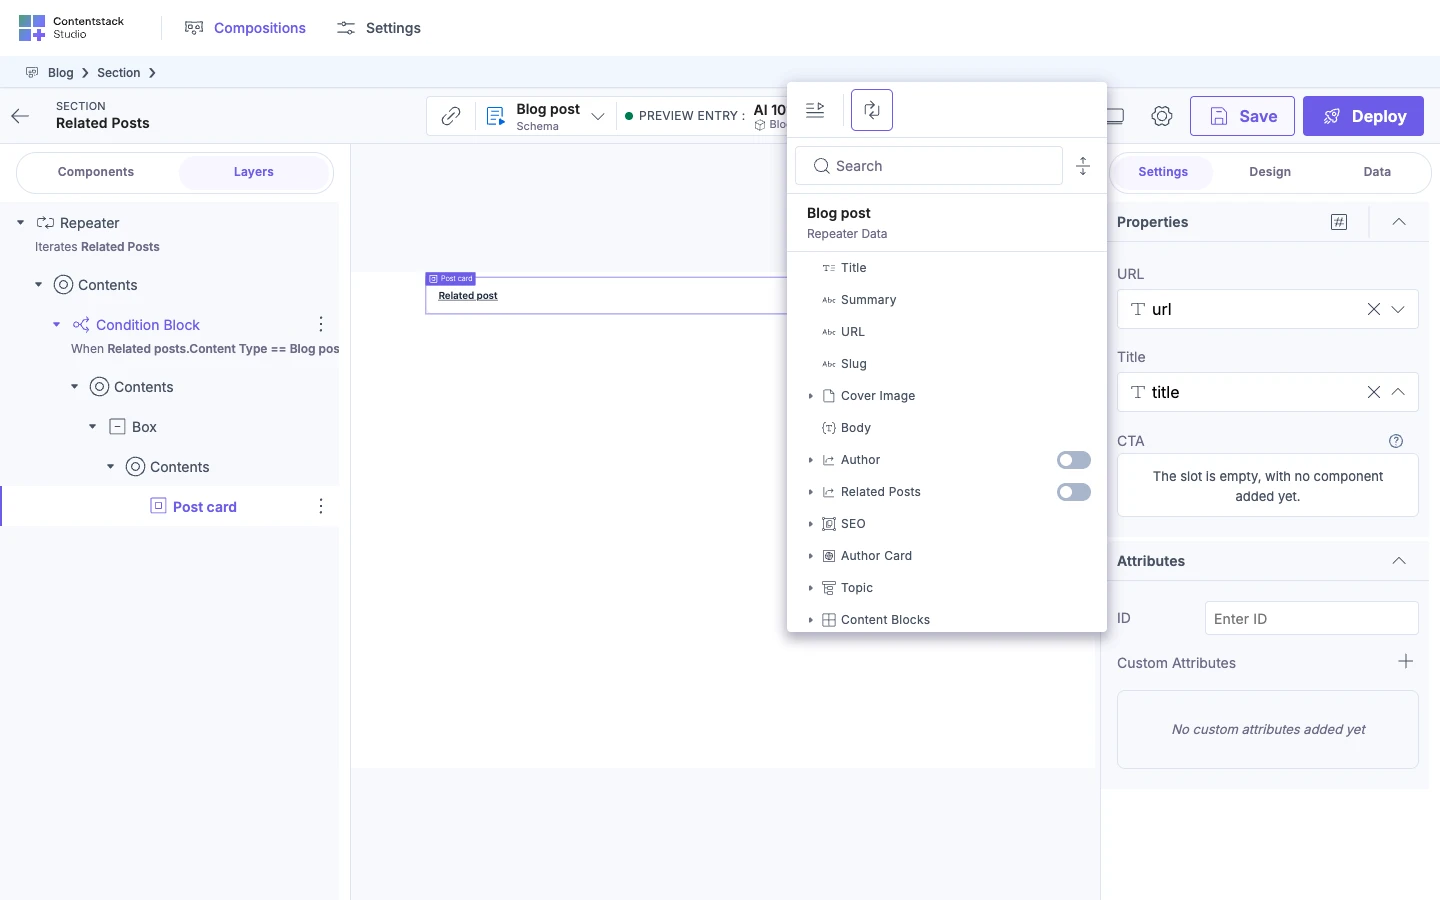
The Data Picker opens on the Repeater Data tab. It lists the fields of one item, not of the page entry.
-
Bind the prop to a field of the item, such as its URL. The prop shows the field.
The Data Picker tabs are Linked Template Entry, Pinned Entries, Pinned Queries, Component Data and Repeater Data. The tabs are icons, so hover one to see its name. The picker shows only the tabs that apply. Repeater Data appears only inside a Repeater.
To use a field of the page's own entry inside a Repeater, open the Linked Template Entry tab. A page field bound inside a Repeater shows the same value on every card, such as the entry's Title.
A freeform template has no Linked Template Entry tab, so use Pinned Entries or Pinned Queries there.
Switch a Repeater between Design and Preview
A new Repeater starts in Design. In Design, the canvas shows what's inside the Repeater once, so you can edit it. In Preview, the canvas repeats what's inside for each item in the preview entry.
-
Select the Repeater in Layers.
-
In the Settings tab, under Configuration, find Repeater Mode. Design is on the left and Preview is on the right.
-
Switch it to Preview.
The canvas repeats the PostCard for each item in the preview entry. The info icon beside Repeater Mode says "View the Repeater in action using real-time data."
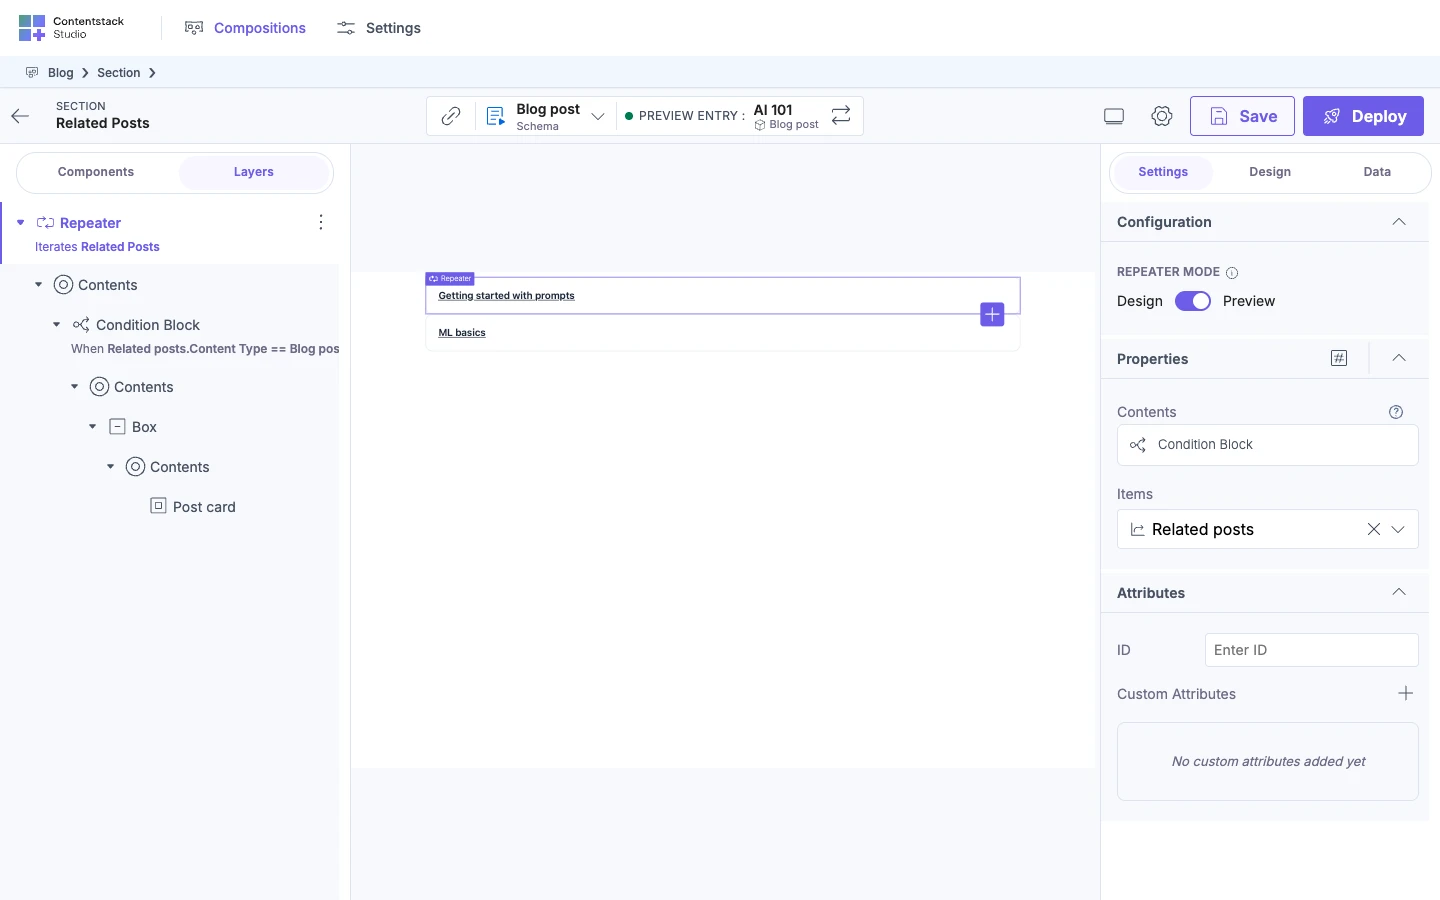
Switching the mode on one Repeater also switches every Repeater, Condition Block and section nested with it.
Preview shows the preview entry you selected. To check another entry, see Preview with a different entry.
Nest one Repeater inside another
To list items inside each item, nest a second Repeater. In the example, Post chapters, post_chapters, is a section linked to Blog post. Its outer Repeater is over chapters and its inner one is over each chapter's links. For AI 101, the Basics chapter has the links Models and Prompts.
-
Create the Post chapters section and connect Blog post to it.
-
Add a Repeater and bind its Items to
chapters, as in Add a Repeater and bind its items. -
Put a Text in the outer Repeater and bind it to the chapter's
title, as in Bind a component to each item. -
Drop the inner Repeater into the outer one. Studio puts the inner one in a Box. The inner Repeater appears under the outer one in Layers.
-
Select the inner Repeater in Layers. The canvas outlines the inner items.
-
Bind its Items from the Repeater Data tab to a list field inside the outer item, such as
links.In a nested Repeater's picker, you can't select text fields such as Title. You can select list fields, such as Links.
-
Bind a component inside the inner Repeater, such as a Text bound to a link's
label. It binds to the inner item. The picker opens on Repeater Data for the inner item. -
Add Post chapters to the Blog post template, as in Drop a section onto the template.
The two Repeaters don't mix up their items, because each binding names its own Repeater.
If it doesn't work
-
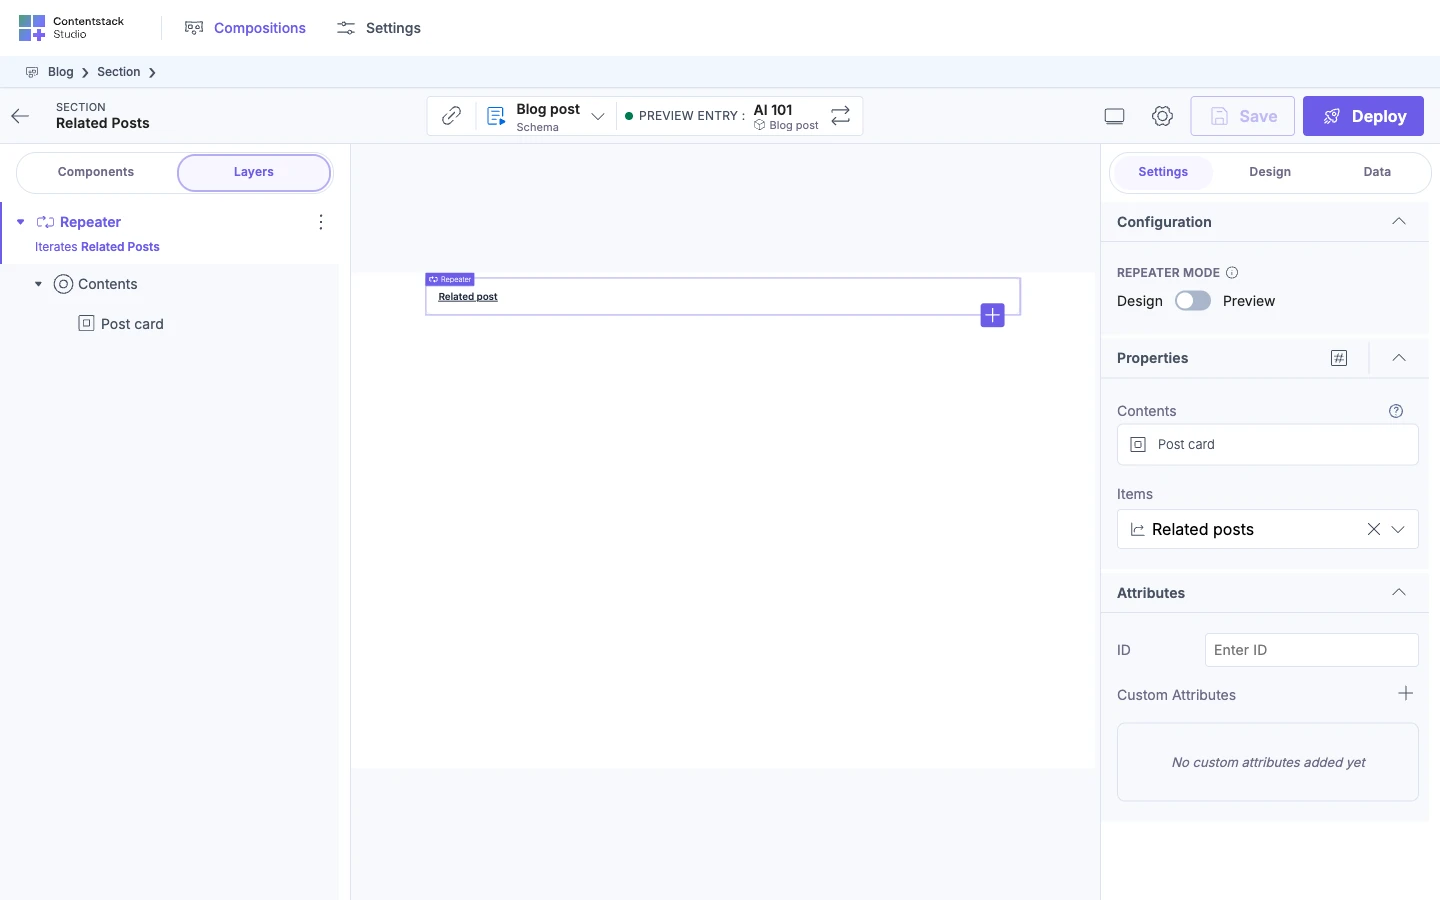
The canvas shows one card, not one per item. Repeater Mode is on Design. Switch it to Preview.
-
The Repeater shows nothing in Preview. The preview entry has no items in the field. Select an entry that has them. See Preview with a different entry.
-
In Layers, the Repeater reads "No source configured". Select the Repeater, click Bind items and select a list field.
-
Clicking a field does nothing while you bind a nested Repeater's Items. In a nested Repeater's picker, you can't select a field that isn't a list, such as a text, number or boolean field. The rows look like the others, your pointer shows a not-allowed cursor, and Studio shows no message. Select a list field, such as Links, instead.
To show a different layout for each type of item in a list, go to Render a list of mixed things.
For worked examples organized by the result you want, see Repeater recipes for common results.