Show or hide content with a condition
Use a Condition Block to show or hide part of a layout, depending on a field's value in the entry. A Condition Block shows what's inside it only when its condition is true.
The example on this page is the Blog post template, previewing AI 101. You wrap the Related posts section in a Condition Block that tests the Related posts field.
Prerequisites
- You have a template or a section open on the canvas.
- The Data Picker offers a field on that template or section. Condition Blocks test the field you select there.
- You have entries that differ in that field. In the example, AI 101 has two related posts and ML basics has none.
- The Related posts section is on the Blog post template.
What this is and what you get
A condition is made of a field, an operator and a value. When the condition is false, nothing takes its place.
Condition Block is in the Smart Containers group of the Components tab. It doesn't need a Repeater, so you can put one anywhere in a layout. On your live site, a Condition Block adds no element of its own, so it doesn't change your layout.
When you bind a Repeater over a modular blocks or reference field, Studio opens an Add Condition dialog and adds a Condition Block for each type you select. Render a list of mixed things covers that case.
A Condition Block isn't the same as Show/Hide on an element's menu. Show/Hide hides the element for every visitor. A Condition Block depends on the entry.
Add a Condition Block
-
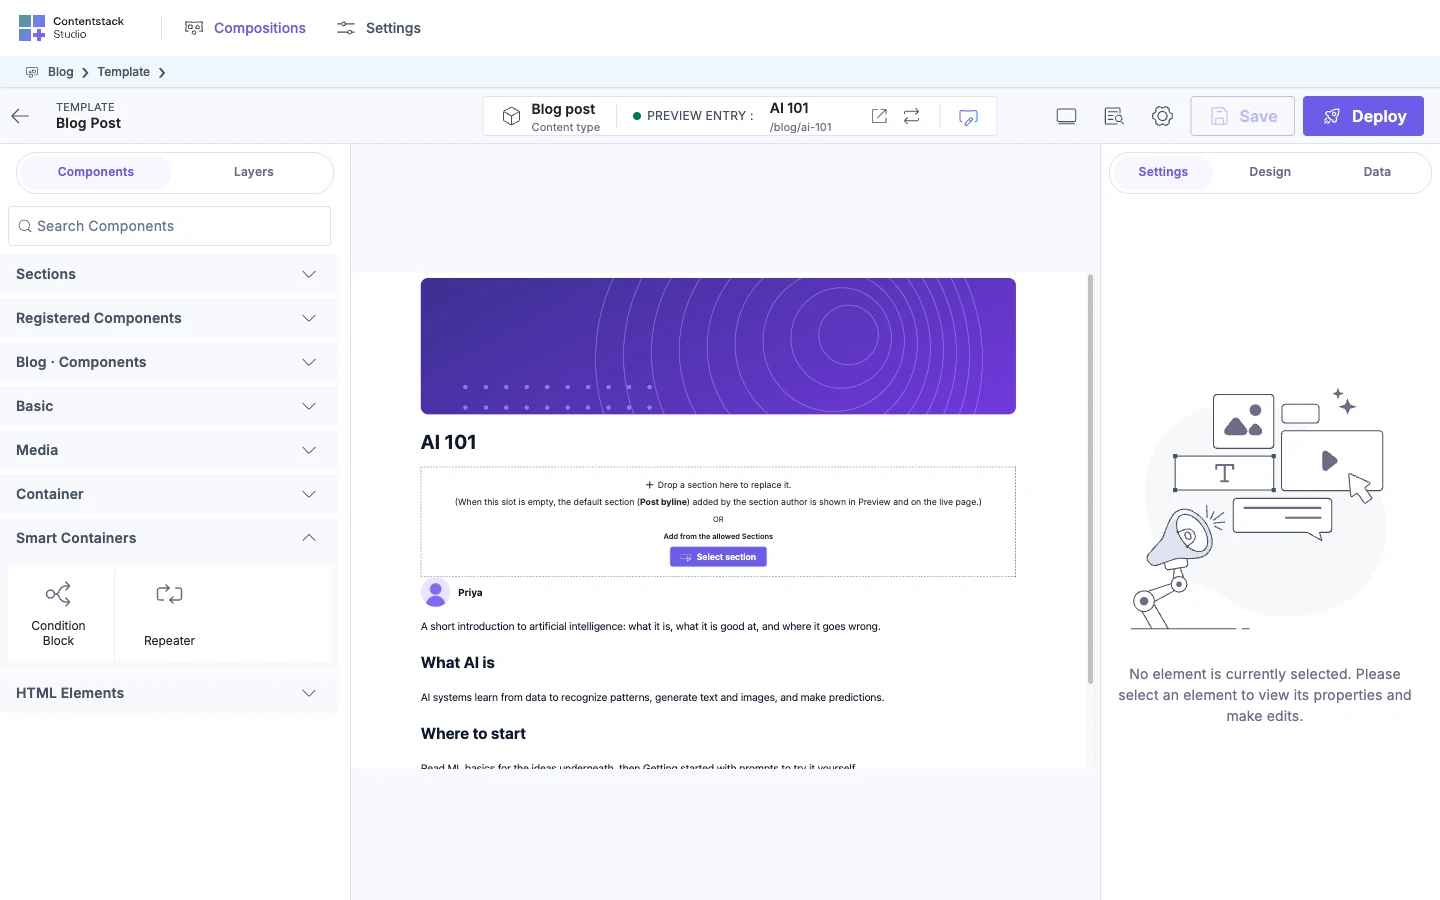
Open the Components tab, open Smart Containers, and drag Condition Block to where the content goes. A Condition Block appears in Layers.
-
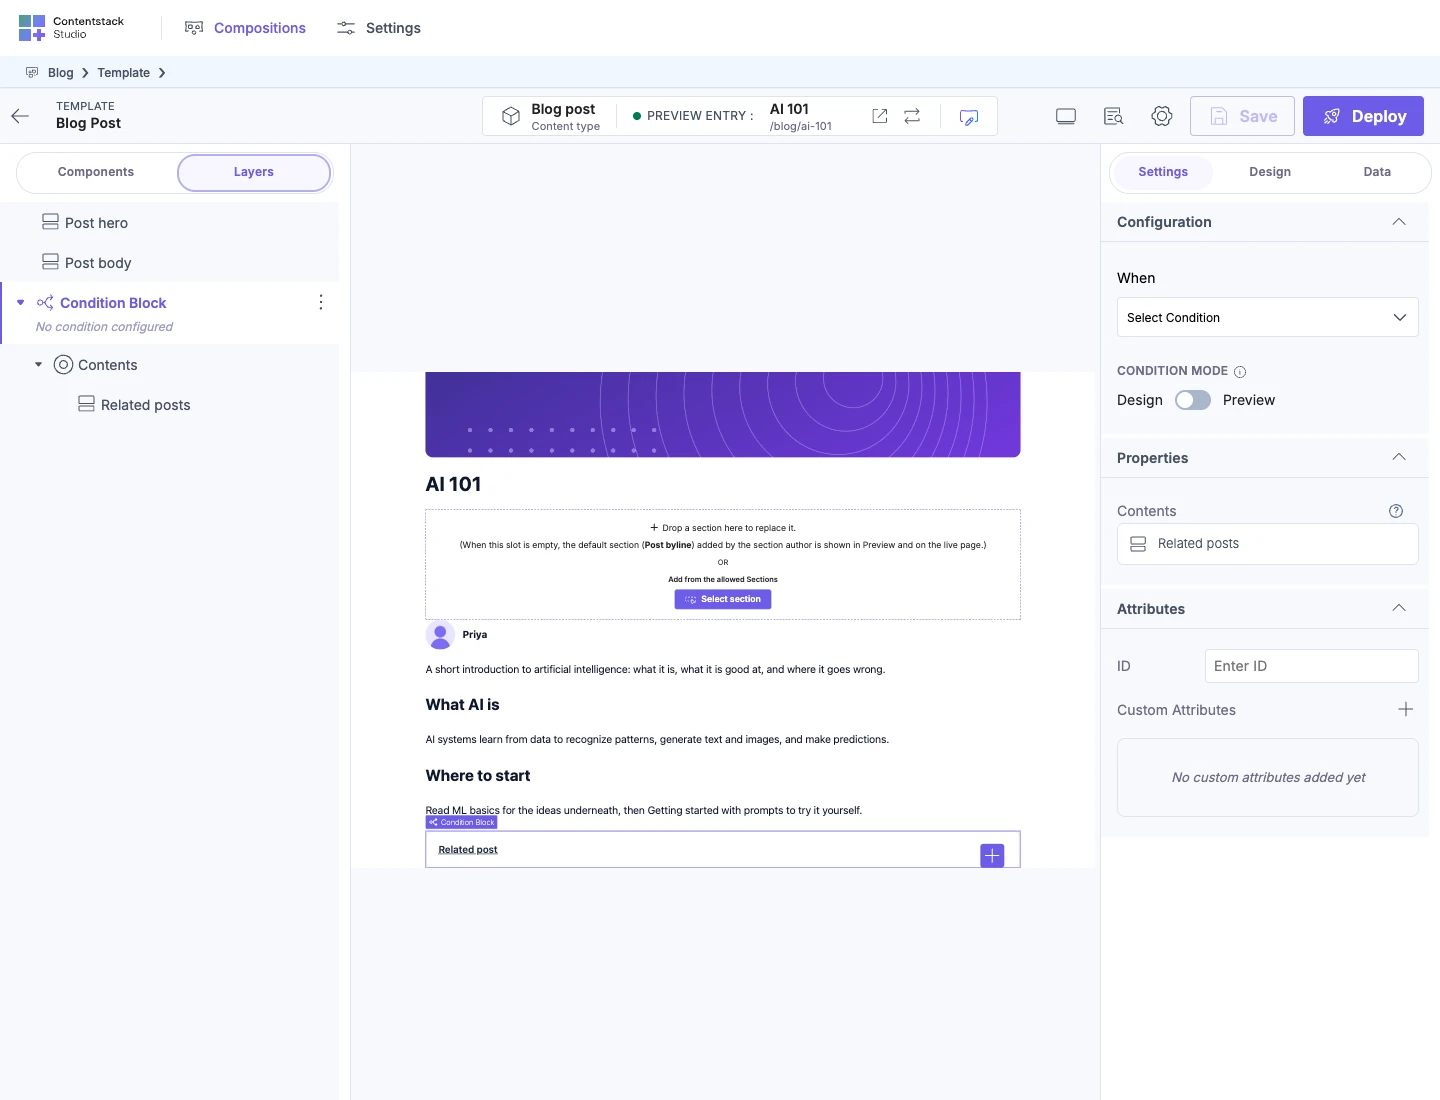
In Layers, drag the content you want to show or hide onto the Condition Block, such as the Related posts section. The section is then listed under Contents.
A new Condition Block is empty. It has one drop area, named Contents. A Condition Block can contain any number of elements.
-
Open the Layers tab and select the Condition Block's row. A Condition Block has no outline of its own, so you select it in Layers. For more on selecting, see Select and arrange elements.
The canvas outlines everything inside the Condition Block. A new Condition Block's row reads "No condition configured".
Set the condition
-
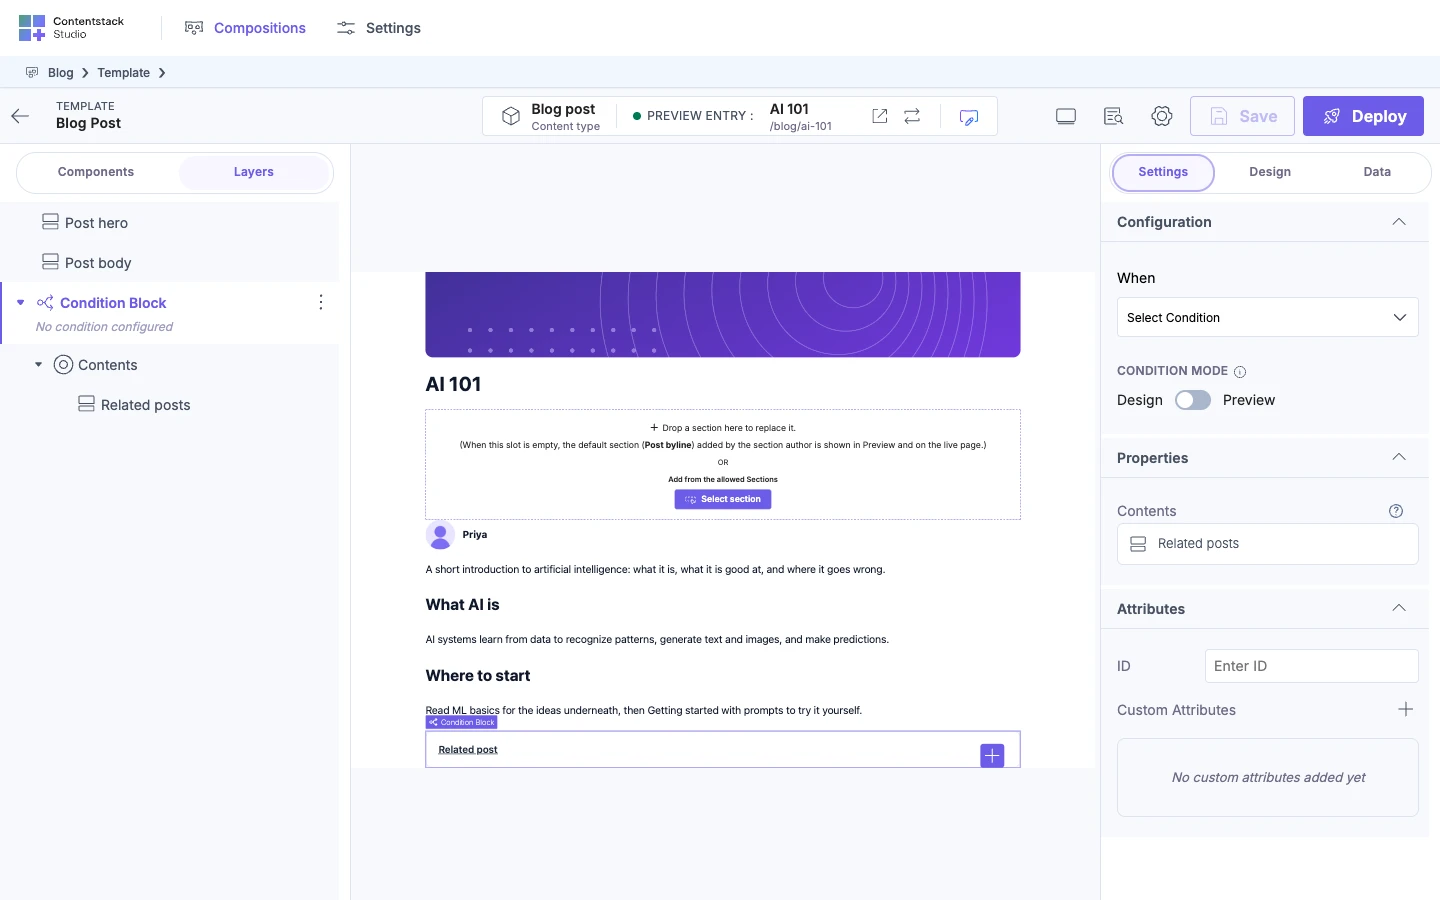
Select the Condition Block in Layers. In the Settings tab, under Configuration, When shows Select Condition.
-
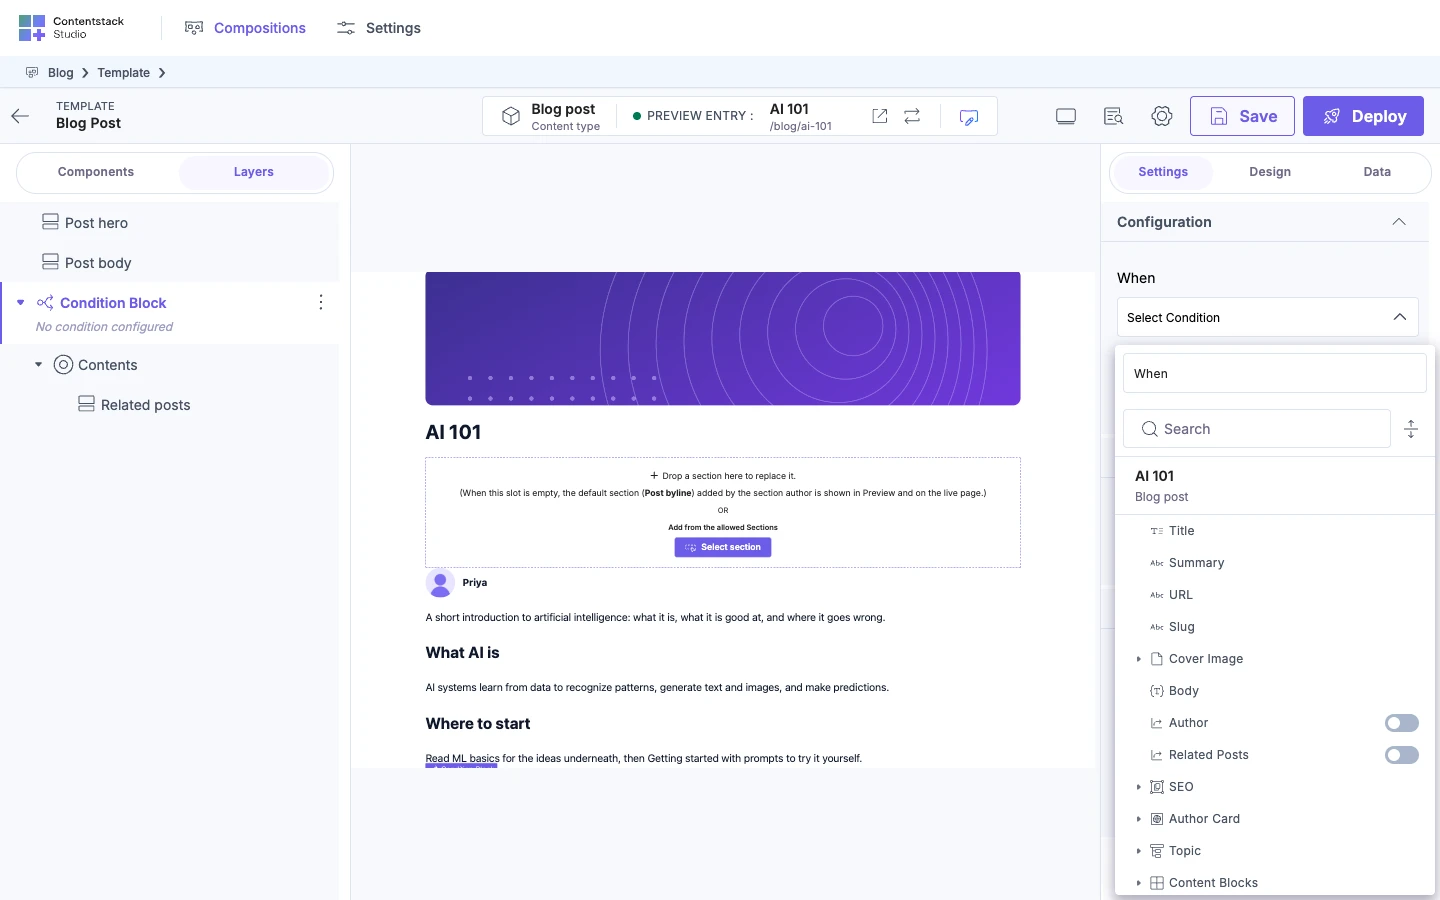
Click Select Condition. The Data Picker opens, the same one you use to bind a prop. Select the field to test, such as Related Posts.
The picker has the same tabs as for a prop: Linked Template Entry, Pinned Entries, Pinned Queries, Component Data and Repeater Data. The tabs are icons, so hover one to see its name. It shows only the tabs that apply. On a connected template, the Linked Template Entry tab lists the entry's fields, such as Related Posts. Inside a Repeater, the picker opens on Repeater Data, so the condition tests the current item.
-
If Studio asks which part to test, select one. A text, number, date, boolean or single select field opens the operator list. For an asset, a reference, modular blocks, a multiple select or a list field, Studio asks first. For Related posts, the parts are Content Type, Length and Presence. Select Length. The operator list opens.
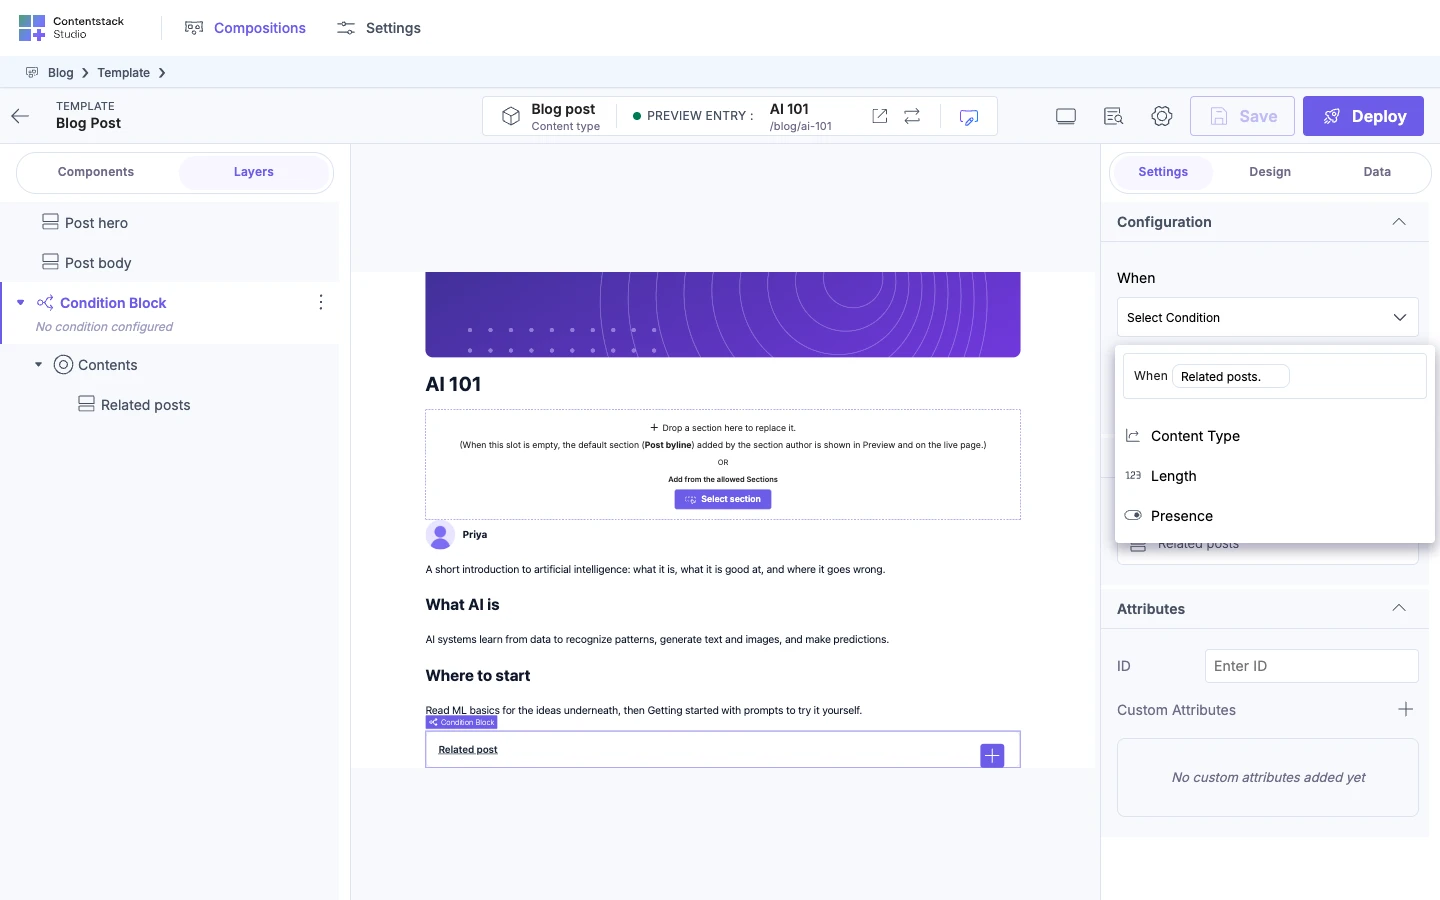
-
Select the operator. The list shows each operator's name, with its symbol where it has one, such as Greater Than and >. Select Greater Than. The value box opens. For the operators each field offers, see Common operators by field type.
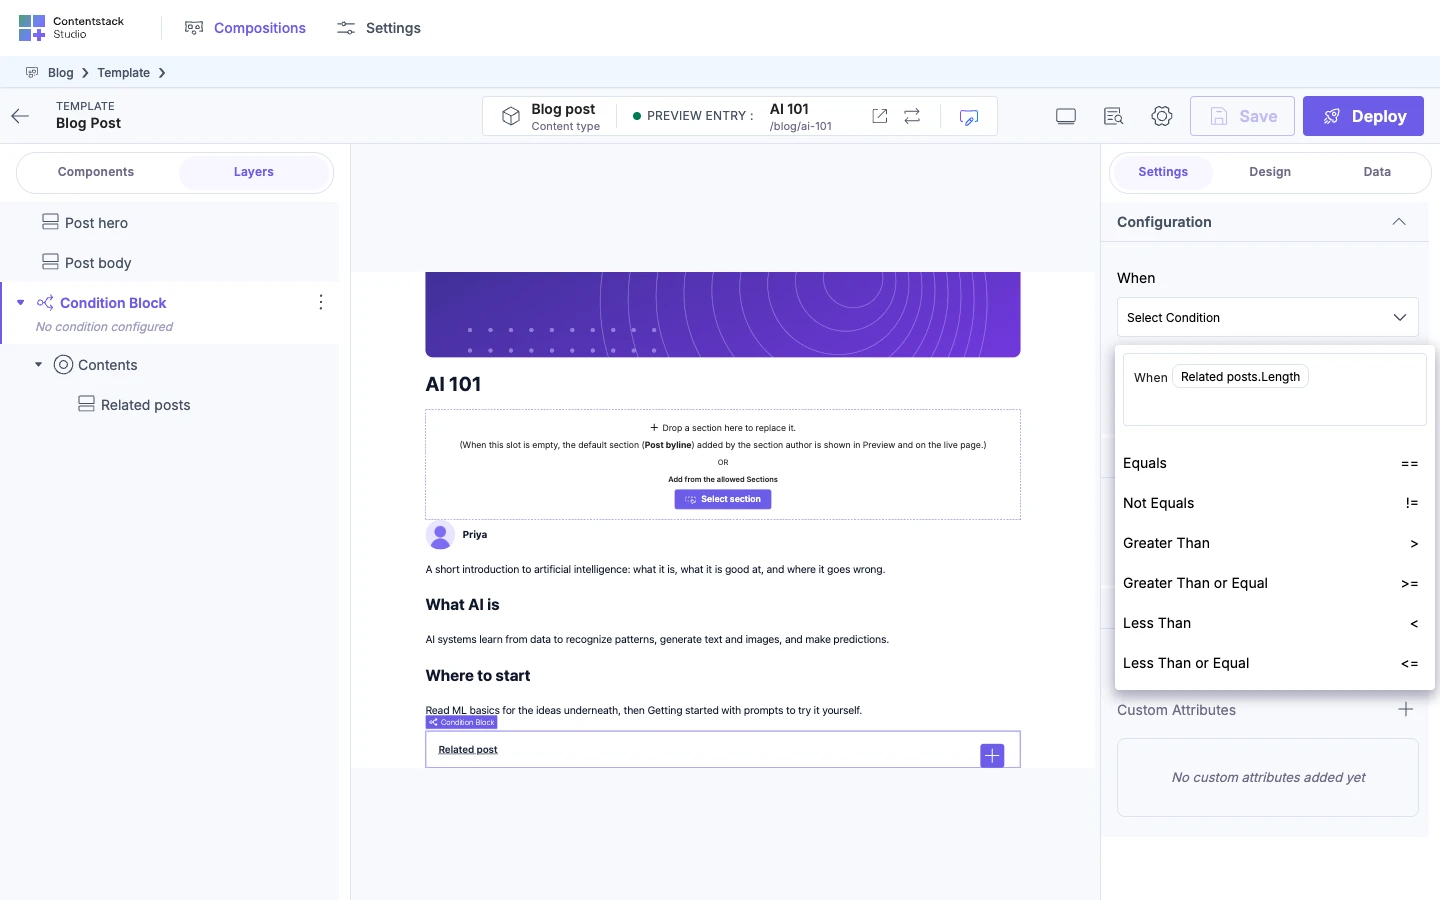
-
Enter the value. For text, number and date fields, type it and press Enter. A date field's value box is a date input. For boolean, select, Content Type and Block Name values, you select from a list. A boolean field's list is True and False. For Related posts, type 0 and press Enter.
These operators take no value: Is empty, Is not empty, Exists and Does not exist. Studio saves the condition when you select one.
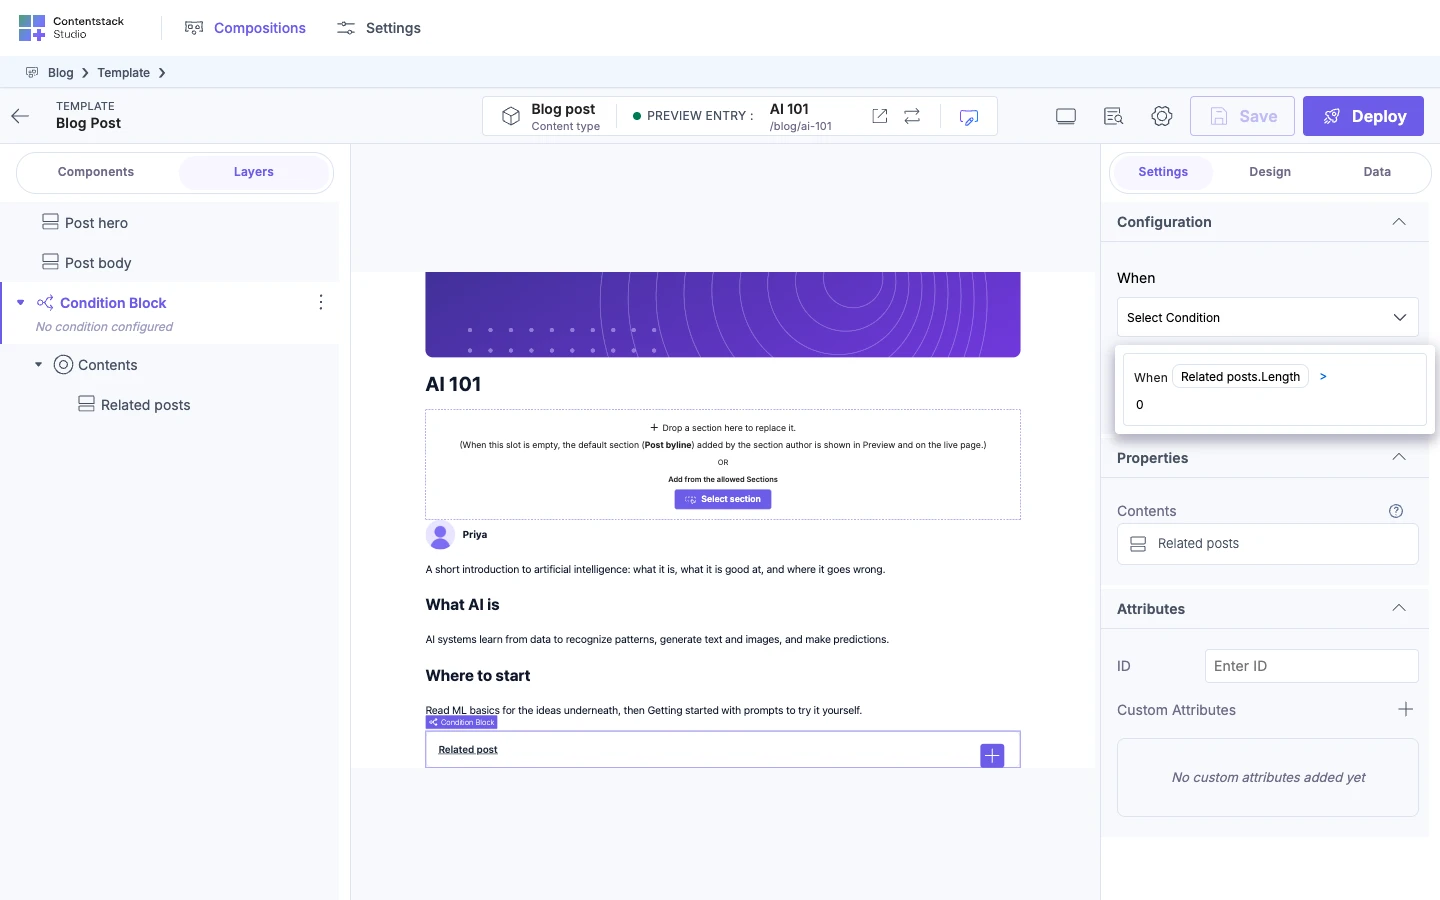
After you enter the value, the row under When shows the field, the operator and the value, such as Related posts.Length > 0. The Condition Block's row in Layers now starts with "When" and describes the condition. It no longer reads "No condition configured".
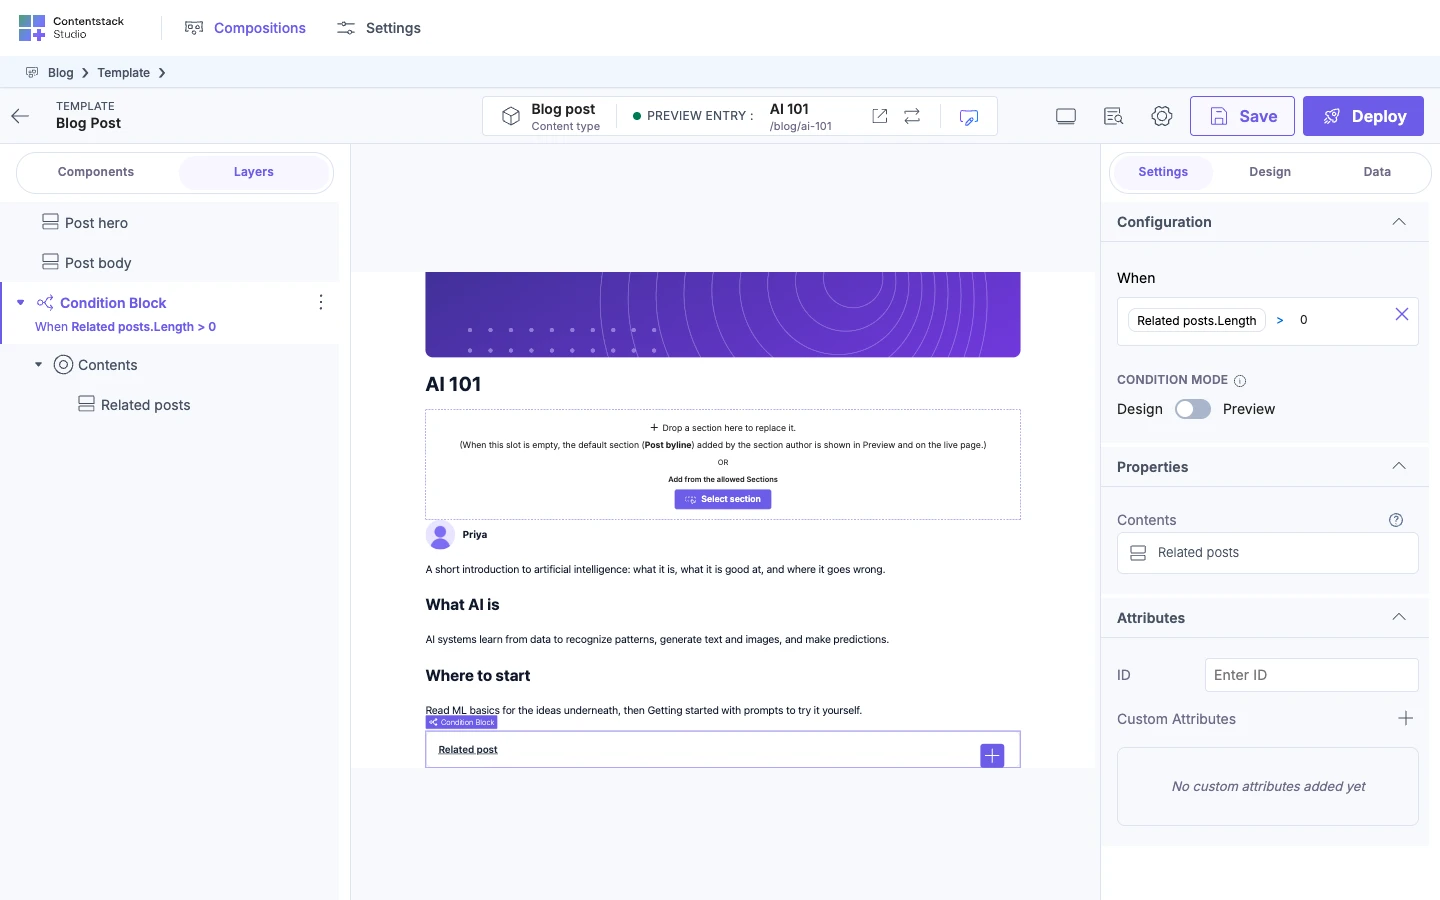
If you click away before you enter the value, Studio doesn't save the condition, and When shows Select Condition again.
You type the value or select it from a list. It can't be another field.
Check the condition in Preview
A new Condition Block starts in Design. In Design, the canvas always shows what's inside the Condition Block, whether or not the condition is true. Switch to Preview to see what the condition does.
-
Select the Condition Block in Layers.
-
In the Settings tab, under Configuration, find Condition Mode. Design is on the left and Preview is on the right.
-
Switch it to Preview.
In Preview, the canvas shows what's inside only when the condition is true for the preview entry. The info icon beside Condition Mode says "View the Condition Block in action using real-time data."
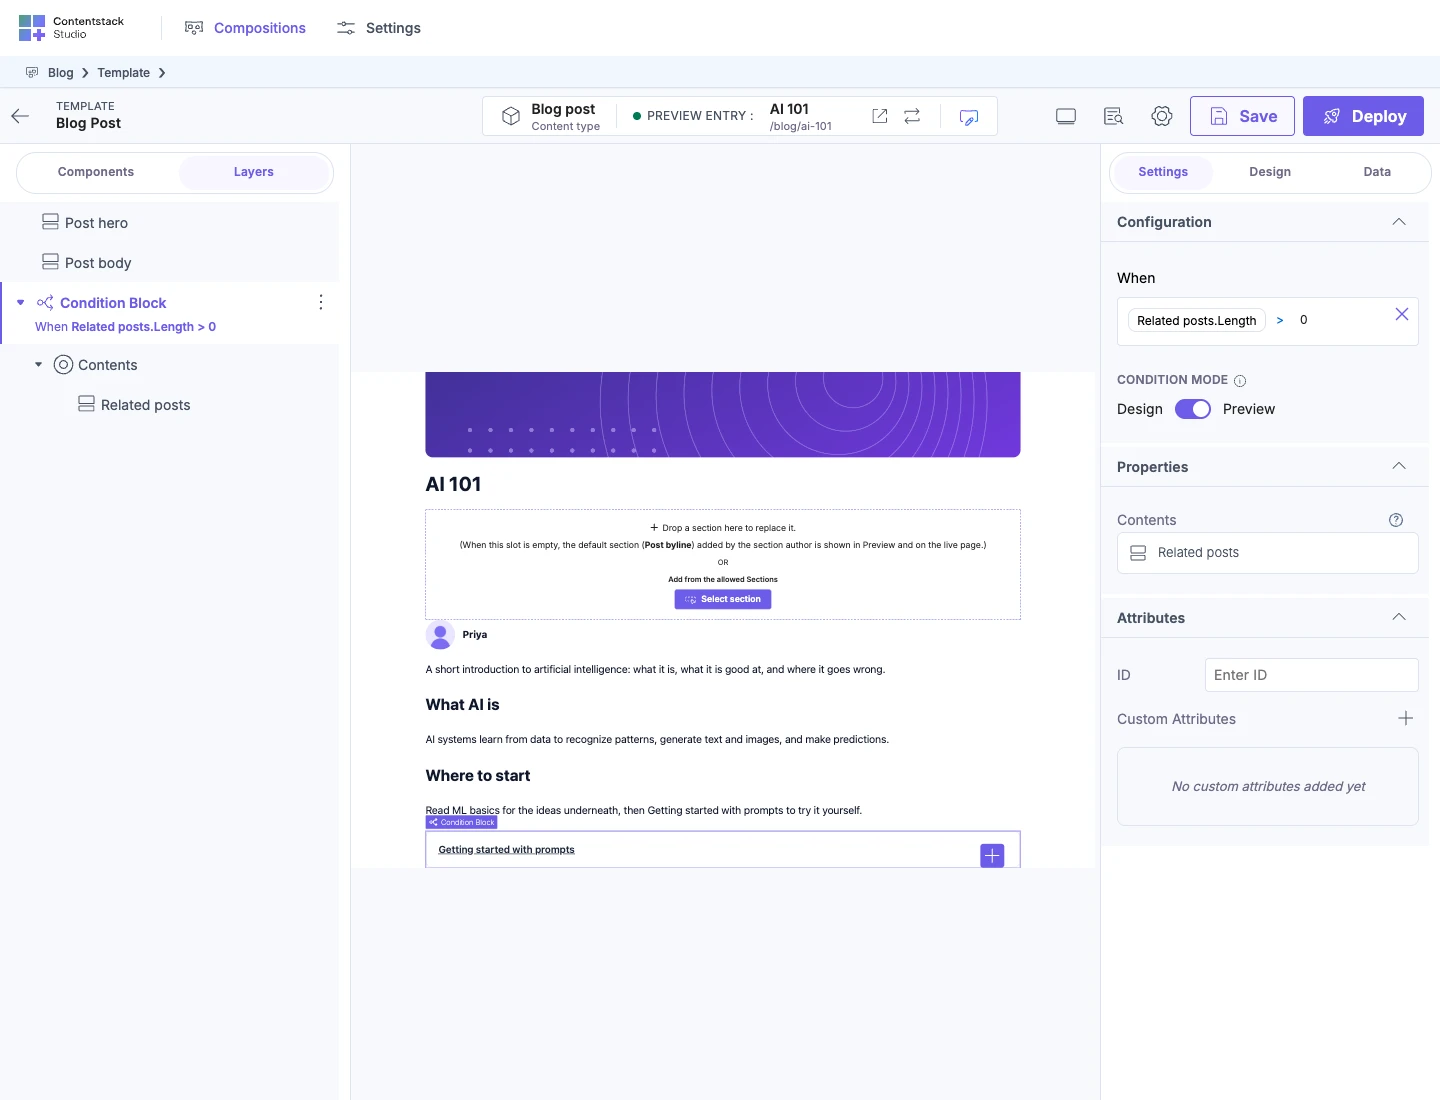
-
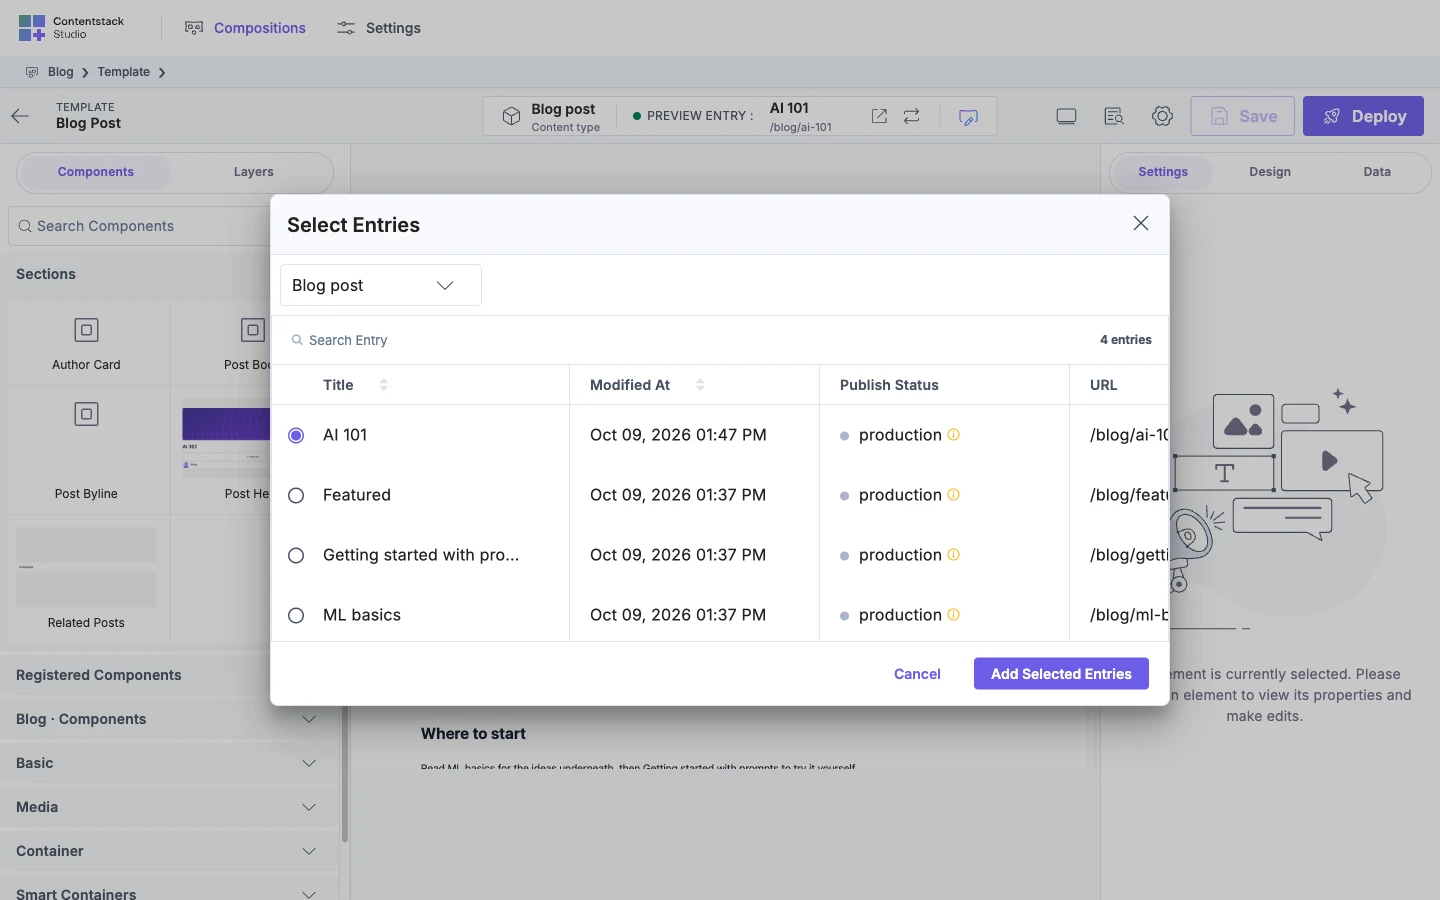
To check the other case, select another preview entry, such as ML basics, which has no related posts. See Preview with a different entry. The Related posts section disappears from the canvas.
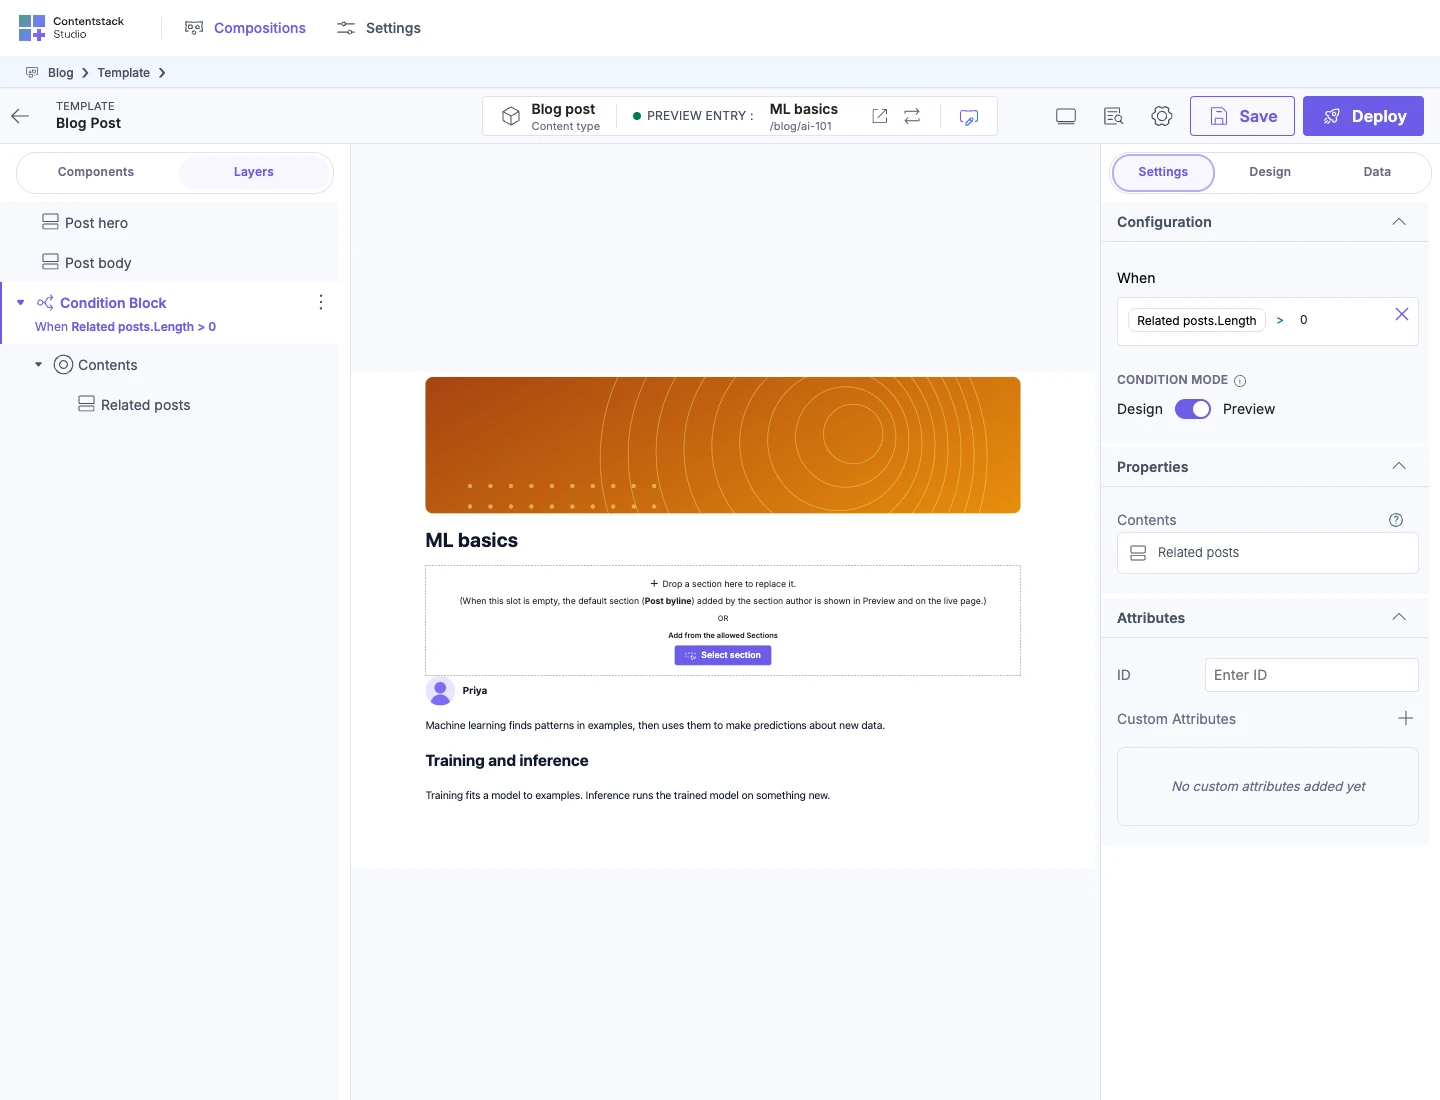
Switching Condition Mode on one block also switches every Repeater, Condition Block and section nested with it.
Your live site always checks the condition. Design and Preview only change the canvas. A Condition Block with no condition shows nothing in Preview and on your live site.
Change or remove a condition
-
To change the value. Select the Condition Block in Layers and click the condition under When.
-
To change the field or the operator. Clear the condition and build it again. Click the close icon beside the condition to clear it. The Condition Block stays, and its row in Layers reads "No condition configured" again.
-
To remove the block. Delete it like any element. Delete removes it and everything inside it. Undo brings it back. To keep what's inside, drag it out of the Condition Block in Layers before you delete the block.
Common operators by field type
These are the operators for the field types you test most. For every field type, see Condition operators.
| Field type | Part you select first | Operators |
|---|---|---|
| Text | None | Equals, Not Equals, Contains, Starts with, Ends with, Matches, Is empty, Is not empty, Exists, Does not exist |
| Number or date | None | Equals, Not Equals, Greater Than, Greater Than or Equal, Less Than, Less Than or Equal, Exists, Does not exist, Is empty, Is not empty |
| Reference | Content Type, Length or Presence | Content Type offers Equals, and you select one of the field's content types |
Length and Presence offer the same operators on every field that asks for them.
| Part | Operators | Value |
|---|---|---|
| Length | Equals, Not Equals, Greater Than, Greater Than or Equal, Less Than, Less Than or Equal | A number |
| Presence | Exists, Does not exist, Is empty, Is not empty | None |
What a Condition Block can't do
- A Condition Block has no else branch. To show something when the condition is false, add a second Condition Block with its own condition.
- Studio checks each of two neighboring Condition Blocks on its own, so both show when both conditions are true.
- A Condition Block has one condition. You can't combine fields with "and" or "or" in one block.
- A condition can't test a value you typed into a prop's Settings form. The picker doesn't list typed values.
If it doesn't work
-
The canvas shows the content whether or not the condition is true. Condition Mode is on Design. Switch it to Preview.
-
The content is missing in Preview or on your live site. The condition isn't true for that entry, or the block has no condition. Check the Layers row, or preview another entry. See Preview with a different entry.
-
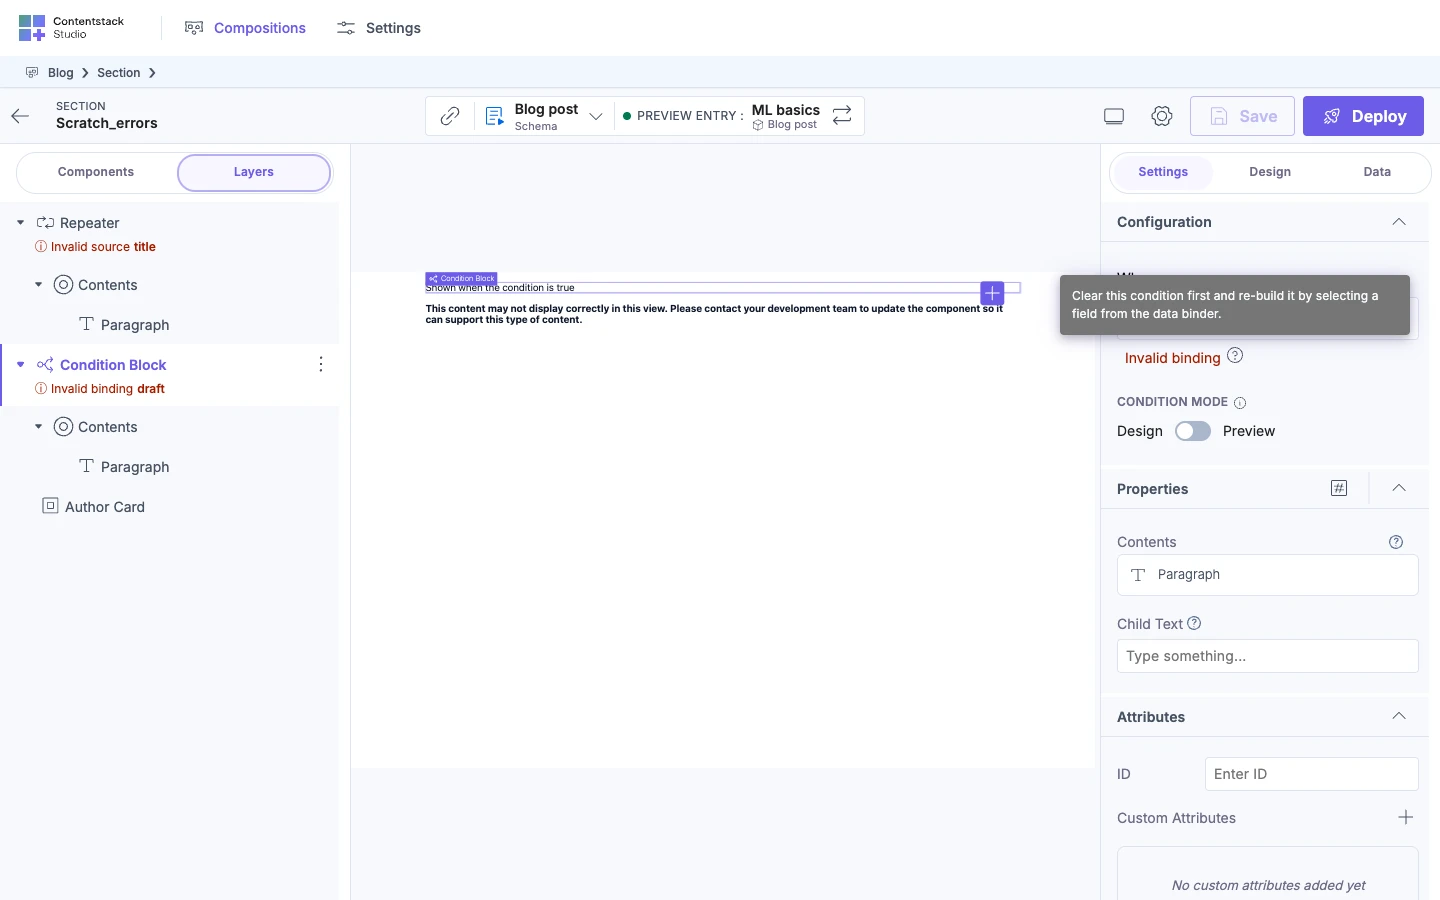
When shows "Invalid binding" and an info icon. The icon's text reads:
Clear this condition first and re-build it by selecting a field from the data binder.
Layers shows "Invalid binding" and the value the condition compares against beside the Condition Block. Click the close icon to clear the condition, then select the field again from the Data Picker.
-
A field in the picker can't be selected. Studio can't test a group field itself, such as SEO. Select a field inside it, such as Canonical under SEO, or a field of a type listed in Condition operators.
-
When goes back to Select Condition after you selected a field. If you leave before you enter the value, Studio discards the condition. Select the field again and finish with the value.
-
Dropping onto a Condition Block shows "Condition blocks inside this repeater can only have one child container." The block already contains one container, inside a Repeater over modular blocks or references. See Render a list of mixed things.
To bind a Condition Block's content to each item of a list, go to Render a list.
For worked examples organized by the result you want, see Repeater recipes for common results.