Promote across environments
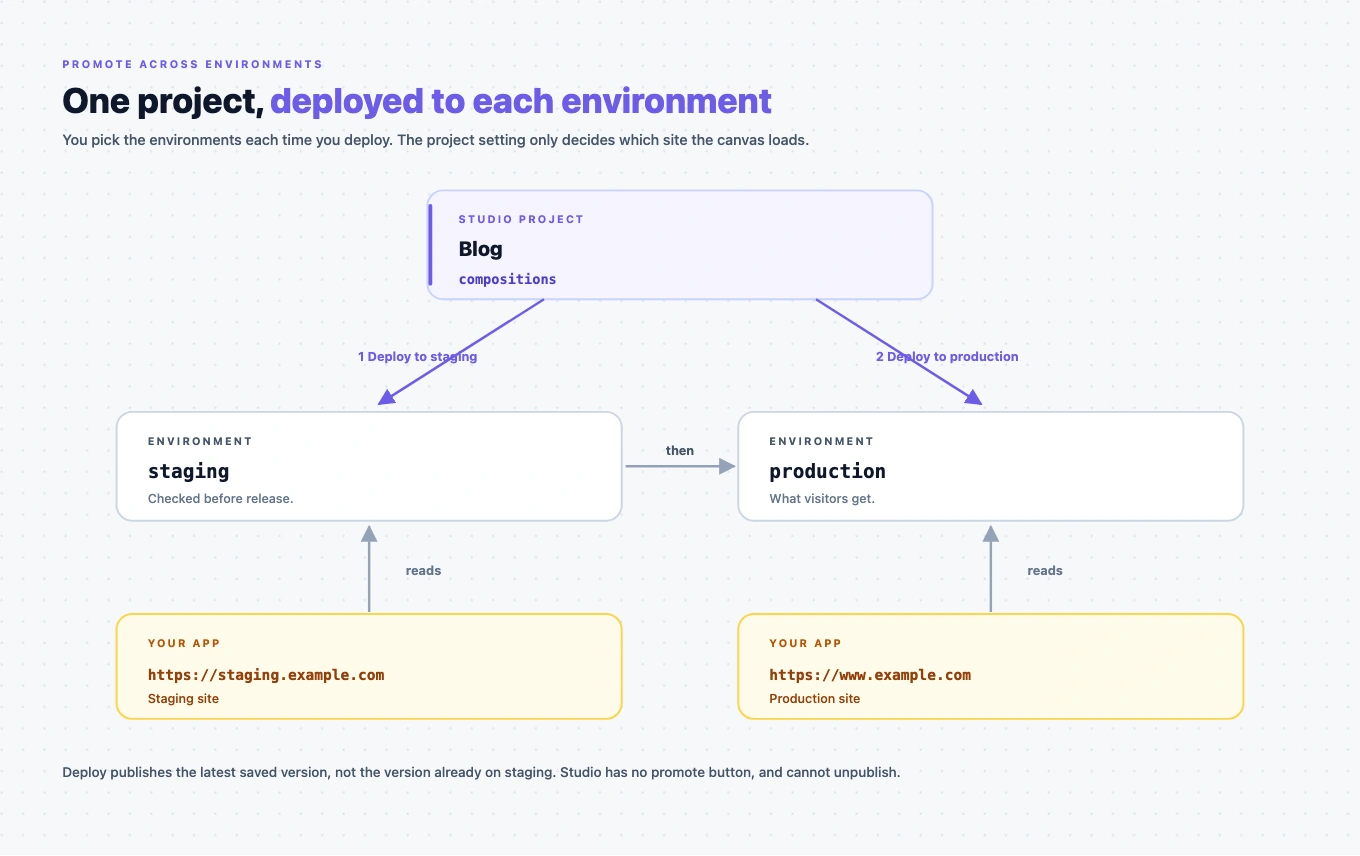
Studio has no promote button. You promote a template by deploying it to staging, checking the staging site, then deploying it again to production.
The example on this page is the Blog post template, previewing AI 101, deployed to staging and then production.
Prerequisites
- A second environment on your stack, such as
staging, besidesproduction. For how to create one and give it URLs, see the Contentstack docs on environments. - A URL for English on
staging, such ashttps://staging.example.com. You need it to open the staging site and to load it in the canvas. - A copy of your site running against
staging. In the example, the staging site runs withNEXT_PUBLIC_CONTENTSTACK_ENVIRONMENTset tostaging, and the production site withproduction. - A saved template, such as Blog post.
What promotion is and what you get
Each template and section is an entry of your project's composition content type, such as compositions. Deploy publishes that entry to the environments you tick, through Contentstack's publish API.
You pick the environments each time you deploy. The project doesn't decide where Deploy publishes. The project's Environment setting only decides which site the canvas loads.
Studio has no workflow, approval or scheduling screens. Those stay in Contentstack.
Use one project for all your environments
Use one project, such as Blog, and pick staging or production each time you deploy.
Don't create a project per environment. Creating a project creates a new composition content type for it. Studio won't reuse a content type that already exists, so a second project on the same stack gets a second content type.
So three projects on one stack means three separate sets of templates and sections. Your site's Studio SDK reads one content type, set by contentTypeUid, so it only sees one project's templates.
Deploy the Blog post template to staging, then production
For more on the Deploy dialog and the two Send buttons, see Save, preview, deploy.
-
Open the Blog post template and click Deploy. If you have unsaved changes, Studio saves them first.
The Deploy Template dialog opens, or Deploy Section for a section. Under Select Target Environments, it lists every environment on your stack, with its first URL or "No URL configured".
-
Tick
stagingonly. Select All ticks every environment, and reads Unselect All when they're all ticked.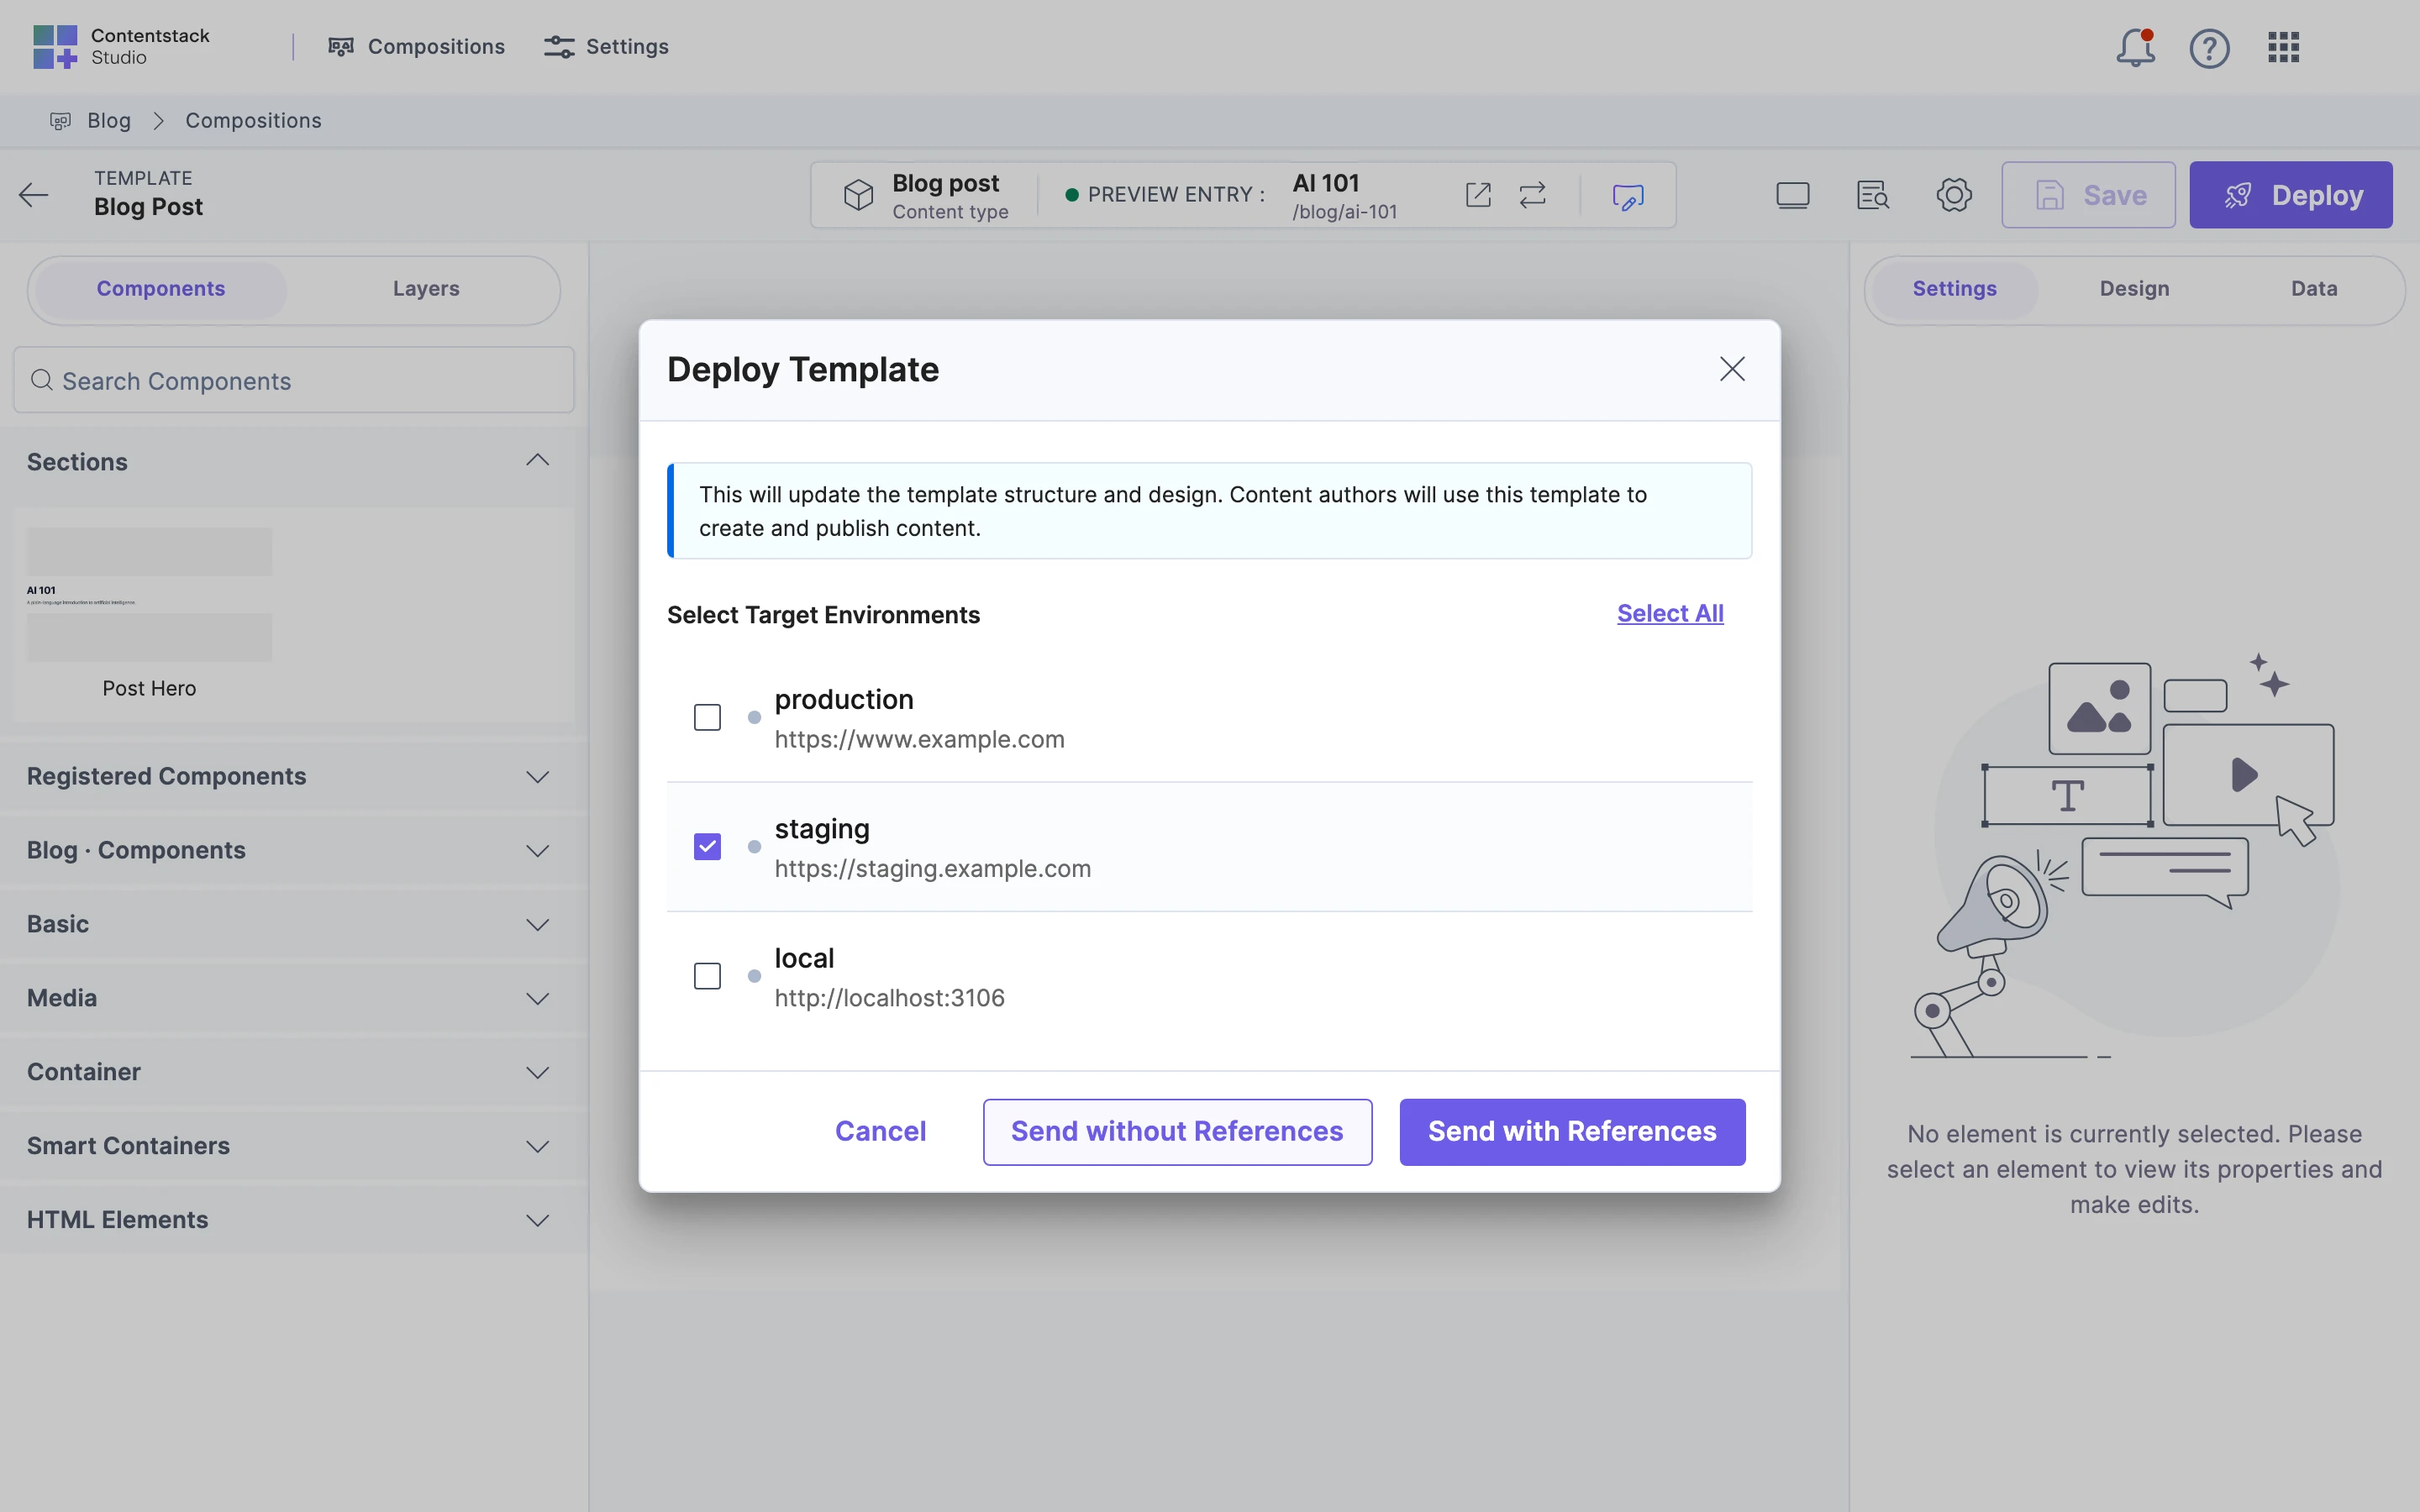
-
Click Send with References. Both Send buttons stay greyed out until you tick an environment.
Studio shows "Template Published Successfully", or "Section Published Successfully" for a section.
The Publish Status column of the Templates list now shows
stagingfor Blog post. A template that isn't deployed anywhere shows "Not Published". -
Publish AI 101 to
stagingin Contentstack too, if it isn't there yet. Deploy doesn't publish your content, so without it the staging site has no content for the post. -
Open
https://staging.example.com/blog/ai-101and check the new layout. -
When staging looks right, click Deploy again, tick
production, and click Send with References.The Publish Status column now shows
stagingandproductionfor Blog post.
Deploy publishes the latest saved version, not the version on staging. If anyone saved the template since your staging deploy, production gets their changes too.
Load the staging site in the canvas
The canvas loads your site from the Base URL, which is the URL of the project's environment for the project's language. To check your edits against the staging site, switch the canvas to staging.
-
Click Configuration in the canvas top bar.
-
Pick
stagingunder Environment, and click Save.The dialog shows the Base URL for your pick,
https://staging.example.com.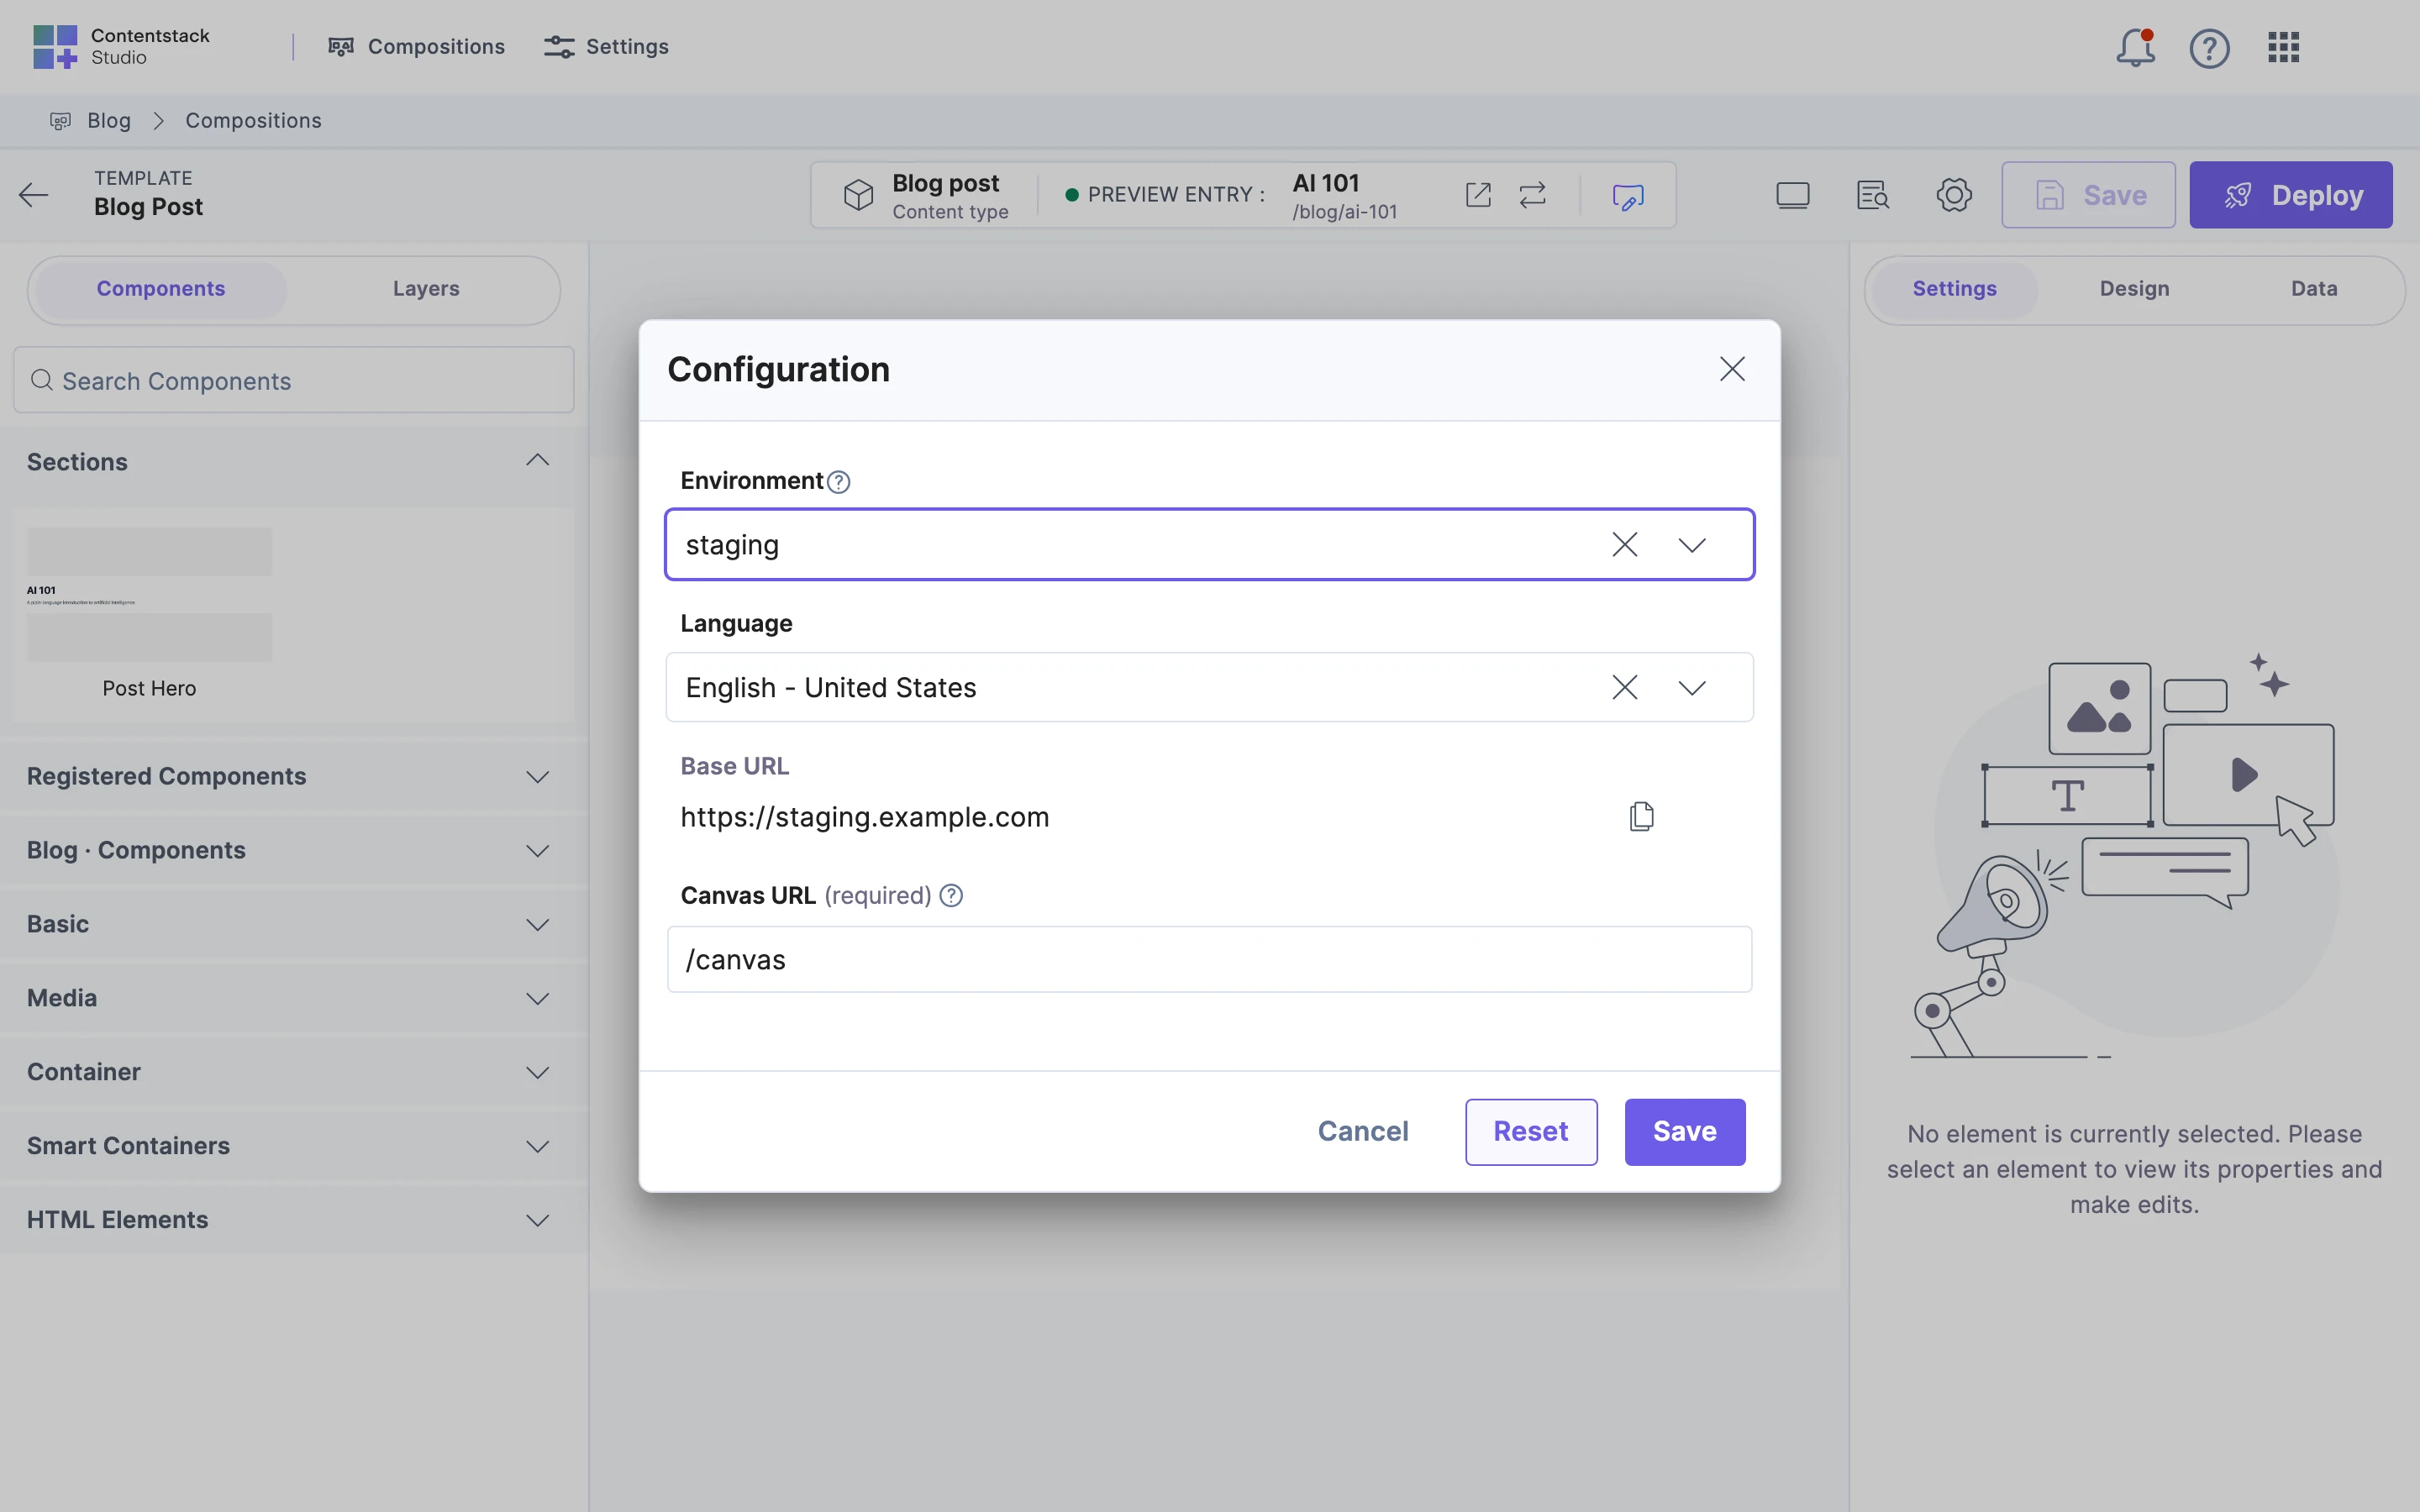
Studio keeps that choice only in your browser, for this project. Reset goes back to the project's settings. To change it for everyone, change Environment on the project's Configuration tab in Settings. See Pick the environment.
The canvas always shows your edits as you make them, whichever environment it loads.
Changing the environment in the canvas doesn't change where Deploy publishes. You tick environments in the Deploy dialog.
Approvals and workflows when you deploy
Deploy asks Contentstack to apply your stack's publish approval rules. Send with References skips workflow stage checks. Send without References doesn't.
When Contentstack refuses the publish, Studio shows Contentstack's error message, or "Failed to deploy the template".
These docs don't yet cover what an author sees when an approval rule holds back a deploy. To set up workflows and approvals, see the Contentstack docs on workflows and publish rules.
Who can change or deploy a layout
Studio has no roles of its own. It saves and deploys as you, so your stack role decides what you can do. For how roles work, see the Contentstack docs on stack roles.
These docs don't yet say which role permissions on the compositions content type stop someone saving or deploying in Studio.
Schedule a Deploy in Contentstack
Deploy publishes straight away. The Deploy dialog has no date or time, so Studio can't schedule a Deploy.
These docs don't yet say whether you can schedule the publish of a composition entry in Contentstack. Until they do, deploy at the time you want the change to go out.
What Studio can't do across environments
- Promote the exact version that's on
staging. Deploy always publishes the latest saved version. - Warn you about someone else's save. Studio doesn't tell you if someone saved the template after you opened it.
- Show version history. Studio has no version history, and no visual comparison between versions.
- Unpublish. Studio can't take a template off an environment.
If it doesn't work
-
You deployed to the wrong environment. Deploy again to the right one. Studio can't remove the template from the wrong one.
-
The staging site shows production content. The site's
NEXT_PUBLIC_CONTENTSTACK_ENVIRONMENTnames the wrong environment. Set it tostaging. -
The canvas shows staging, but your change went to production. The canvas and the Deploy dialog pick environments separately. Check the ticks in the dialog.
-
Deploy fails with a message from Contentstack. A publish rule, a workflow stage or your role stopped it. Ask whoever manages your stack.
-
A section is missing on the staging site. You deployed with Send without References. Deploy again with Send with References.
-
The new layout is on staging, but AI 101's content is old or missing. AI 101 isn't published to
staging. Publish it in Contentstack. -
Deploy is greyed out. The project's environment has no URL for its language, so Studio shows the Playground canvas and turns Deploy off. The tooltip says "Deployment is disabled in the playground." Add the URL to the environment in Contentstack.

-
Production shows the old layout after a deploy. Your app or a CDN is caching the page. See Caching and invalidation.