Templates
Two audiences on this page. Content authors: read the two sentences below then jump to For Authors: Working with Templates. The React / Next.js analogy in the callout is engineering context. You don’t need it. Developers: keep reading. The React / Next.js callout gives you the mental-model bridge.
A template is a full page connected to a content type. One template renders every entry of that content type. Write the layout once, publish many pages.
For Engineers: Think of a Template as a Studio Page
Studio’s terminology lines up neatly with React: a Section is a Studio Component (composed React components + binding mapper + live preview), and a Template is a Studio Page, the page-level unit that composes Sections, owns the URL pattern, and carries the data-binding shape for every entry that hits that URL.
If you’re used to thinking in… The Studio equivalent is… A React component (<Button>, <Card>) registered for use A registered component in Studio A composed React component (<HeroStrip> made of <Heading> + <Subhead> + <CTA>) A Section, a Studio Component A Next.js page (app/blog/[slug]/page.tsx), which owns the URL, the data fetch and the layout A Template, a Studio Page The win: where a Next.js page bakes URL + data + layout into code that ships through git/PR/deploy, a Template stores the same three things as data in the composition spec. The layout, the sections, the bindings, the per-instance overrides: all editable in the canvas, all shipped through Contentstack publish. New entries (or even brand-new content types) become new live URLs without touching the route file.
One Template renders many pages: a Connected template + N entries of the content type = N live URLs at /blog/{{entry.slug}} (or whichever pattern the template defines).
Do It With a Skill
build-connected-template scaffolds a Connected template: it drops sections, wires the linked-schema bindings and saves, so every entry of the content type renders at its derived URL.
curl -fsSL https://studio-documentation.contentstackapps.com/install.sh | sh
Unsure which kind of template you need? choose-connected-vs-freeform decides, then hands off to the matching builder.
When to Use a Template (and When Not To)
Studio templates are ONE of several patterns for adding Studio to a site. The right pattern depends on what kind of page you’re building:
| Page kind | What it is | Best Studio pattern |
|---|---|---|
| Content-driven (blog posts, product pages, recipes, author profiles, knowledge-base articles) | “One entry per URL”: page shape is constant. Content varies per entry | Connected template (this chapter), the canonical use case |
| Evergreen / functional (PDP, checkout, account, search results) | Engineered by devs, high conversion-cost, rarely re-laid-out | Embedded composition in a code-owned page: expose ONE bounded editable zone (a “shelf” inside the PDP). The rest stays code-owned. See 40-recipes/embedding-a-composition-in-a-code-owned-page.md |
| Code-driven app already shipping | You already own routes (/products/[slug], /collections/[slug]), adding Studio incrementally | Partial adoption: catch-all serves URLs not claimed by code routes, full-swap migration when ready. See 40-recipes/partial-adoption-coexisting-with-a-code-driven-app.md |
Templates are not the only entry point. This chapter covers the connected-template use case in depth, but if your goal is “expose one editable band on an existing PDP” or “add Studio without taking over my routes,” the embedded-composition + partial-adoption recipes are better fits.
Use templates for content-driven pages: blog posts, product pages, recipes, author profiles (anything where the page is “one entry per URL”).
How It Works
When you create a template, you pick a content type to connect it to. After that:
- Bindings inside the template resolve against the current entry: {{entry.title}}, {{entry.featured_image}}, {{entry.author.name}}, …
- The template renders at a URL Studio derives from the content type’s URL settings.
- Studio picks the right entry when a visitor lands on a URL.
Where Templates Render
Templates render at real URLs on your site, not on the canvas URL.
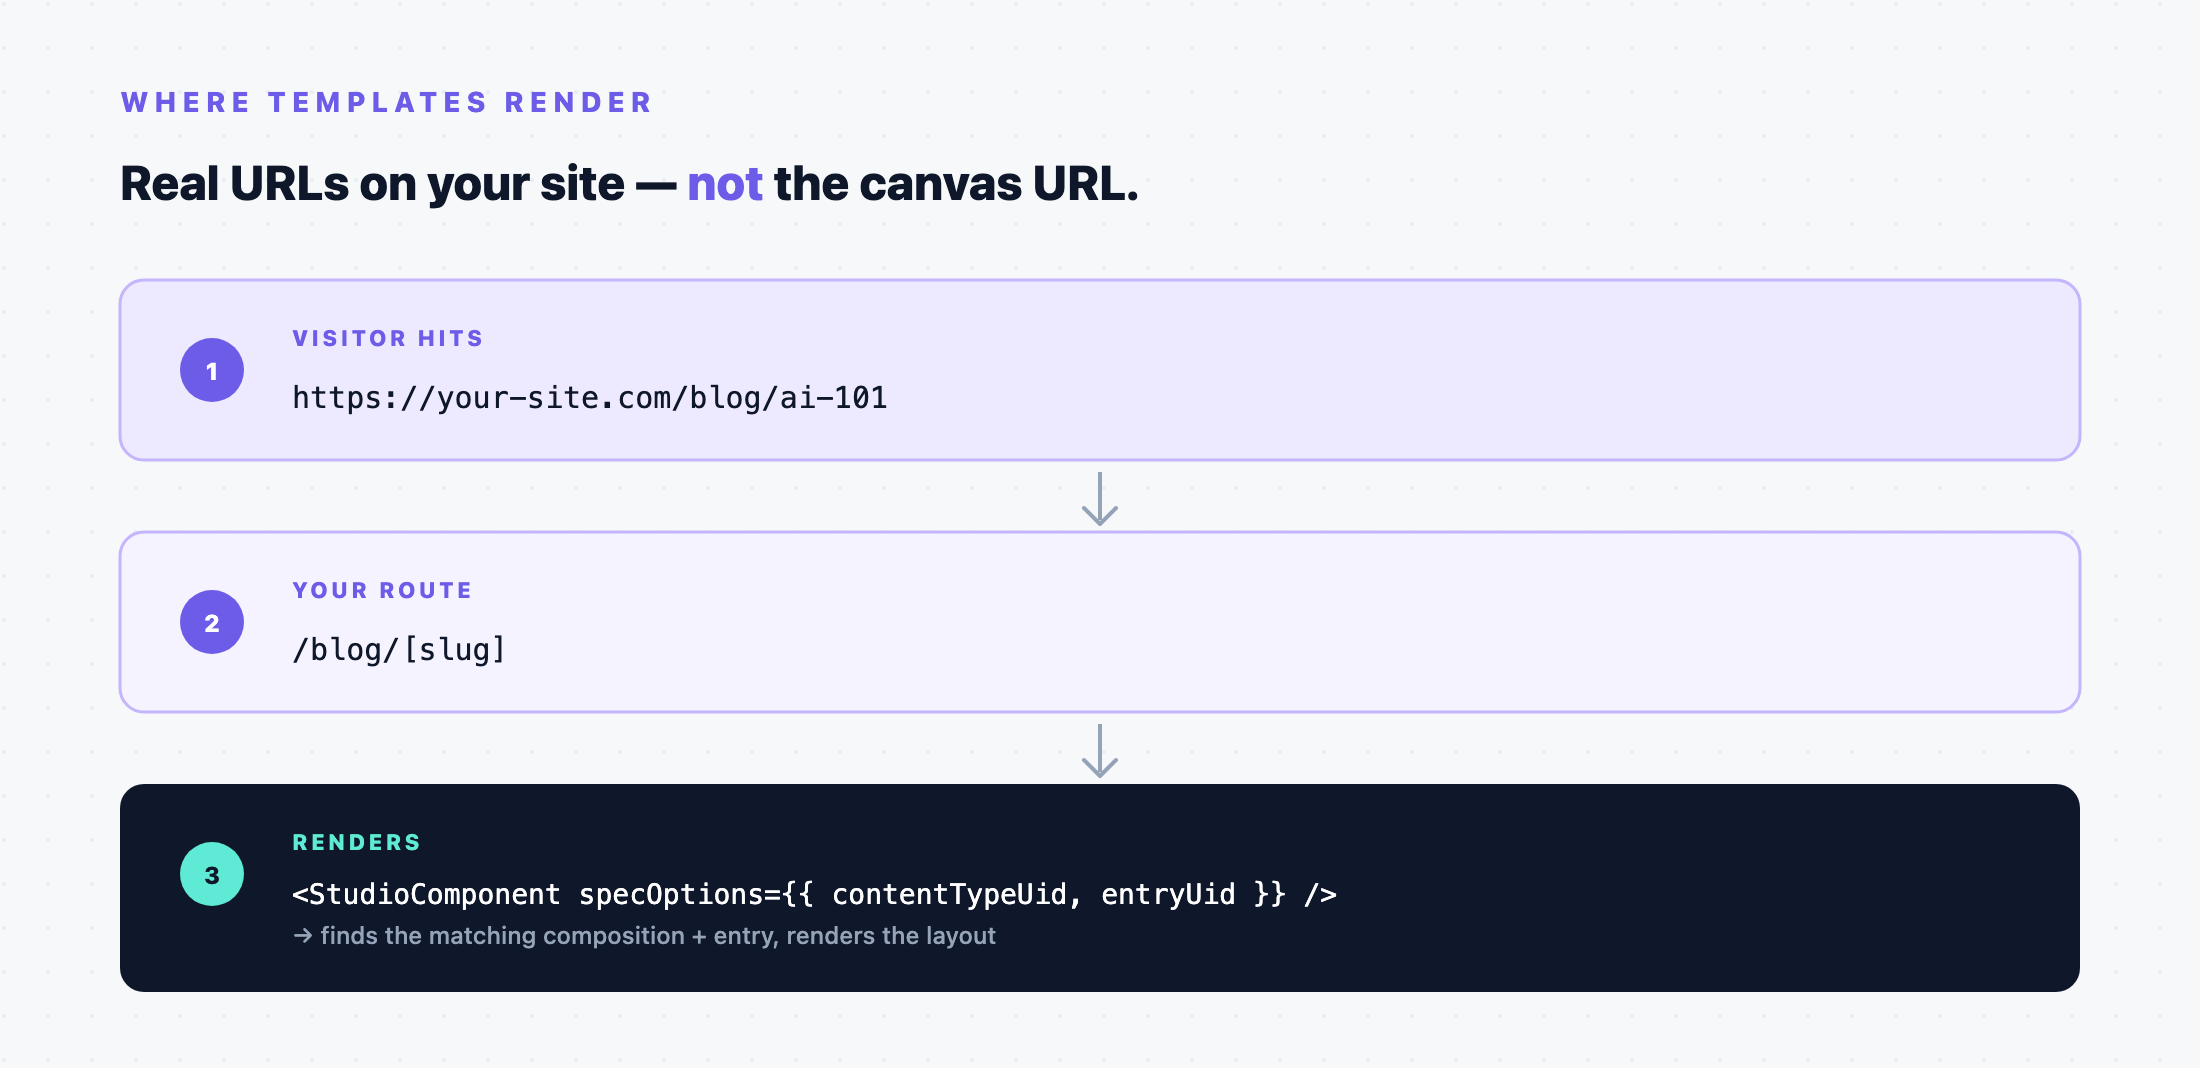
A typical Studio-powered app has:
- One canvas route mounting <StudioCanvas />, for section authoring
- ONE catch-all template preview route that fetches the composition via useCompositionData({ url: pathname }) (CSR) or csStudio.fetchCompositionData({ url, searchQuery }) (SSR) and passes the resolved object straight into <StudioComponent specOptions={specOptions} />: handles every URL on the site. Studio’s CDA query resolves which template matches each URL. No per-template route registration needed.
The Templates Tab
A fresh project’s Templates tab is empty, just an illustration and a + New Template button. Once one or more templates exist, the same tab becomes a list with one row per template:
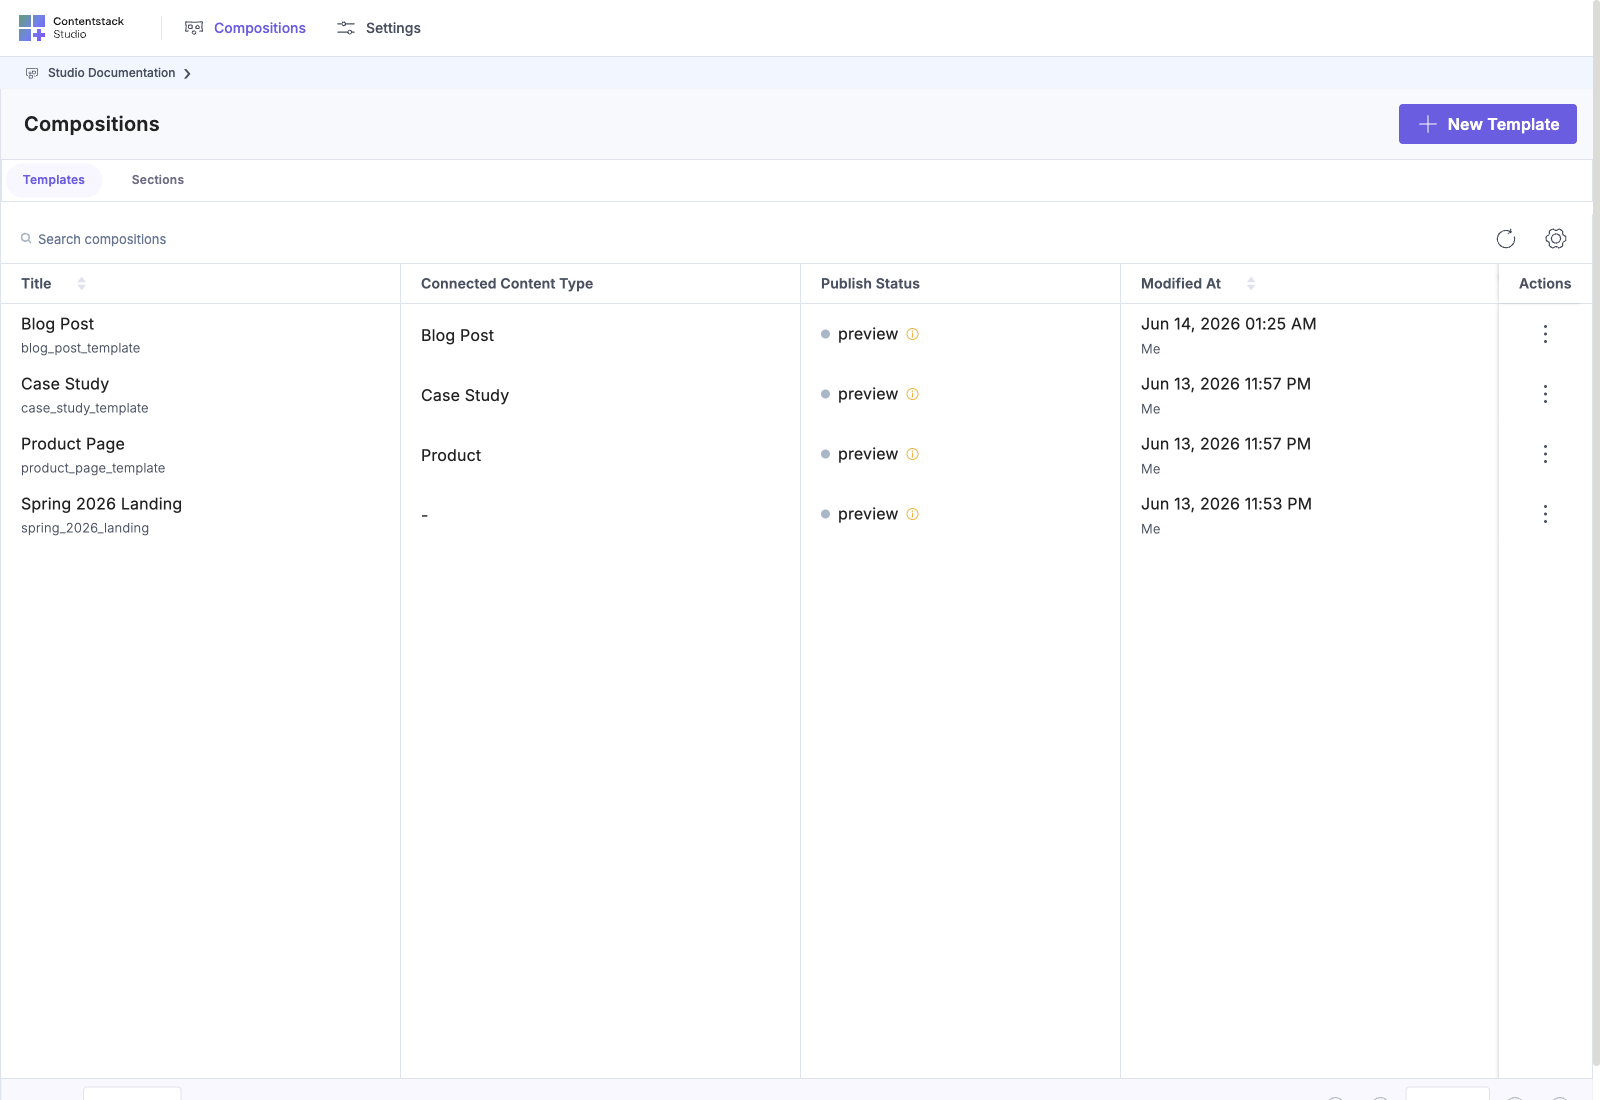
Columns: Title · Connected Content Type · Publish Status · Modified At · Actions.
Button at top right: + New Template. Click it and Studio walks you through creating a Connected template: pick the content type it binds to, then compose the layout in the canvas.
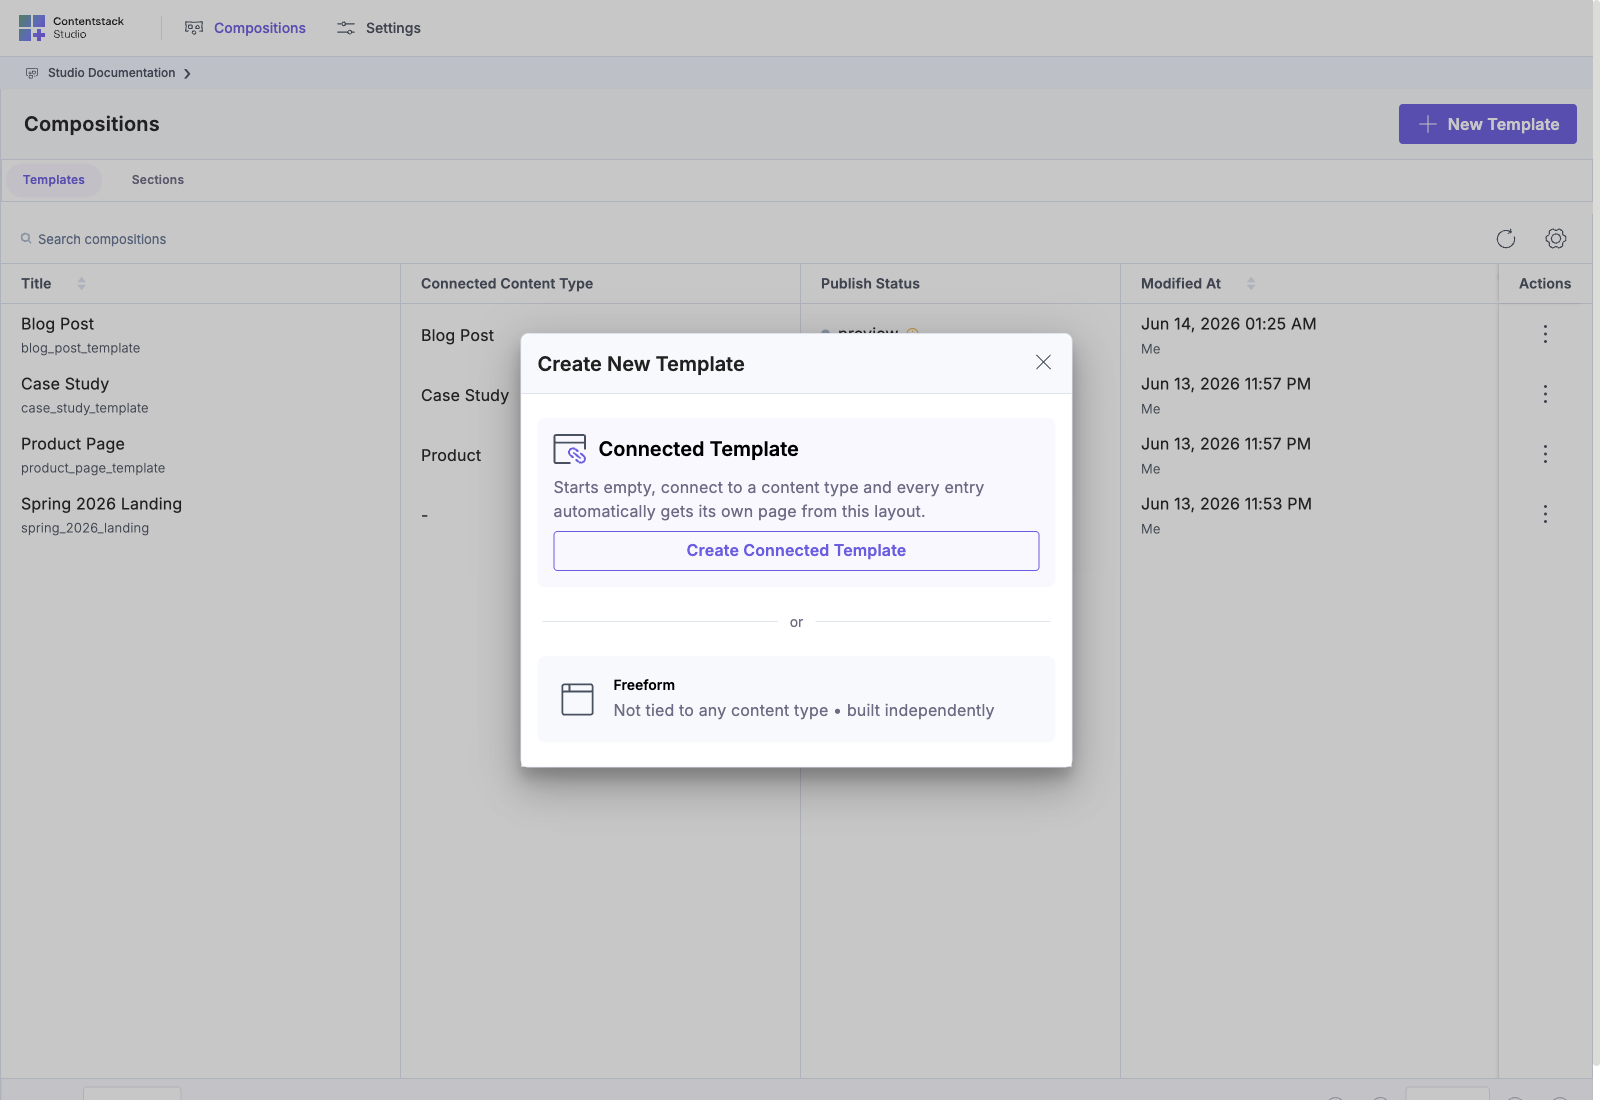
Each entry of the connected content type renders as one page at the URL pattern the template defines. That’s the canonical use case this chapter covers.
What’s in This Chapter
- Connected content type: picking a content type, URL pattern derivation, the Edit URL modal
- Using sections and components: what you drop onto a template, how the canvas works
Next
- Sections: what you drop inside templates
- URL variables