Your First Edit in 5 Minutes: Assuming Your Team Has a Template Ready
Prerequisite: a developer has to set Studio up first. Before you can author anything, a developer on your team needs to have done the one-time setup: installed the Studio SDK in your app, registered your React components, and (if your pages need them) built the Sections you’ll compose with. That’s a separate, ~1 hour developer workflow: Build your first page in Getting Started. If nobody’s done that yet, send them that link. Nothing below will work until they have. Building Templates is your job, not theirs. That’s exactly what this guide teaches.
You’re a content author. Your engineering team has already installed Studio, provisioned content types, and built at least one Template with some Sections. You want to compose a page.
Level: Beginner. First-time exposure to Studio.
Watch the walkthrough (3:55): a page built from ready-made Sections with no code and no data binding. It builds a brand-new Template rather than opening an existing one, so your Templates tab will look different, but every action after that is the same. See all six videos.
You need (check with your engineering lead if unsure):
- Access to your team’s Studio project (see the callout below if you can’t see any project).
- At least one Template already built and available in the Templates tab.
- At least one entry populated for the CT that Template is bound to (otherwise the canvas will look empty).
- Basic knowledge of Save vs Deploy: 30 seconds of reading in the Glossary covers it.
If any of the four aren’t ready, this is a 30-second read + a message to your engineering lead, not a 5-minute exercise. That’s fine. Come back when they are.
Hit a word you don’t know? Every Studio term (Template, Section, Slot, Deploy, and 20 more) is defined in one line at the Glossary. Keep it in a tab.
Can’t see any Studio project when you sign in? You haven’t been added yet. Message your engineering lead or the person who set up Studio at your company. Ask them to invite you as an author on the Studio project (in Contentstack, open Studio, select the Project, and go to Settings, then Team). Once you’re invited, come back here.
Do It With a Skill
Nothing to run here. This quickstart is entirely in Studio, in your browser.
The setup it assumes, SDKs installed, components registered, sections built, is a developer’s job. verify-setup is what they run to confirm it is all in place before you start.
What You’ll Have at the End
- A published page rendering with your chosen content.
- One value changed per your instance (e.g. a different headline).
Steps
1. Open a Template your team has already set up
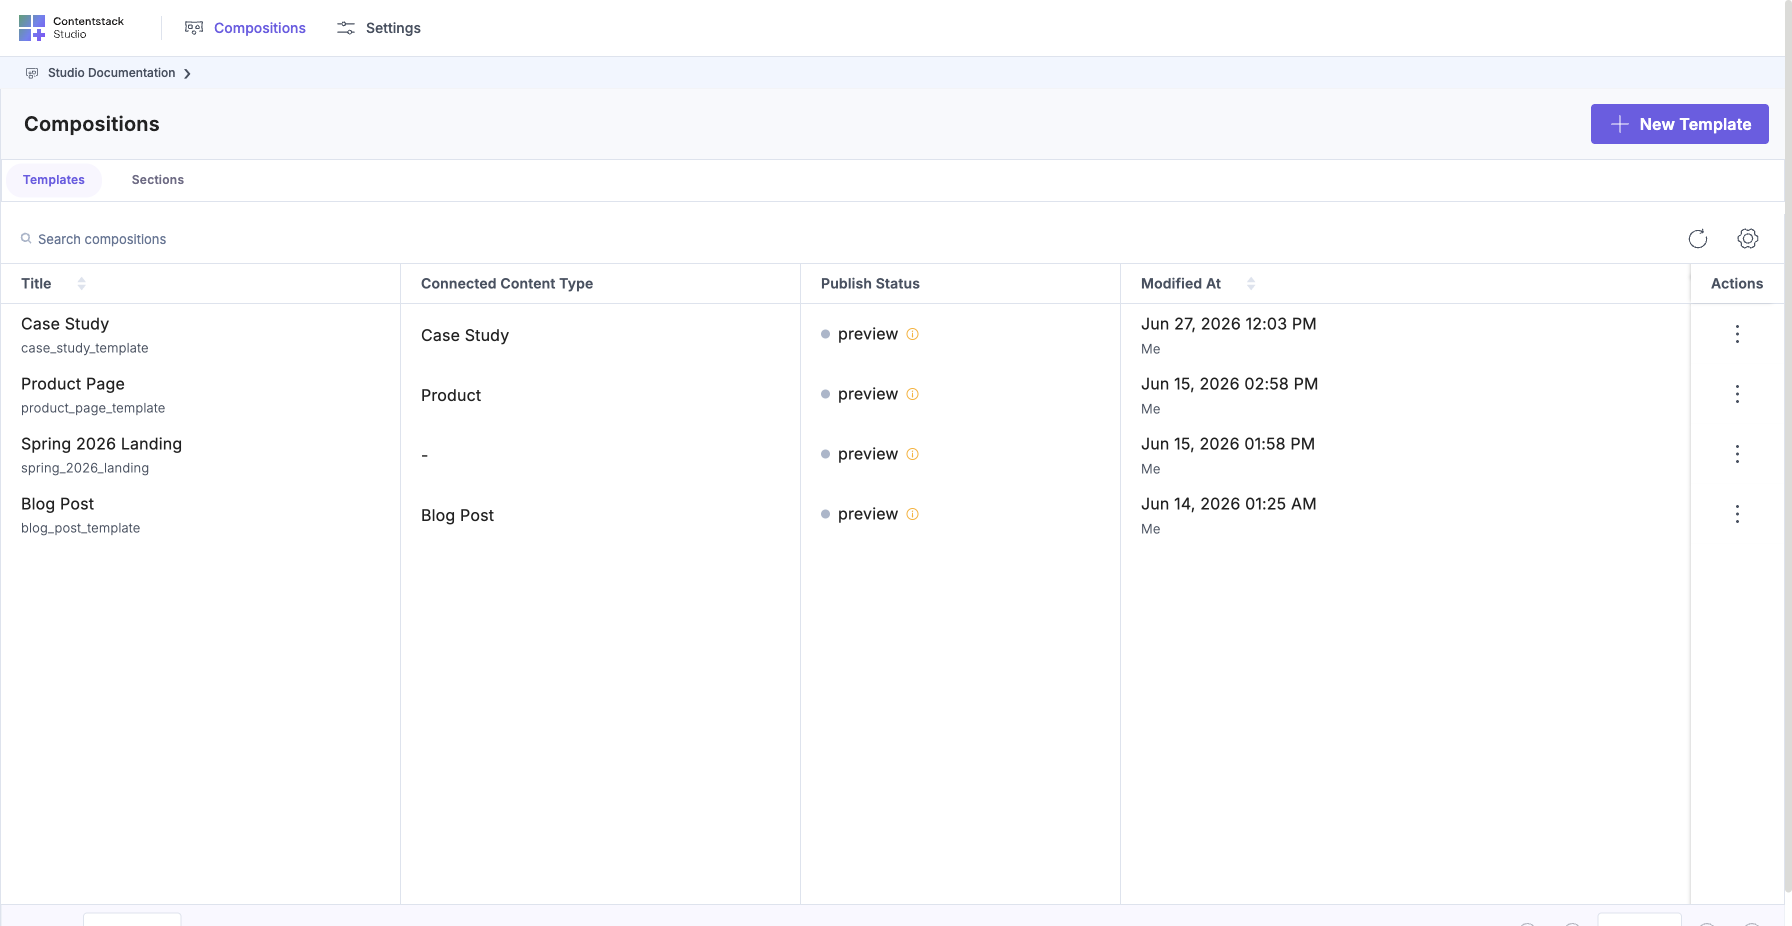
In Contentstack, open Studio, select your project, and go to Compositions, then the Templates tab.
Pick any Template (e.g. “Blog Post Page”). Click it to open in the canvas.
2. Drop a Section
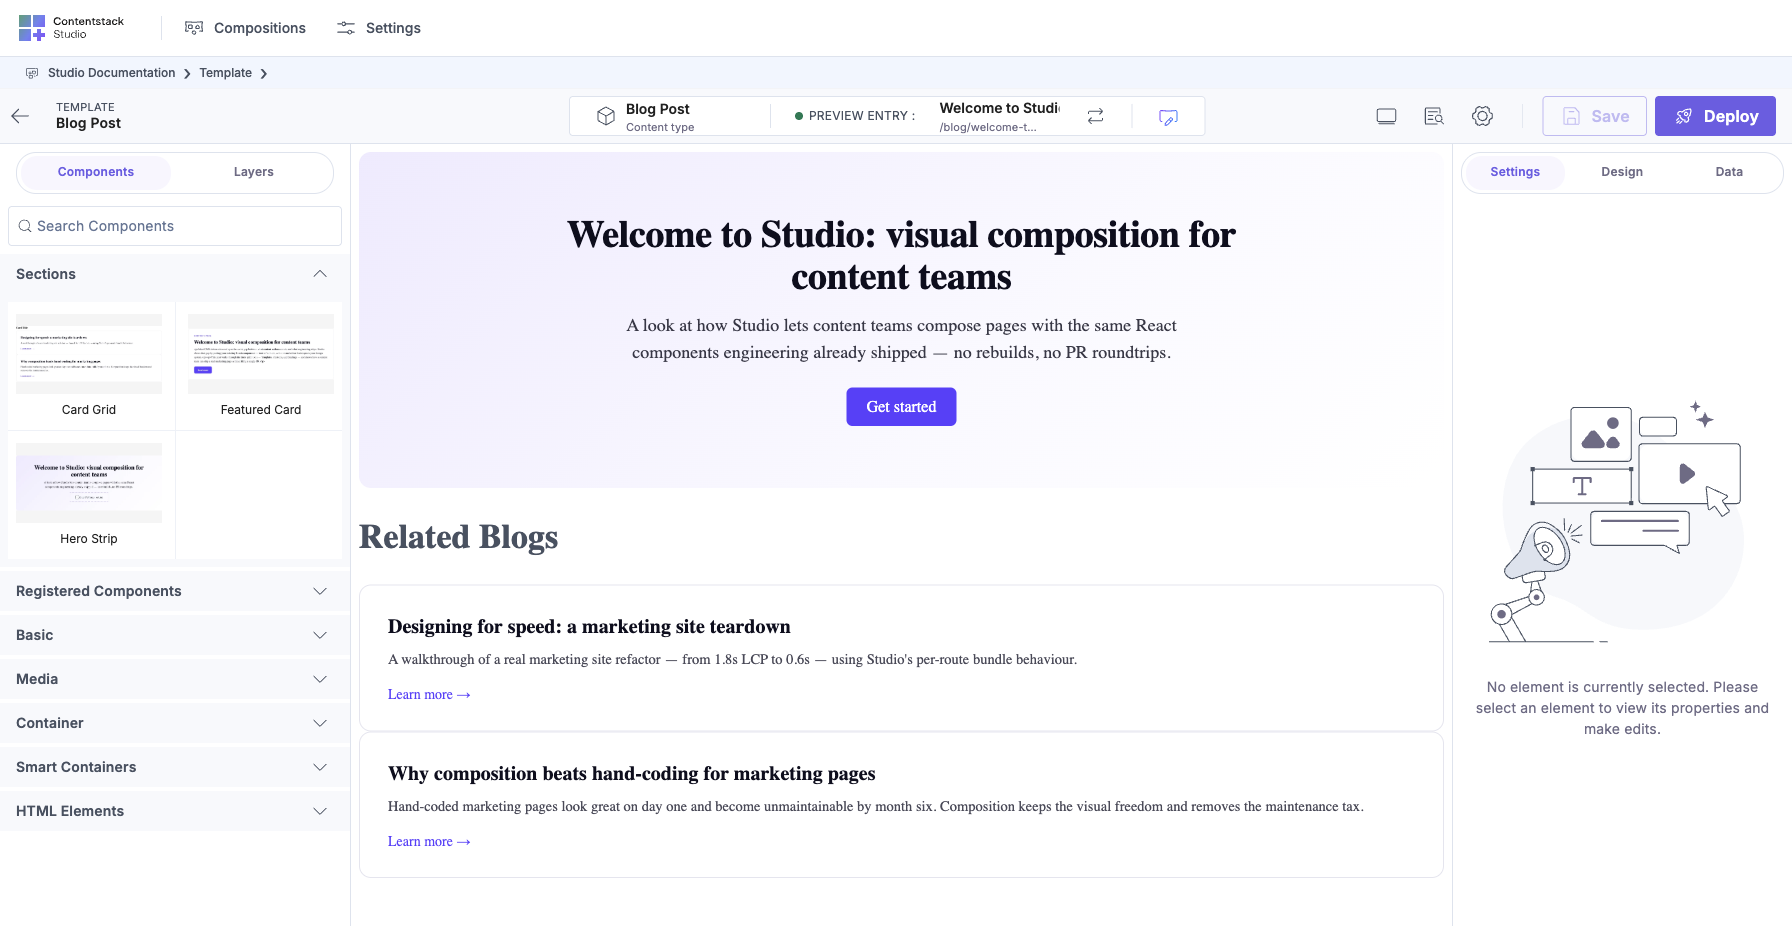
The left palette has two tabs:
- Registered Components: individual React building blocks (Hero, Card, Button…).
- Sections: pre-composed, bound arrangements your engineering team built (Hero Section, Card Grid, Article List…).
Author from Sections, not from individual components. Drag a Section onto the canvas. It auto-fills with data from the connected content type, no manual wiring.
3. Change one exposed value
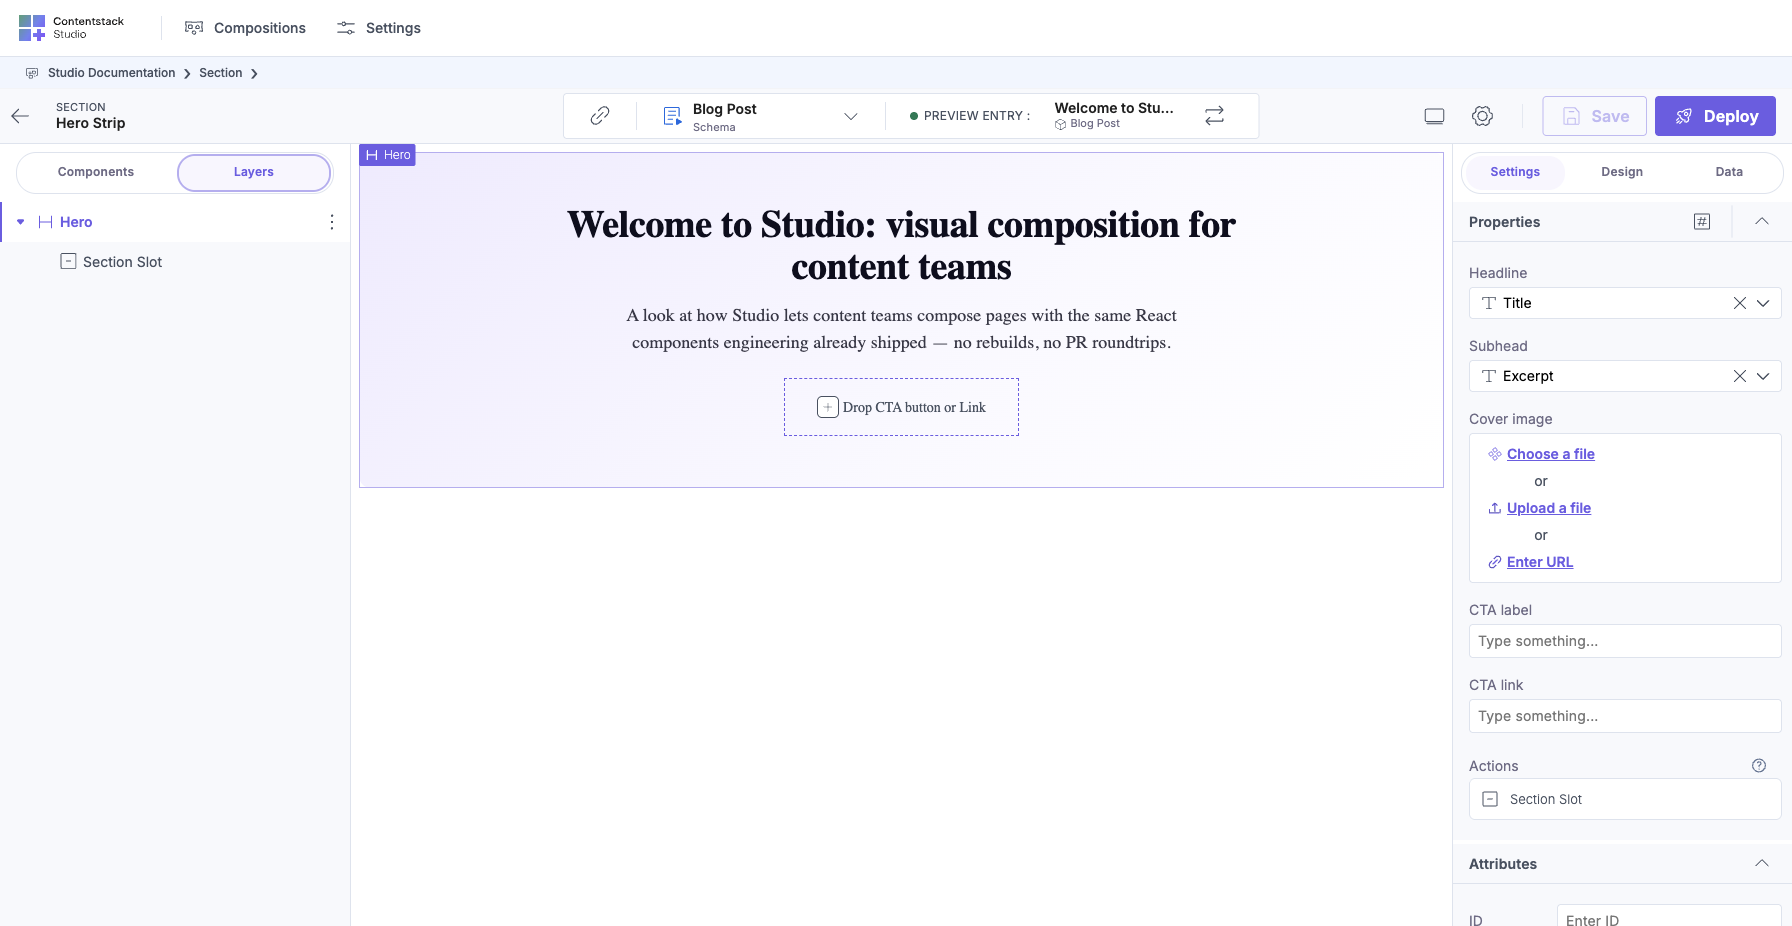
Click the dropped Section. The right panel shows a list of exposed properties, the values your engineering team let you override per instance.
Type into any field, e.g. rename the “Hero headline” to something specific to this page. Values not in the exposed list are locked. That’s intentional.
4. (Optional) Fill a Section Slot
If the Section has a Section Slot (a labeled drop-zone inside), it means you get to choose what goes there per instance. Drag a component (from Registered Components) or another Section into the slot.
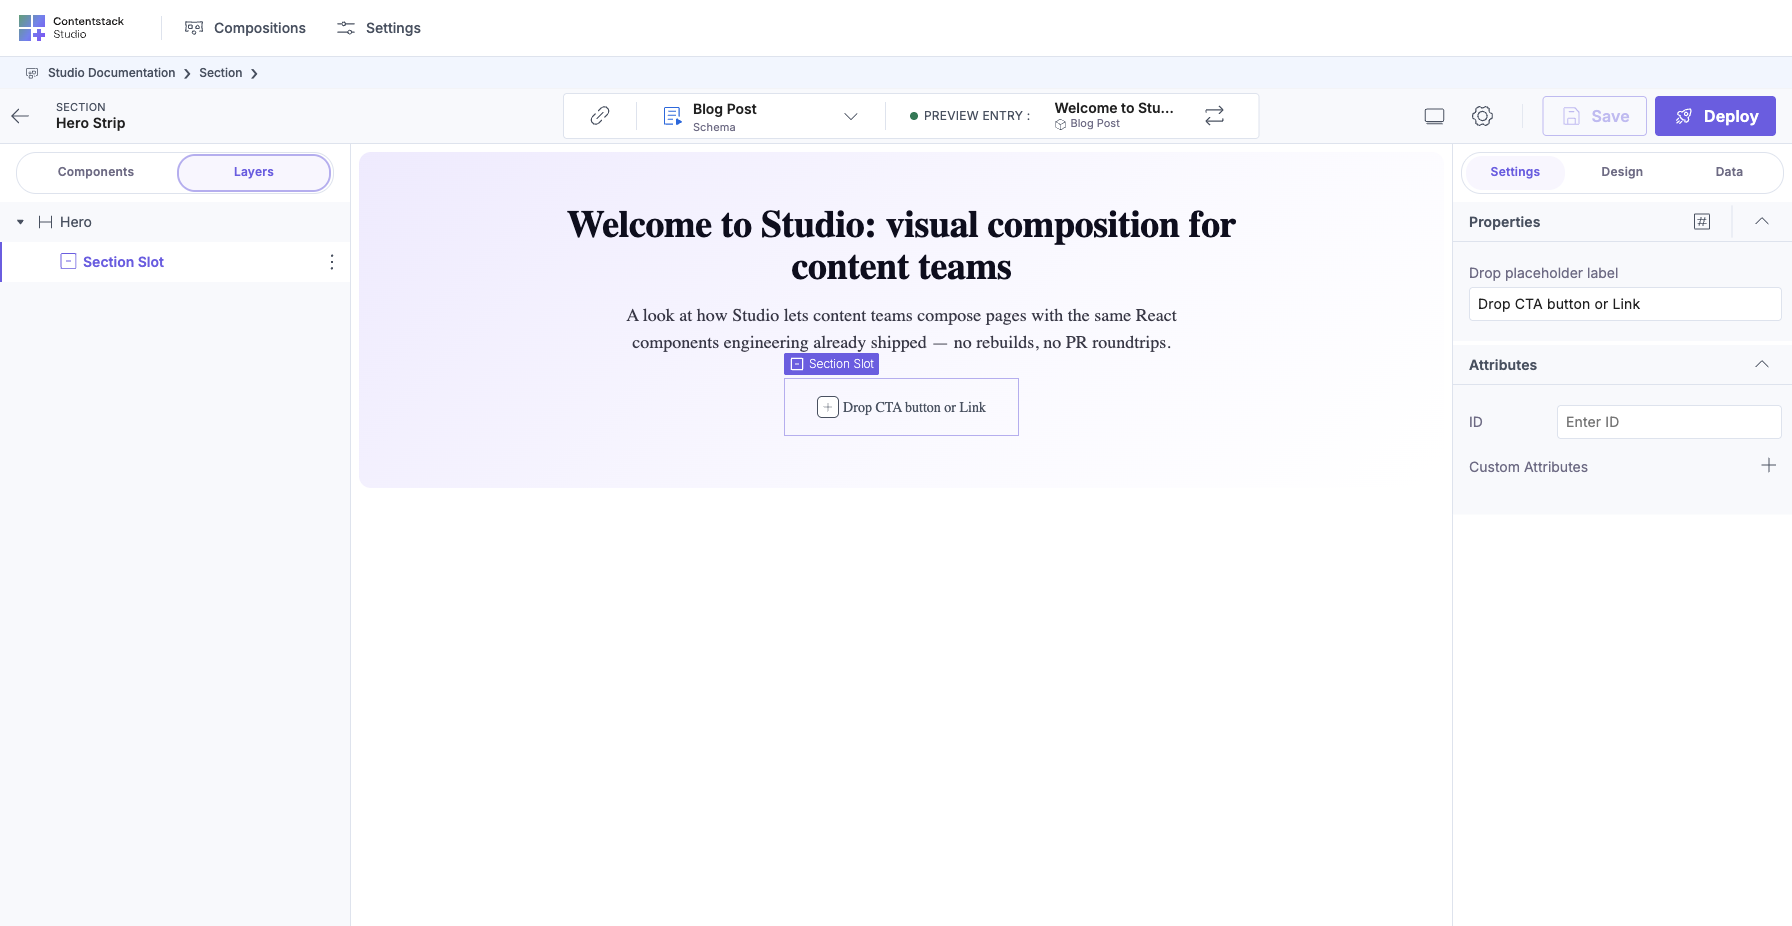
Common example: a card list Section leaves the individual card’s design to you. Drop a <PromoCard> in one Template, a <PlainCard> in another. Same list, different card style.
5. Save + Deploy
- Save: writes your changes as a draft. Only you can see them in the canvas.
- Deploy: publishes to live. Every visitor now sees the new composition.
Click Save, then Deploy. Reload your site. Your changes are live.
You Did It
Every page in Studio is composed the same way: pick a Template, drop Sections, fill exposed props and slots, then deploy. That’s the whole workflow.
When Something Looks Wrong
- The Section is empty. The content type entry linked to this Template probably has an empty field. Fill the entry in Contentstack: open Content, then Entries.
- The exposed field isn’t taking effect. Save + Deploy again. Save alone doesn’t publish.
- The section renders differently than the design. The engineering team may not have shipped that variant yet. Ask.
- You can’t find a Section you were told existed. Your team may not have shared the Studio project with you. Ask them to add you.
What’s Next
Once you’re comfortable with editing, you’ll want to know:
- Working with Templates: creating new ones, changing URLs, deploying variants.
- Working with Sections: when to drop what, how the palette is organized.
- Publishing and previewing: draft-vs-live, staging environments.
These are covered in “For Content Authors” in the sidebar. Take them one at a time.
If your work needs a Section your team hasn’t built yet, share Quickstart 3 or Quickstart 4 with your engineering team. Those walk them through building it.