Quickstart 5: Create a Template + URL
Create a Connected Template bound to blog_post, drop the Sections you built, set the URL pattern, deploy. Every entry of the CT now renders at a URL.
Watch the walkthrough (4:15): it goes deep on where the URL comes from: the two places a pattern can already be configured, and how URL variables pick the right entry. See all six videos.
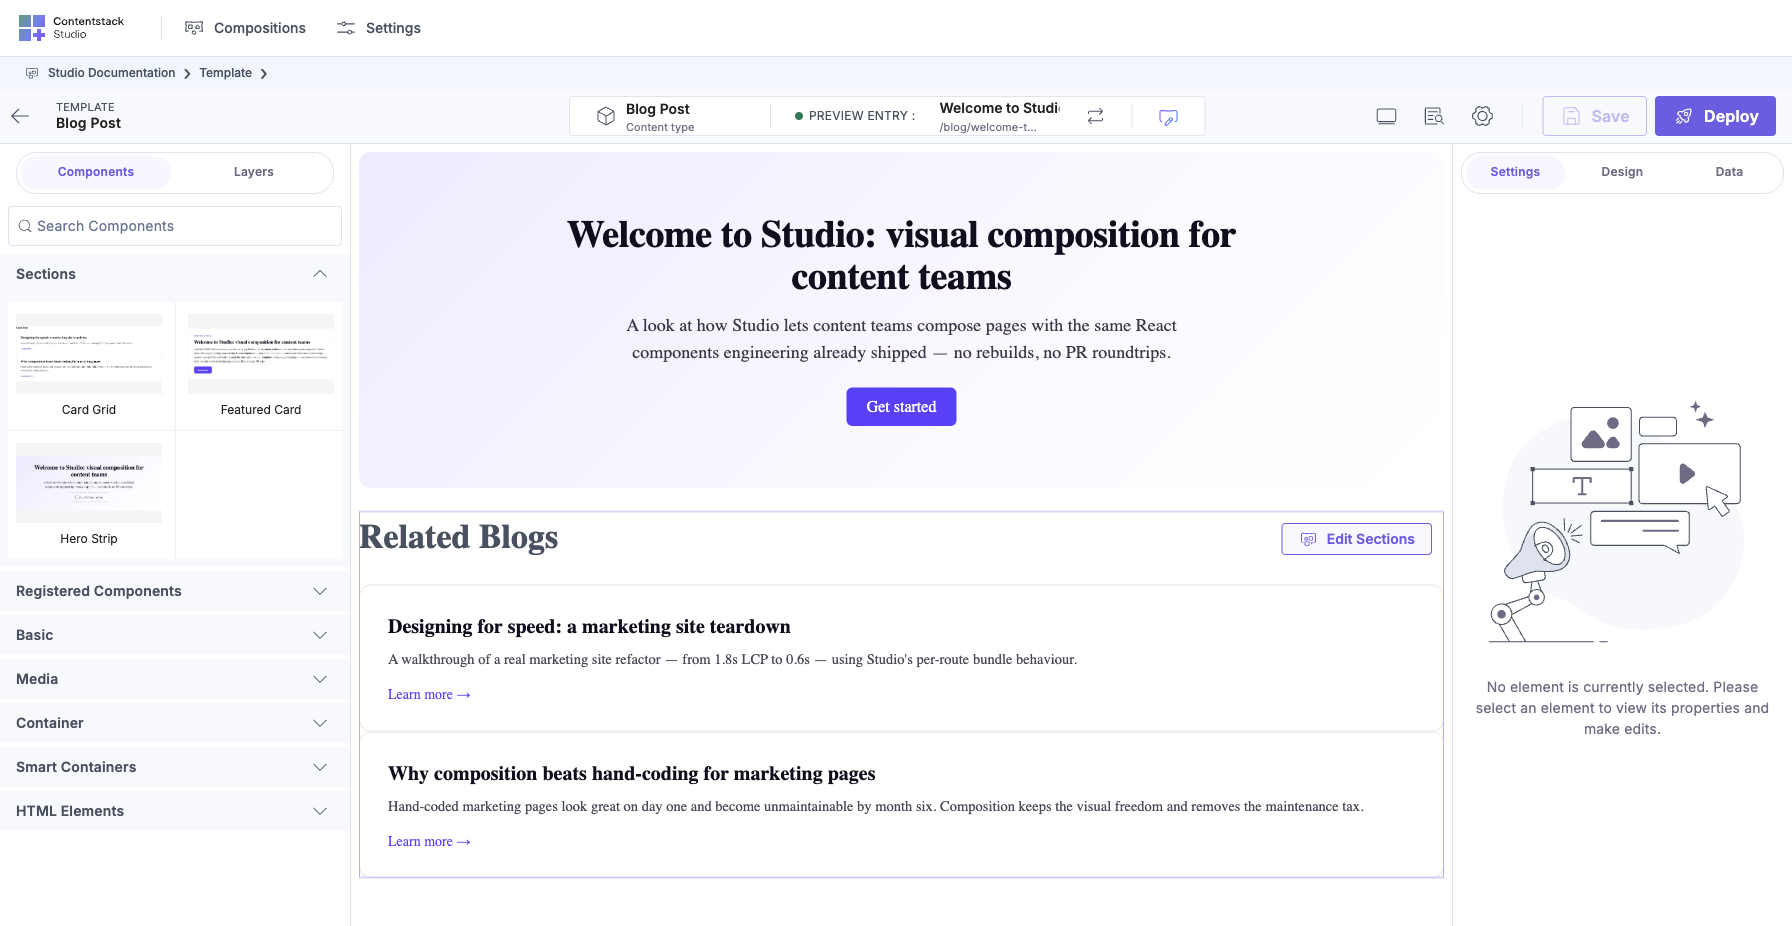
Switch the sidebar to the Layers tab to see the Template’s section stack, each dropped Section shows as one row, in the order it renders top-to-bottom:
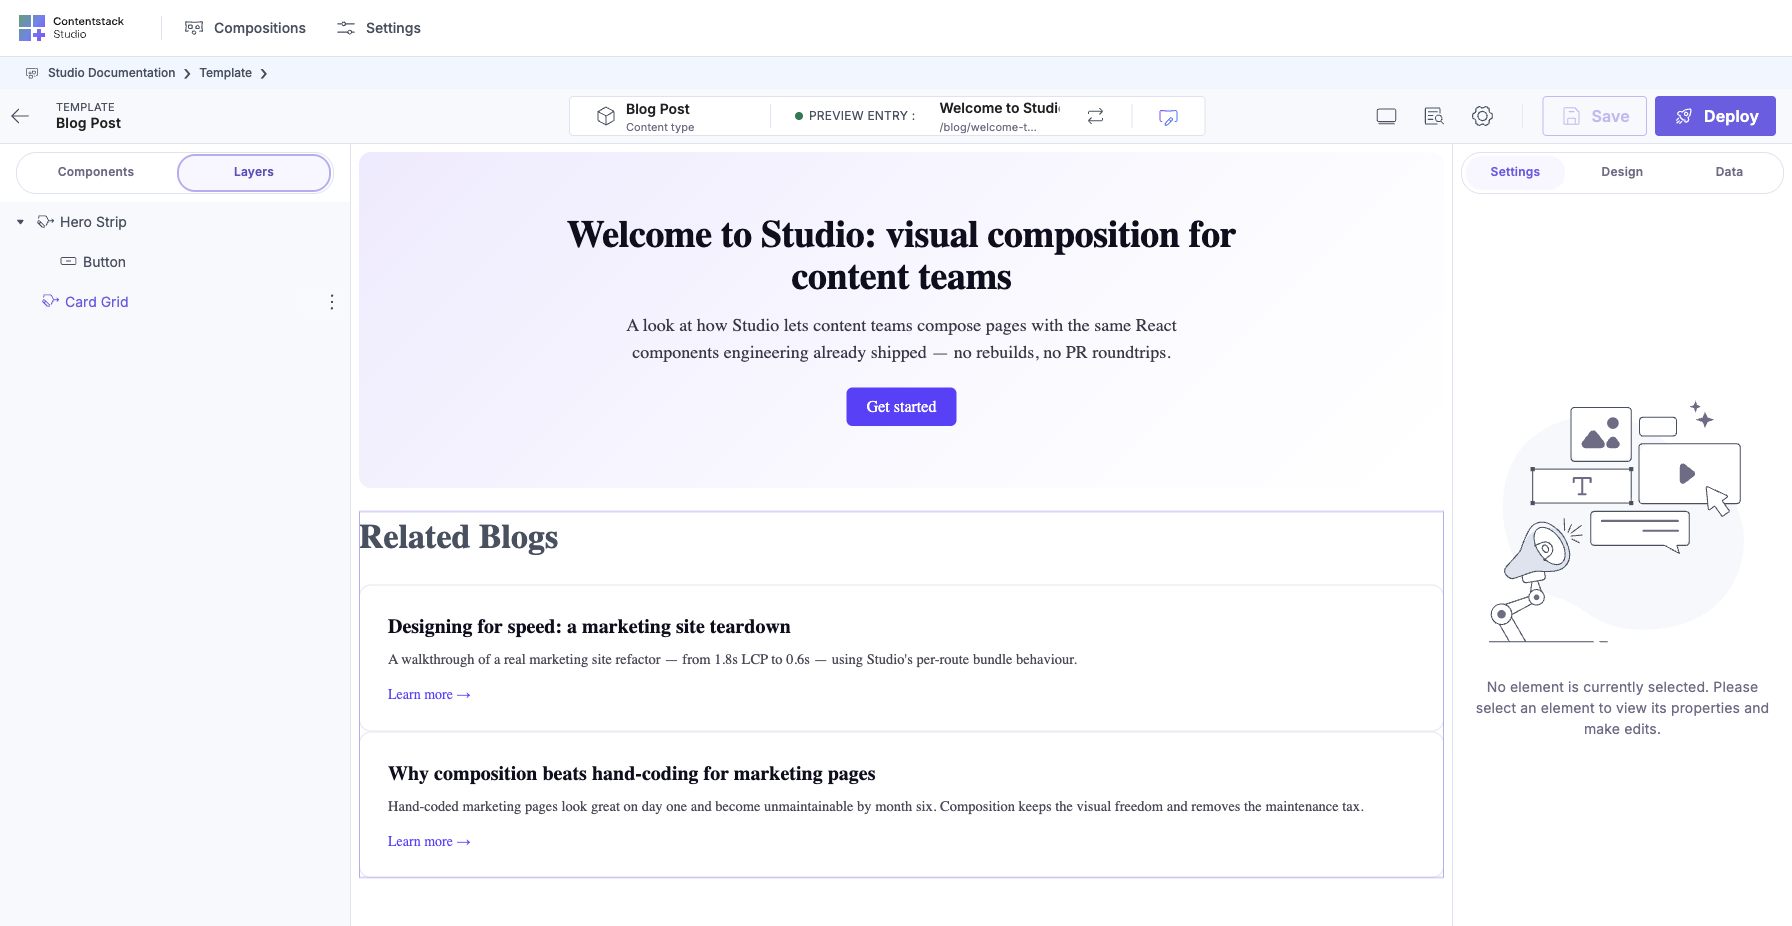
Do It With a Skill
build-connected-template scaffolds the Connected template, wires the linked-schema bindings and saves, so every entry renders at its derived URL.
curl -fsSL https://studio-documentation.contentstackapps.com/install.sh | sh
What You’ll Have at the End
- A blog_post_page Connected Template bound to the blog_post CT.
- URL pattern: /blog/{{entry.slug}}, every blog_post entry renders at /blog/<its-slug>.
- Both Quickstart 3’s Hero Section and Quickstart 4’s List Section dropped on it.
- Three different blog_post entries produce three different URLs, and one Template renders them all.
Prerequisites
- Quickstart 3’s hero_section exists.
- Quickstart 4’s sections_list exists (with the Slots filled).
- The blog_post CT has a slug field (a URL-safe single-line text).
- At least one published blog_post entry with a slug, a hero group filled in, and one or more items in the sections Modular Block.
Steps (in Studio’s Canvas)
1. Create the Template
In Studio, open your project, go to Compositions, select the Templates tab, and click + New Template. The Create New Template modal opens:
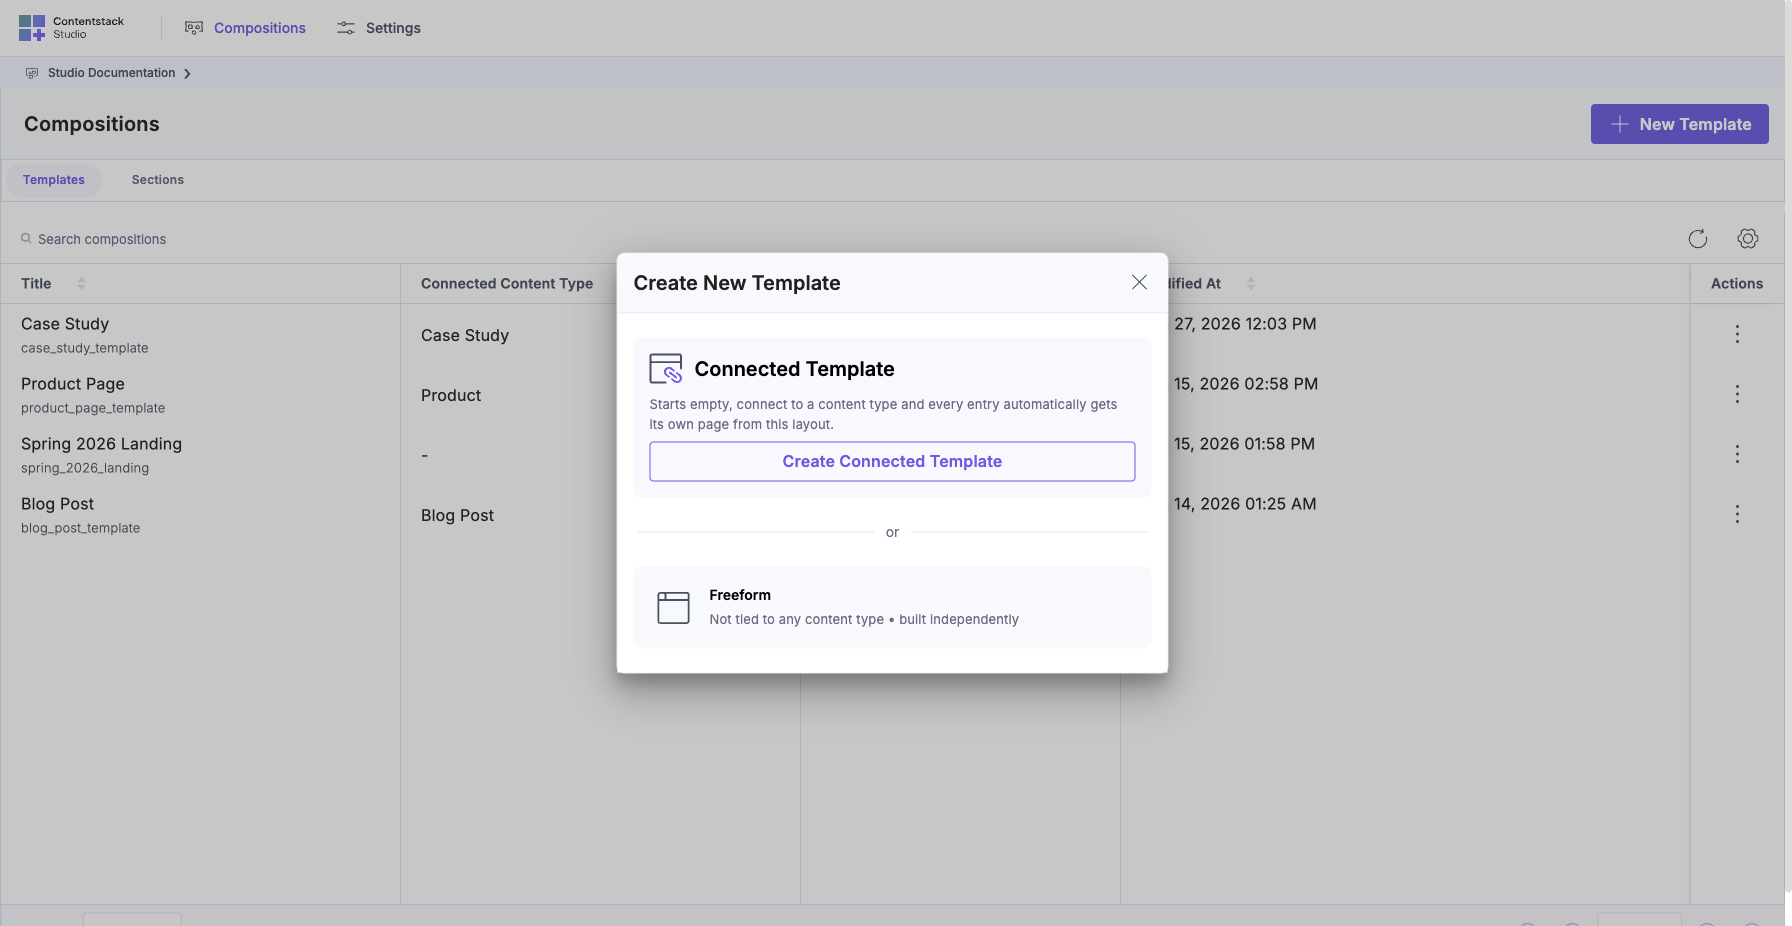
Click Create Connected Template, a second modal opens for the details:
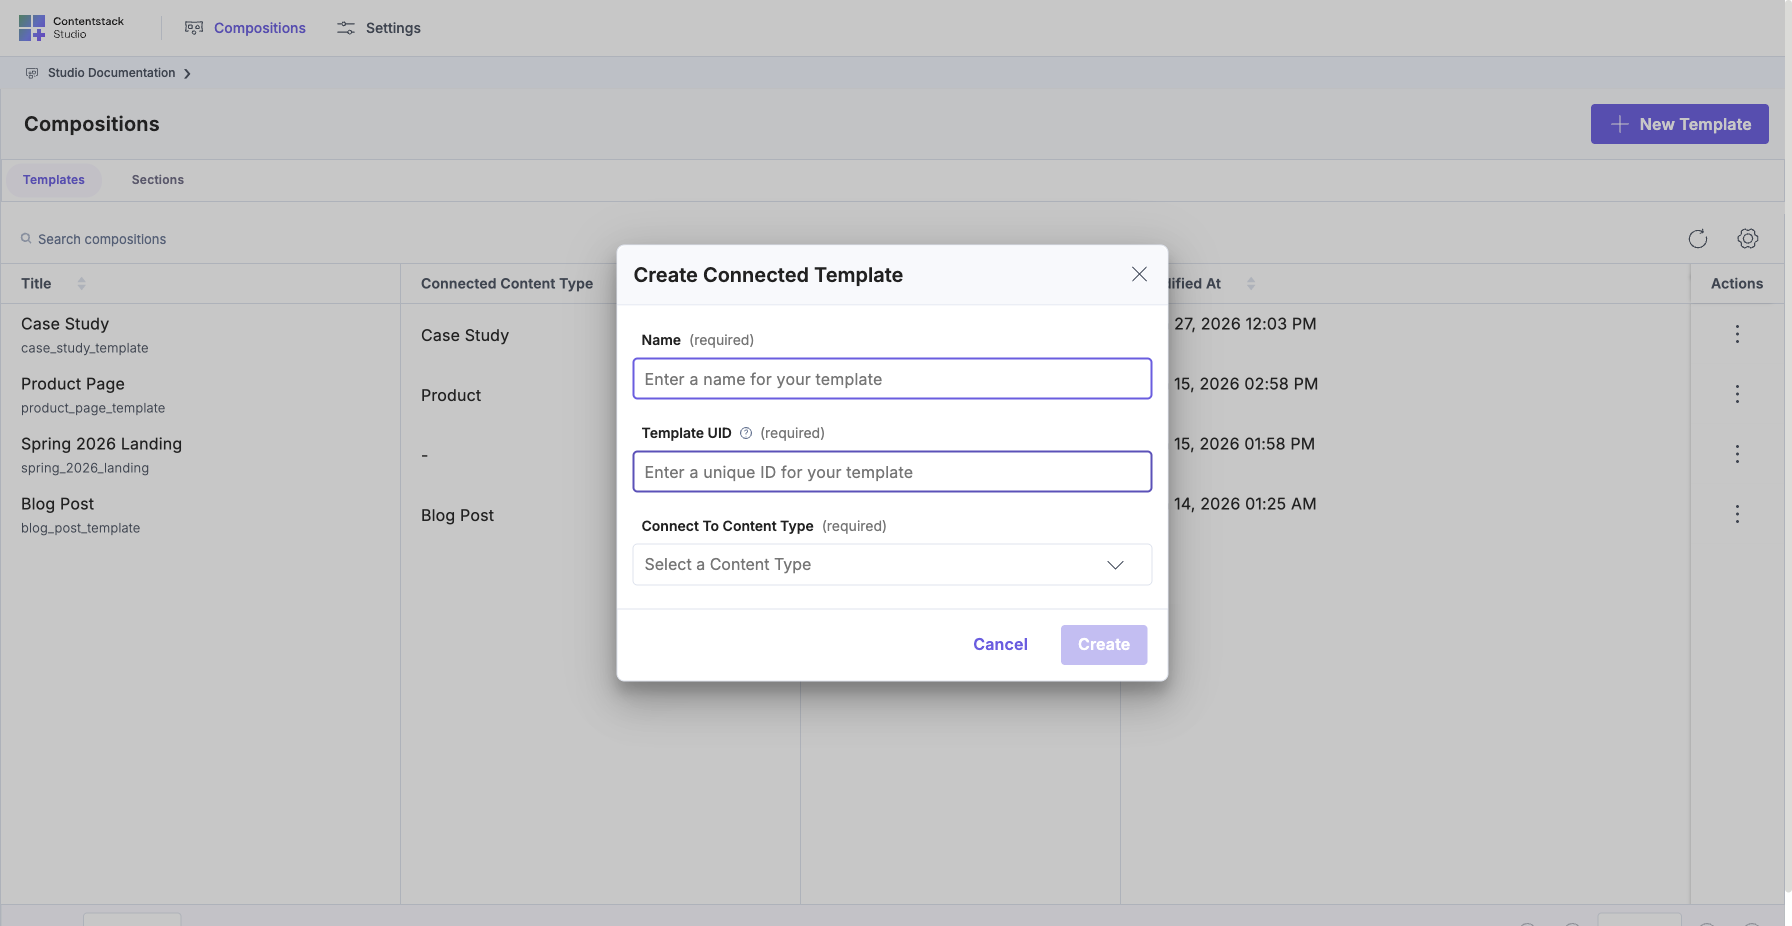
- Name: Blog Post Page.
- Template UID: blog_post_page.
- Connect To Content Type: pick blog_post.
Click Create.
2. Set the URL pattern
On the Template canvas top bar, click the URL icon (the link icon next to the Preview Entry chip), which opens the Edit URL modal:
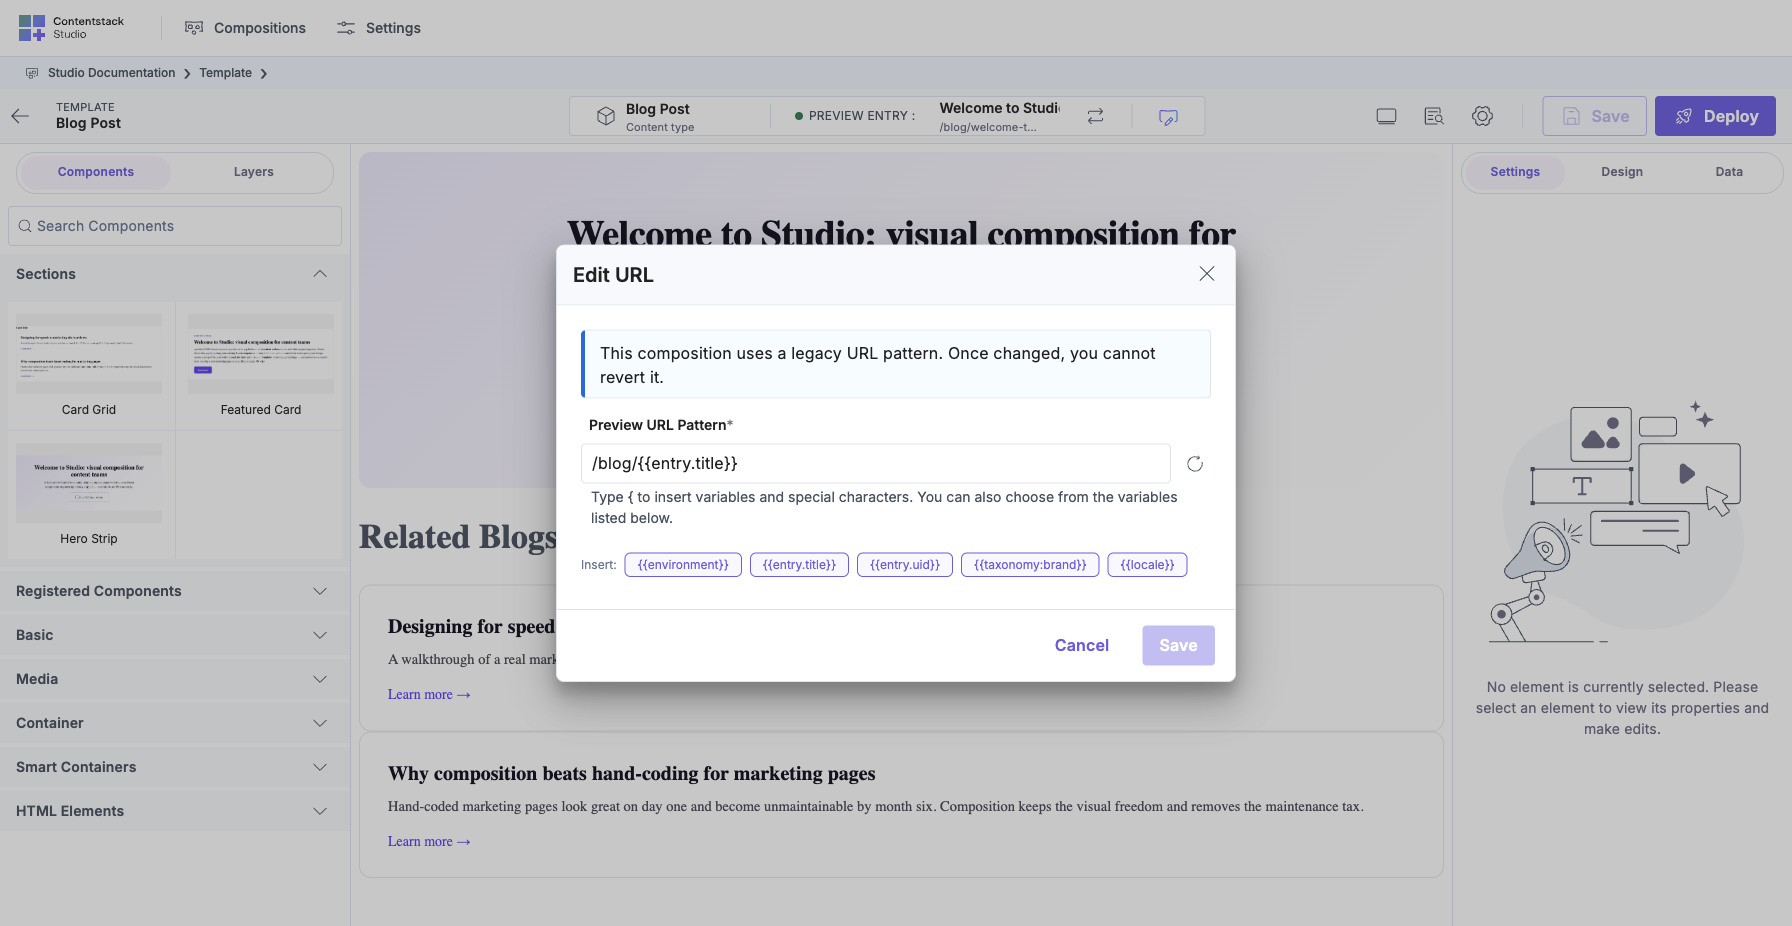
Type the pattern:
/blog/{{entry.slug}}
{{entry.slug}} is a URL variable. At runtime, Studio matches every incoming request URL against this pattern, extracts the variable, and looks up the entry whose slug equals it. A request for /blog/hello-world finds the blog_post entry with slug: "hello-world", then renders this Template with that entry as the connected data source.
The pill-shaped buttons below the input are shortcuts: click Insert Entry Title / UID / Taxonomy / Locale to add each variable, or type {{ to open an inline picker. Save the URL, then Save the Template.
URL patterns you can use: the five categories
Studio’s URL pattern DSL is small. Anything inside {{...}} is substituted at match time. Anything else is a literal path segment. Five categories of variable, all documented in full at URL variables, the summary here is enough to design 90% of real Templates:
| Variable | Where the value comes from | Example pattern | Matches |
|---|---|---|---|
| Entry field: {{entry.<field_uid>}} | Any field on the connected content type: text, slug, uid, or any custom UID. | /products/{{entry.sku}} | /products/PC-2026 (renders the product entry with sku: "PC-2026") |
| Entry reference: {{entry.<ref_field>.<sub_field>}} | Follow a single-reference field, then read a field on the referenced entry. | /blog/{{entry.category.slug}}/{{entry.slug}} | /blog/dev-tips/hello-world (the blog post’s category ref, then the category’s slug) |
| Entry system fields: {{entry.uid}}, {{entry.locale}} | Studio-managed fields on every entry. | /preview/{{entry.uid}} | /preview/blt7cf... |
| Taxonomy: {{taxonomy.<taxonomy_uid>}} | Slug of a taxonomy term assigned to the entry. Requires the CT to have that taxonomy attached. | /{{taxonomy.region}}/products/{{entry.slug}} | /emea/products/pcx-2026 |
| Context: {{context.locale}}, {{context.environment}} | Request-side metadata, not per-entry. Used for locale prefixes and environment gating. | /{{context.locale}}/blog/{{entry.slug}} | /en-us/blog/hello-world, /fr-fr/blog/bonjour-monde |
Static path segments (no variables) work fine for pages that don’t repeat per entry, for example, the About page or a single-entry landing:
/about                        ← always renders the same About Template
/campaigns/spring-2026        ← Freeform Template with a fixed URL
Multi-variable patterns are the most common shape for real sites. Combine as many {{...}} slots as you need:
/{{context.locale}}/blog/{{entry.category.slug}}/{{entry.slug}}
Precedence when multiple Templates could match. Studio picks the most specific match first: pattern with the most literal (non-variable) segments wins, then longer patterns beat shorter ones. If two Templates could match the same URL, the more specific one is chosen. When in doubt, prefer explicit paths over wildcards.
Common patterns catalog:
| Use case | Pattern | Notes |
|---|---|---|
| Blog post detail | /blog/{{entry.slug}} | 1 entry per URL. |
| Product detail | /products/{{entry.slug}} (or sku) | Same shape, different field. |
| Category landing | /category/{{entry.slug}} | Bind Template to a category CT. |
| Locale-scoped blog | /{{context.locale}}/blog/{{entry.slug}} | Studio serves each locale from the matching entry translation. |
| Nested taxonomy path | /shop/{{taxonomy.department}}/{{entry.slug}} | Requires the department taxonomy on the product CT. |
| One-off marketing page | /campaigns/spring-2026 | Static path, Freeform Template. |
| Author profile | /author/{{entry.slug}} | One entry per author. |
| Post by reference | /blog/{{entry.category.slug}}/{{entry.slug}} | Follows a single-reference field on the CT. |
Full reference (every variable, validation rules, resolved-value behavior, legacy wildcards): URL variables. Matching-rules deep dive (per-data-type, scope-aware, positional remap): Matching rules.
3. Drop the Sections
In the left palette, open the Sections tab, then drop hero_section at the top of the canvas. Below it, drop sections_list.
Both Sections auto-bind:
- hero_section binds to the entry’s hero Group (from Quickstart 3’s linked schema).
- sections_list binds to the entry’s sections Modular Block (from Quickstart 4).
If either Section has exposed props (“Hero headline”, “List heading” from earlier), the right panel lets you set them per Template.
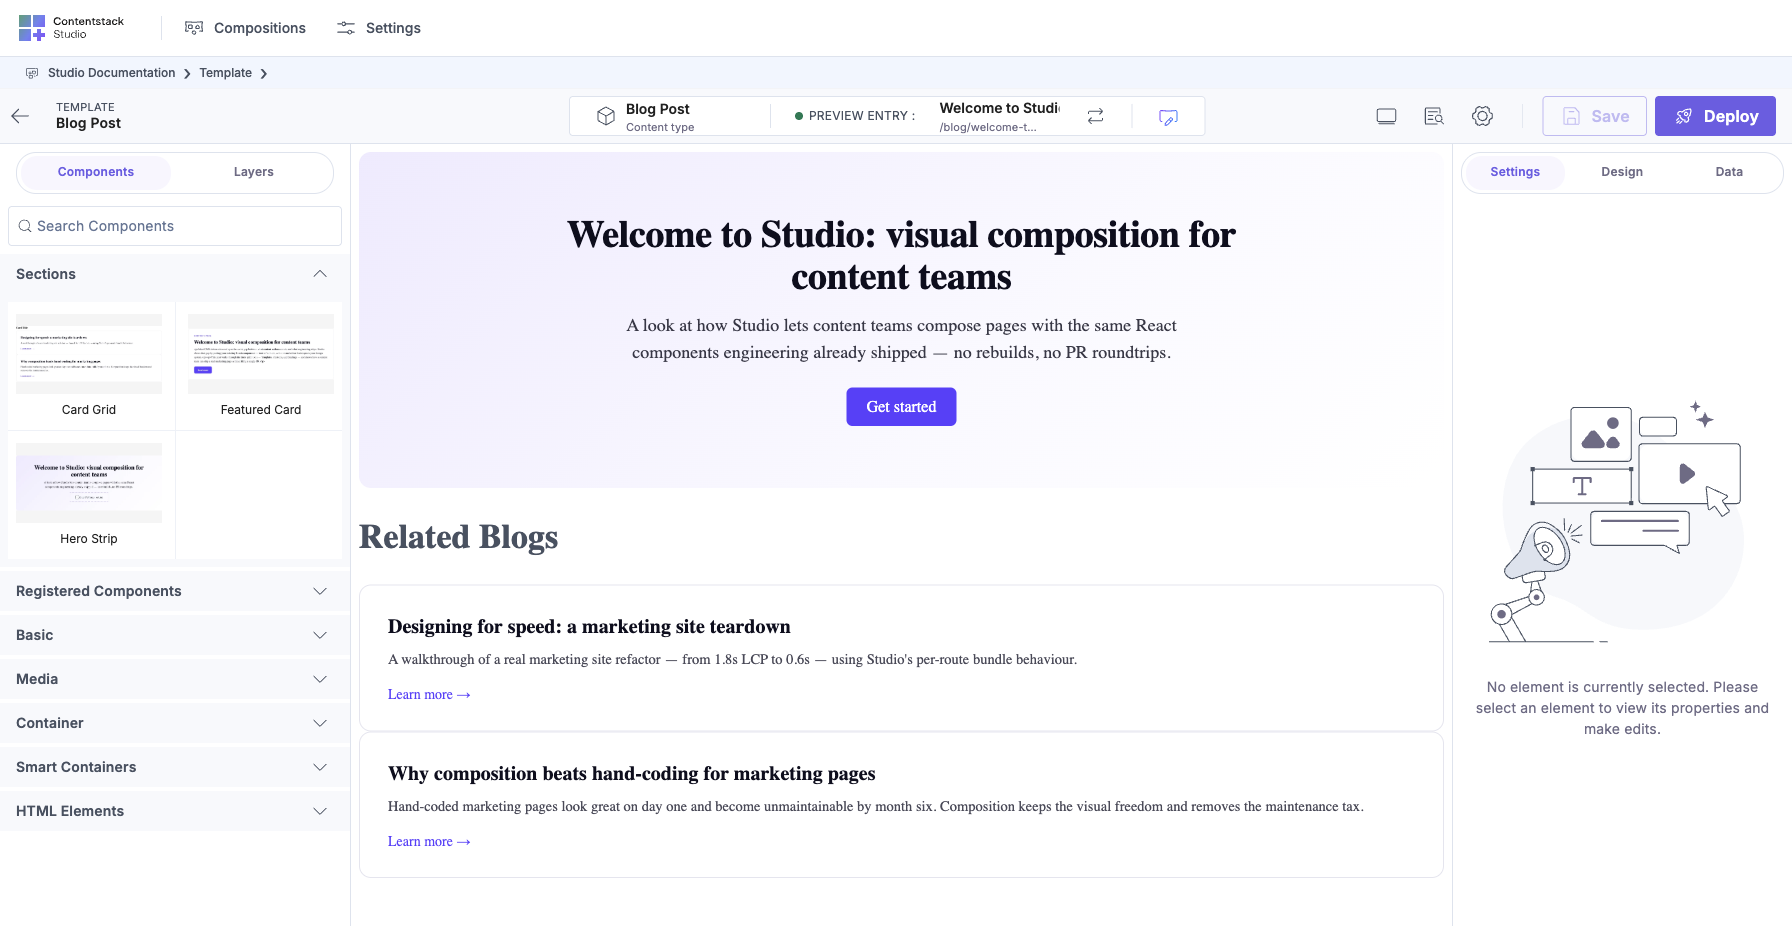
After dropping, the Template canvas renders end-to-end with real entry data: the Hero Section at the top with the connected entry’s hero fields, the List Section below iterating each Related Post through the Repeater + Condition Block chain:
4. Save + Deploy
Two distinct actions in Studio:
- Save: writes the Template composition to Contentstack (as a draft). Not yet live.
- Deploy: publishes the composition to your Studio project’s live environment. Your app’s <StudioComponent /> route starts resolving to this Template.
Click Save, then Deploy. Deploy is what makes the Template render on your app.
Full detail: Deploy.
5. View it live
Open your app at the URL of any blog_post entry: http://localhost:5173/blog/hello-world (replace hello-world with the actual slug).
You’ll see: the Hero Section renders the entry’s hero group. Below it, the List Section iterates every item in sections, rendering the right component for each block-type.
Load /blog/another-post. Different entry, same Template, same Sections. The whole thing is wired.
Verify
- The Template appears in the Templates tab of your project.
- Its connected_content_type is blog_post and url is /blog/{{entry.slug}}.
- Three different entries render at three different URLs.
- hero_section shows the correct hero data per entry.
- sections_list shows each entry’s Modular Block items with the right components.
What Just Happened
- The URL pattern connects request URLs to entries. Studio does the routing. Your app just has the catch-all route from Quickstart 1.
- Deploy activates the composition. Save-without-Deploy is a draft only the author sees in the canvas.
- Sections auto-bind on drop because their linked_schemas matches paths on the entry the Template resolves to. No wiring on the Template.
You’re Done
Five Quickstarts. From an empty React app to a live, CMS-driven, author-editable page in about an hour. Every Section and Template is reusable: add more Sections, wire more Templates against different content types, drop the same Section on N Templates.
Graduating From CSR to SSR
The five Quickstarts bootstrap Studio in client-side render (CSR) mode: studioSdk.init({ stackSdk }) fires side effects and the browser fetches compositions on load. That’s the fastest path to a working canvas + preview surface.
When to graduate to SSR: the moment you care about (a) SEO on public pages, (b) first-paint performance, or (c) social-share metadata (og:*, twitter:*) that must be present in the initial HTML.
The SSR bootstrap looks different in one specific way:
// CSR (what the Quickstarts do): fire-and-forget
studioSdk.init({ stackSdk })

// SSR (what you need for production): capture the returned SDK,
// call sdk.fetchCompositionData(url) inside your route handler,
// and pass the result down to <StudioComponent> as props.
export const sdk = studioSdk.init({ stackSdk, mode: 'ssr' })
That one-line shift (capturing the return + calling fetchCompositionData(url) server-side) is the graduation. The Sections + Templates + palette + canvas you built in QS3-5 all work unchanged. The SDK just serves them from your host framework’s server-render path.
Every host framework has a recipe with the exact server-side code:
- Node.js (bare Express / Fastify / raw http): Node SSR recipe.
- Next.js, App Router (server components): Next.js App Router recipe.
- Next.js, App Router (RSC entry): Next.js RSC recipe.
- Next.js, Pages Router: Next.js Pages Router recipe.
- Remix: Remix recipe.
- Astro: Astro recipe.
- Gatsby: Gatsby recipe.
Every recipe shares one contract: the same three-call API + five universal rules at the Framework recipes index. Read that page first, then the per-host recipe is just the framework-specific bootstrap wiring.
Verify each recipe’s SSR is actually working via the curl-based verification test, three assertions any host must pass.
Common bumps on the way from CSR to SSR live in the Framework recipes troubleshooting page: “Attempted to call X() from the server”, “Internal components missing”, the json-rte-serializer jsdom gotcha in Node, Invalid hook call.
Where Next
- Reuse the pattern for other CTs. Product page? Case study page? Same five steps.
- Make components composable at author time. See the Section Slots chapter for more Slot patterns.
- Add responsive design. See Breakpoints.
- Bring in your design system’s tokens. See Design tokens.
- Faster load. See Optimizing load: lazy-registered components.
- Deep-dive on any piece: chapter landing pages in the sidebar have every option and gotcha.